




The first time I watched a crew unload a truck, I noticed something that stuck with me: every piece that had been cleaned and dried properly before the move slid into its plastic wrap and came out the other end looking almost untouched. Every piece that hadn’t — the dusty bookshelf, the sofa nobody vacuumed, the dresser with sticky drawer tracks — came out looking like it had aged five years in five hours. Grime doesn’t just sit there during a move. It grinds. It shifts under straps, rubs against moving blankets, and works itself into finishes that were fine the day before.
That one observation changed how I approach every move now, personal or professional. Cleaning furniture before you move isn’t a nice-to-have step you skip when you’re short on time — it’s the difference between furniture that survives transport looking the same and furniture that survives transport looking worse. This guide covers exactly how to do it, material by material, including which products are actually worth buying and which ones are marketing noise.
Table of Contents
- Why This Step Actually Matters
- Supplies Checklist: What You Actually Need
- The Step-by-Step Pre-Move Cleaning Process
- Material-by-Material Cleaning Guide
- Product Comparisons: What Actually Works
- Special Situations
- Common Mistakes That Cause Real Damage
- Honest Verdicts: What I’d Actually Do
- After Cleaning: Protecting Furniture for Transport
- Frequently Asked Questions
- Final Thoughts
- About the Author
Why This Step Actually Matters
There’s a genuinely useful counterargument floating around in the moving industry, and I want to address it head-on rather than pretend it doesn’t exist: some movers argue that cleaning furniture right before a move is pointless, because sweaty hands, rain, and general handling will just dirty it again on the way out the door. I understand where that comes from, but I think it misses the point of the exercise. You’re not cleaning furniture so it stays spotless during transit — you’re cleaning it so you can inspect it properly, so you’re not sealing dust and allergens into plastic wrap for weeks, and so nothing organic (food residue, pet dander, a damp patch) has a chance to turn into odor or mold in a moving truck or storage unit.
There’s a practical inspection benefit too. Wiping down a dresser or vacuuming a sofa cushion is when you notice the water ring you forgot about, the loose joint, or the drawer that’s been sticking for months. Catching that before moving day means you can fix it, pad it separately, or at least warn the movers — instead of discovering it’s now a bigger problem after a 300-mile drive.
Supplies Checklist: What You Actually Need
You don’t need a cart full of specialty products. Here’s a realistic list:
- Microfiber cloths (several — dust and cleaning cloths should not be the same cloth)
- A vacuum with an upholstery attachment and a crevice tool
- A soft-bristled brush for carvings and tight corners
- A mild, pH-neutral all-purpose cleaner for hard surfaces
- A dedicated wood cleaner (not the same thing as a polish — more on that below)
- A fabric/upholstery cleaner appropriate to your furniture’s cleaning code
- Leather cleaner and conditioner, if applicable
- Glass cleaner for tabletops and cabinet fronts
- White vinegar and water for metal frames and glass
- Baking soda for odor absorption
- A screwdriver set, for removing legs, shelves, and hardware before deep cleaning
The Step-by-Step Pre-Move Cleaning Process
Step 1: Declutter and decide what’s actually moving. Clean nothing you’re donating, selling, or leaving behind — sort first, clean second. It sounds obvious, but I’ve watched people deep-clean a couch that got listed on a marketplace app that same afternoon.
Step 2: Remove loose dirt and dust first. Always dust and vacuum before you introduce any liquid cleaner. Wiping a dusty surface with a wet cloth just turns dust into paste, which is harder to remove and can scratch a finish as you wipe it around.
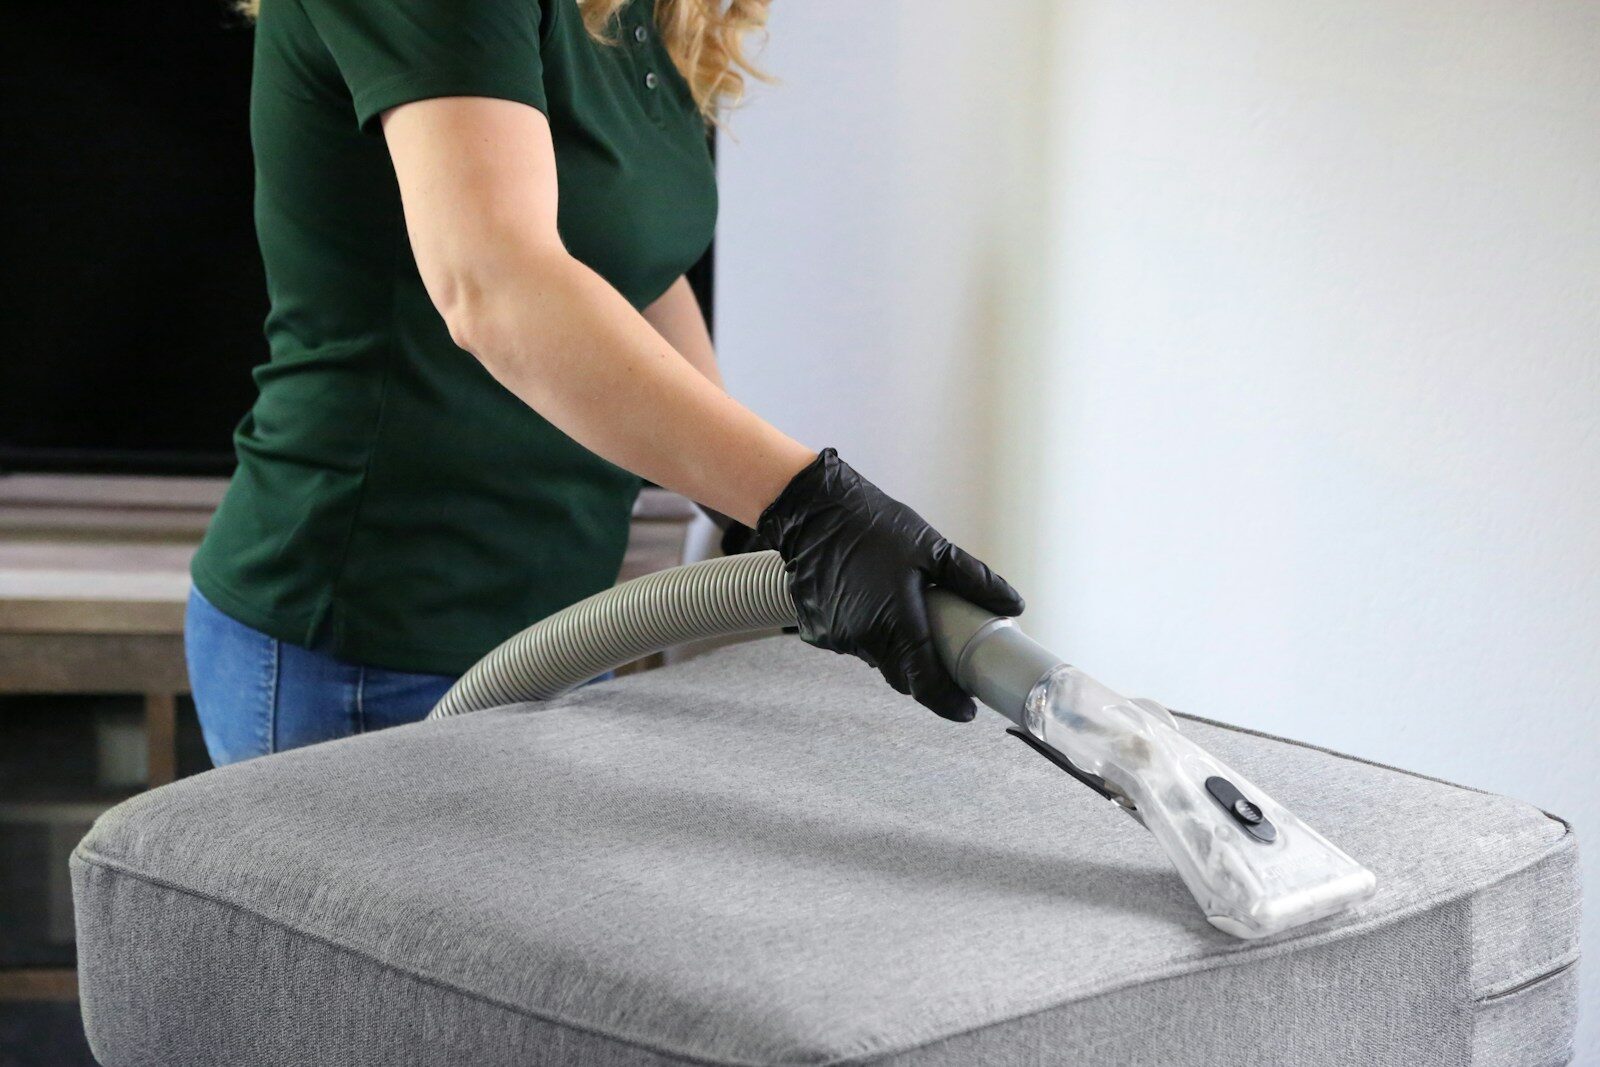
Step 3: Vacuum upholstery, cushions, and crevices. Use the upholstery attachment on cushions and the crevice tool along seams, under cushions, and in the folds where crumbs and pet hair collect. This step alone catches most of what people assume needs a chemical cleaner.
Step 4: Clean surface by surface, using the right product for that material. This is where most damage happens — using one all-purpose spray on wood, leather, and fabric alike. See the material guide below.
Step 5: Dry everything completely before moving on. Moisture trapped against wood causes warping and white haze; moisture trapped in fabric or a mattress that then gets sealed in plastic for a move is exactly how mildew starts. Give surfaces time to air-dry, or dry them manually with a clean cloth.
Step 6: Disassemble where it makes sense. Remove furniture legs, shelves, and detachable hardware before final cleaning if you’re disassembling for the move anyway — it’s far easier to clean these individually than to clean around them, and it prevents you from missing the undersides and grooves where grime hides.
Step 7: Do a final inspection. Once everything is clean and dry, walk each piece and note any existing damage. This protects you if something looks different on the other end, and it’s the same reason professional movers do a condition check before loading.
Material-by-Material Cleaning Guide
Wood Furniture
Dust first with a microfiber cloth, always following the direction of the grain rather than cleaning in circles, which can create fine scratches on some finishes over time. For actual cleaning, use a dedicated wood cleaner or a mild soap-and-water solution, applied with a barely damp cloth — wood and standing water do not get along, and warping or clouding the finish is a real risk if you oversaturate the surface. Dry immediately after cleaning rather than letting it air dry.
One distinction that trips people up: a wood cleaner and a wood polish are not interchangeable. Cleaners lift dirt and grime; polishes add shine and, in some formulas, light conditioning. If your furniture just needs a wipe-down before a move, you want a cleaner. If it’s dry, dull, or has minor surface scuffs you want disguised before transport, that’s when a polish or scratch-cover product earns its place.
Upholstered and Fabric Furniture
Before you spray anything on fabric furniture, check the cleaning code tag, usually found under a cushion or on the frame:
- W — water-based cleaners only
- S — solvent-based (dry-cleaning) products only
- WS — either water or solvent-based products
- X — vacuum only, no liquid cleaners at all
This single tag prevents more accidental damage than any other piece of advice in this guide. Using a water-based spray on an “S” or “X” coded fabric — often silk, velvet, or certain blends — can leave permanent rings, shrinkage, or watermarking that no amount of blotting will fix. Vacuum thoroughly first, spot-test any product on a hidden area (like the back or underside), then treat visible stains before doing a light overall clean.
Leather Furniture
Wipe down with a slightly damp microfiber cloth to remove surface dust, then use a leather-specific cleaner — never a generic household cleaner or baby wipes, both of which can strip the finish over repeated use. After cleaning, apply a leather conditioner. This step matters more before a move than people expect: leather that sits dry for weeks in a moving truck or storage unit is far more prone to cracking than leather that was conditioned right before storage.
Metal and Glass Furniture
A simple water-and-vinegar solution handles most metal frames and glass tabletops well, cutting through fingerprints and light grime without leaving the streaking that some glass cleaners cause on metal edges. Dry glass with a lint-free cloth to avoid streaks, and check metal joints and hinges for any surface rust while you’re at it — small spots are far easier to address before a move than after months in a humid storage unit.
Mattresses
Vacuum both sides thoroughly using the upholstery attachment, paying extra attention to seams. Sprinkle baking soda over the surface, let it sit for at least a few hours (overnight if you have the time), then vacuum it off — this pulls out trapped odor far better than any spray. Spot-treat any visible stains with a fabric-safe cleaner and let the mattress dry completely before bagging it for the move; sealing any residual dampness into a mattress bag is one of the most common causes of mold complaints after long-distance moves and storage stays.
Product Comparisons: What Actually Works
Wood Cleaners and Polishes
| Product | Type | Best For | Notes |
|---|---|---|---|
| Murphy’s Oil Soap | Cleaner (not a polish) | Routine cleaning, budget pick | Dilutable, gentle, biodegradable — but adds no shine and can film if overused |
| Howard Feed-N-Wax | Conditioner/polish | Dry, dull, or antique wood | Deep conditioning; best used after cleaning, not as the cleaning step itself |
| Pledge (Wood Oil / Multi-Surface) | Polish | Everyday sealed wood surfaces | Fast, widely available, good shine — skip on unsealed or antique finishes |
| Howard Clean-A-Finish | Deep cleaner | Heavy wax buildup or years of neglect | Underrated for pre-move deep cleans on furniture that hasn’t been touched in a while |
| Weiman Wood Furniture Wipes | Wipe-format cleaner/polish | Speed and convenience | Great for a quick pre-move pass on multiple pieces, less thorough than liquid products |
Upholstery and Fabric Cleaners
| Product | Format | Best For | Notes |
|---|---|---|---|
| Folex Instant Carpet Spot Remover | Spray | Fresh, non-organic stains | No rinsing or waiting; weak against embedded pet odor since it isn’t enzymatic |
| Woolite Advanced Stain & Odor Remover | Spray | General pre-move refresh | Hydrogen-peroxide based, sanitizes as it cleans, tested well against mixed stains |
| Rocco & Roxie Stain & Odor Eliminator | Spray | Set-in organic stains and pet odor | Bio-enzymatic formula breaks down odor sources rather than masking them |
| Bissell Little Green (machine) | Extraction machine | Deep clean before a move into storage | Best real clean available at home, but requires setup and cleanup time |
| Puracy Natural Upholstery Shampoo | Spray | Budget, natural-ingredient households | Solid all-around performance without harsh chemical scent |
Leather Conditioners
| Product | Formula | Best For | Notes |
|---|---|---|---|
| Leather Honey | Oil-based, contains beeswax | Dry, cracked, or vintage leather furniture | Deep penetration, infrequent reapplication, slightly heavier residue |
| Lexol | Water-based emulsion | Regular furniture and everyday maintenance | Lighter, no residue, needs more frequent reapplication than Leather Honey |
| Bick 4 | Lightweight conditioner | Light touch-ups, lower cost | Least aggressive option; fine for maintenance, not for restoration |
Special Situations
Antiques and heirloom pieces: Skip generic multi-surface cleaners entirely. Antique finishes (shellac especially) can react badly to modern solvents. When in doubt, a barely damp cloth and nothing else is safer than an unfamiliar product you grabbed off a shelf.
Musty odor from storage: Baking soda left on a surface or inside drawers for 24–48 hours pulls out a surprising amount of odor. For upholstery, a light misting of a diluted white vinegar solution (fully dried afterward) can help neutralize odor-causing bacteria before you resort to heavier fragranced products, which tend to mask rather than fix the problem.
Furniture with visible mold spots: Address this before you clean anything else, and before it goes anywhere near a moving truck. Isolated surface mold on hard finishes can sometimes be handled with a diluted vinegar wipe-down in a well-ventilated area, but for upholstered furniture with mold in the padding, it’s genuinely not worth risking — that item may need to be replaced rather than moved.
Furniture headed straight into storage: Clean and dry more thoroughly than you would for a direct move. Anything going into a storage unit for weeks or months will amplify any leftover moisture or organic residue into odor and, eventually, mold.
Common Mistakes That Cause Real Damage
- Using one all-purpose spray on every material. This is the single biggest cause of avoidable damage — what’s safe on sealed wood can ruin unsealed leather or an “S”-coded fabric.
- Cleaning with excess water on wood. Wood absorbs more moisture than people expect; a barely damp cloth is almost always enough.
- Skipping the dry-time before wrapping in plastic. Plastic traps whatever moisture is left underneath it, which is exactly the environment mildew needs.
- Ignoring the fabric care tag. It takes ten seconds to check and can prevent a stain that becomes permanent.
- Cleaning furniture that’s about to be donated or sold instead of moved. Sort before you clean, not after.
- Forgetting the undersides and backs. Dust and cobwebs on the underside of tables and the backs of dressers rub directly against moving blankets and other furniture during transport.
Honest Verdicts: What I’d Actually Do
If I’m being straightforward about where I’d actually spend time and money on a real move:
Wood furniture: Murphy’s Oil Soap for the cleaning pass, full stop — it’s cheap, it’s gentle, and for pre-move purposes you don’t need the shine a polish adds. Save Howard Feed-N-Wax for pieces that are genuinely dry or antique and would benefit from conditioning before sitting in storage.
Upholstery: I lean toward Woolite’s newer sanitizing formula for a general pre-move pass because it does double duty — cleaning and sanitizing in one product saves a step during an already busy week. If I know I’m dealing with pet odor specifically, I switch to an enzymatic product like Rocco & Roxie, because non-enzymatic sprays like Folex are genuinely great for fresh spills but don’t address the bacterial source of set-in odor.
Leather: Lexol for regular maintenance cleaning before a move. I’d only reach for Leather Honey if the piece already looks dry or cracked and needs real restoration, since it’s a heavier product than most furniture needs for routine care.
Where I’d push back on common advice: A lot of guides tell you to “use a mild soap and water solution” as a universal answer for wood, and while it’s not wrong, it’s vague enough to cause problems — people oversaturate the cloth, or use dish soap that leaves residue behind. A dedicated wood cleaner costs about the same as a bottle of dish soap and removes the guesswork entirely.
After Cleaning: Protecting Furniture for Transport
Cleaning is only half the job — cleaned furniture that isn’t protected during loading can pick up new dirt just as easily as it lost the old dirt. Wrap upholstered pieces in a layer or two of plastic furniture wrap once fully dry; it protects fabric from sweat, dust, and rain while still letting movers get a solid grip. Use moving blankets and corner protectors on wood edges, and avoid wrapping wood directly in plastic for extended periods, since trapped humidity against a wood finish can cause clouding even if the piece was completely dry when wrapped.
Frequently Asked Questions
Should I clean furniture before or after disassembling it? Clean before you disassemble major surfaces, but clean individual hardware and legs separately once removed — it’s easier to get into grooves and joints when they’re not attached to the rest of the piece.
Is it worth deep-cleaning furniture that’s going straight into storage? Yes, more so than furniture headed directly to a new home. Storage units trap odor and moisture far more than a lived-in space does, so any residue left behind has more time to become a real problem.
Can I use the same all-purpose cleaner on wood, leather, and fabric? No. This is the most common cause of accidental damage during pre-move cleaning. Each material needs its own appropriate product — a cleaner gentle enough for sealed wood can still discolor leather or leave a permanent ring on delicate fabric.
What should I do if I find mold on furniture I’m about to move? Handle it before anything else. Surface mold on hard finishes can sometimes be treated with a diluted vinegar solution in a ventilated space, but mold inside upholstery padding is a different situation — that’s often a sign the piece isn’t worth transporting, since sealing it into a moving truck can spread spores to everything else nearby.
Do movers actually care whether furniture is clean? Professional crews will move dirty furniture without complaint, but a clean, dry piece is genuinely easier and safer to wrap, grip, and load — and it means less work for you when you’re unpacking in a brand-new space.
How long before moving day should I start cleaning? Start at least a week out for anything beyond a quick wipe-down. Deep cleaning upholstery or conditioning leather needs drying time, and rushing it the night before moving day is how furniture ends up packed while still slightly damp.
Final Thoughts
Cleaning furniture before a move is one of those tasks that feels optional right up until you’re unpacking in a new place and realize how much easier everything is because you did it. It’s not about arriving with furniture that looks brand new — it’s about not dragging old grime, trapped odor, or a small fixable problem into your next chapter. Match the product to the material, give things time to actually dry, and treat the walk-through inspection as seriously as the cleaning itself. Do that, and your furniture won’t just survive the move it’ll walk into the new place looking like it belongs there.
About the Author
Written by Elena Marsh, a relocation and household logistics researcher who has spent close to a decade consulting with residential moving companies on damage prevention and pre-move preparation standards. Elena’s work focuses on the gap between what moving crews are trained to protect and what homeowners can realistically do themselves before moving day. This guide combines that field experience with current product research as of 2026.
Always spot-test any cleaning product on a hidden area first, and check manufacturer care labels before applying anything to antique, vintage, or unusually finished furniture.