


The first floating staircase I ever measured up close belonged to a couple who’d already paid a contractor once and hated the result. The treads wobbled slightly when you hit the third step. The gap between tread and wall was uneven by almost half an inch in places. It wasn’t unsafe, exactly, but it wasn’t what they’d paid for either. That job taught me more about floating stairs than any spec sheet has since: the “floating” part is easy to sell and surprisingly easy to get wrong.
This guide is the one I wish that couple had read first. It covers how these stairs actually stay up, what they really cost in 2026, which materials hold up over time, and where the process tends to go sideways.
Table of Contents
- What “Floating” Actually Means
- The Four Structural Systems That Make a Staircase Float
- Choosing Materials: Treads, Stringers, and Railings
- Design Ideas by Space and Style
- What Floating Stairs Really Cost in 2026
- Code and Safety: What Inspectors Actually Check
- How Installation Actually Unfolds On-Site
- DIY vs. Hiring a Fabricator: My Honest Verdict
- Mistakes I See Again and Again
- Maintenance: Keeping a Floating Stair Looking Floating
- Where This Is All Heading
- FAQs
- Final Thoughts
- About the Author
What “Floating” Actually Means
Here’s the thing nobody tells you at the showroom: no staircase actually floats. Every tread you’ve ever stood on that looked unsupported was carrying its load somewhere into a wall, down a hidden steel spine, or through a bracket disguised as a shadow line. “Floating” is a description of what you don’t see, not a structural category.
That distinction matters because it changes how you evaluate a design.
When a fabricator tells you a design “floats,” the next question should always be: floats how?
The Four Structural Systems
Nearly every floating stair on the market today comes down to one of four load paths. I’ll walk through each honestly, including where it tends to disappoint people.
Mono-stringer (central spine).
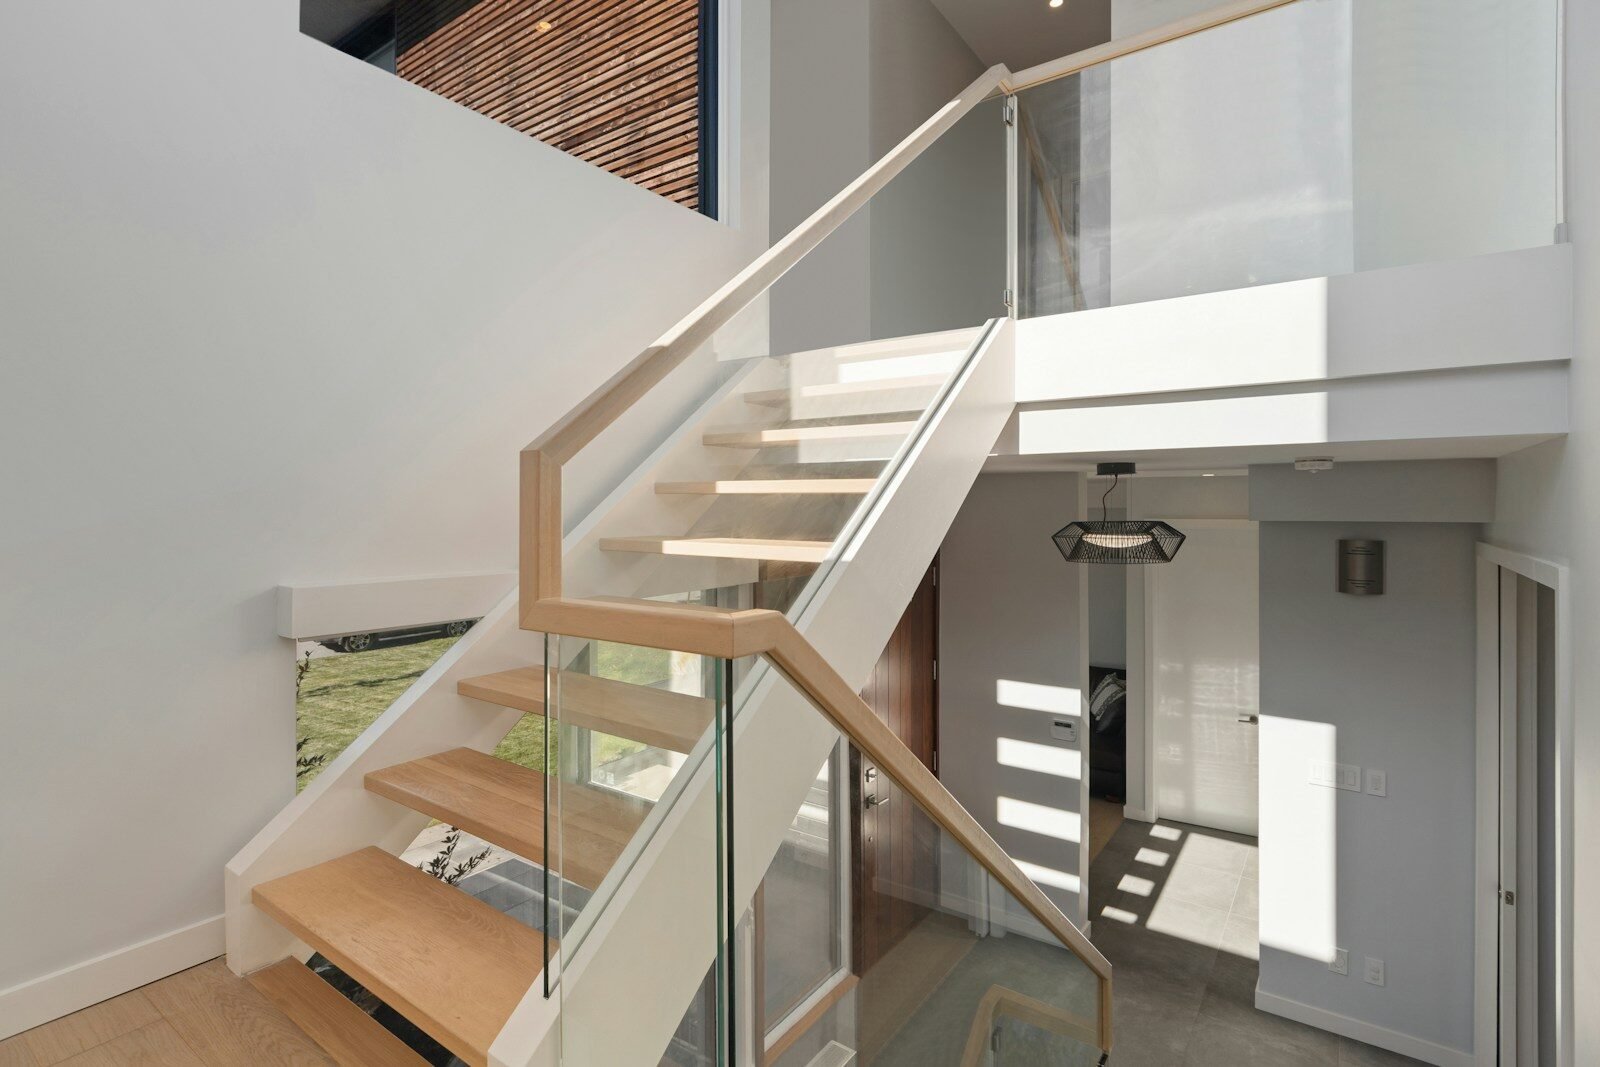
A single steel beam runs up the middle of the stair, and each tread cantilevers off a welded bracket on either side of it. This is the most common system because it’s the easiest to engineer predictably — the beam itself is visible, so there’s less guesswork about where the load goes. The tradeoff is that you do see a structural line down the center, which some homeowners find less “floating” than they expected.
Wall-mounted cantilever.
Each tread anchors independently into a reinforced wall, with nothing visible below it at all. Retrofitting this into an existing wall usually means opening the drywall, sistering in steel or doubled studs, and closing it back up before the stair ever goes in.
Hidden double-stringer.
Two steel supports carry the load, but they’re concealed behind cladding, a drywall bulkhead, or tucked along the wall line so they read as a shadow rather than a beam. It’s a middle ground — more forgiving to engineer than a full cantilever, less visually “heavy” than an exposed mono-stringer.
Rod-hung or suspended.
Less common in houses, more common in commercial atriums: treads hang from rods anchored to the floor or ceiling above rather than pushing up from below. It’s dramatic, but it needs overhead structure that most residential floor framing doesn’t have without reinforcement.
| System | Visual openness | Retrofit difficulty | Typical use case |
|---|---|---|---|
| Mono-stringer | Good — beam still visible | Moderate (two strong connection points) | Open-plan great rooms, straight or L-shaped runs |
| Wall-mounted cantilever | Best — nothing visible below tread | High — often requires opening the wall | Stairs running along a single load-bearing wall |
| Hidden double-stringer | Very good — supports are clad or concealed | Moderate to high | Wider stairs needing distributed support |
| Rod-hung | Dramatic, airy | Very high — needs overhead structure | Atriums, lofted commercial spaces |
My honest verdict after seeing all four built: mono-stringer is the sensible default for most houses. It’s the one system where “looks floating” and “is straightforward to engineer” overlap the most, which keeps both cost and risk down. Reserve the full wall-mounted cantilever for a space where the wall was designed for it from the start — structural planning done early, before the opening is framed, consistently produces cleaner results than retrofitting a floating look onto finished construction.
Choosing Materials
Treads
| Material | Approx. cost per step (material only) | Notes |
|---|---|---|
| Engineered hardwood | $30–$80 | Veneer over plywood/composite core; resists warping in humid climates |
| White oak (solid) | $40–$120 | The most common choice right now; tight grain, Janka hardness around 1,360 |
| Hard maple | $50–$130 | Light, bright, very durable (Janka ~1,450) |
| Walnut | $80–$200 | Rich tone without staining; softer (Janka ~1,010) but favored for high-end modern homes |
| Glass | $250–$500 | Requires laminated safety glazing, not just tempered — treated separately below |
I lean toward white oak for most residential projects, not because it’s trendy but because it forgives small seasonal movement better than walnut and takes a clear coat without looking artificial. Full material and cost breakdowns like this one are becoming standard in contractor bids as floating stairs move from custom rarity to a mainstream renovation line item.
Railings: Glass vs. Cable vs. Rod
This is the comparison people ask me about most, so I’ll be blunt about each.
Glass gives you the clearest sightlines and the most polished, “expensive” feel — a frameless glass guard genuinely changes how a room reads. It’s also the priciest infill option, runs roughly $250–$700 per linear foot installed for premium panels, and it shows fingerprints and dust in a way cable never will. Glass and cable solve the same problem — a barrier you can see through — but they get there in visually different ways, and the difference shows up fastest in upkeep and price.
Cable railing is the budget-conscious, low-maintenance choice. Thin stainless cables under tension read as nearly invisible from a distance, they don’t need the same cleaning regimen as glass, and material costs run meaningfully lower per linear foot. The tradeoff is that cable can develop slight sag over years and needs periodic re-tensioning, and it introduces faint horizontal lines across a view that glass simply doesn’t.
Rod railing — vertical stainless rods instead of horizontal cable — splits the difference. It won’t sag the way cable can over time, and it handles corners and curves more gracefully than a tensioned cable run, which matters on winding stairs.
My honest verdict: if the stair is the visual centerpiece of an open-plan home, spend the money on glass for the most visible run and use cable or rod on secondary sections. That hybrid approach gets you the “wow” where people actually look without paying gallery pricing for the whole staircase.
Design Ideas by Space and Style
Small entryways. A tight footprint is actually where floating stairs earn their keep the most — an open-riser mono-stringer lets afternoon light travel from a front window straight through to the back of the house instead of stopping at a solid staircase wall.
Open-plan great rooms. This is where a hidden double-stringer or wall cantilever pays off, since the stair becomes a piece of furniture in the room rather than a partition. Pairing thick, substantial wood treads with a matte black steel structure has become one of the defining looks of the past year — thin treads read as under-scaled in a large room, while a thicker, cleaner-profile tread creates the kind of architectural rhythm that makes a floating stair feel intentional rather than flimsy.
Basement and loft conversions. Floating stairs are genuinely useful here for a non-aesthetic reason: open risers let borrowed light reach a stairwell that would otherwise feel like a shaft.
Outdoor and exterior stairs. Doable, but treat it as a different project — you need stainless hardware, exterior-rated finishes, and a tread material that won’t become a skating rink when wet. Glass, in particular, needs a textured or fritted surface outdoors.
What Floating Stairs Really Cost in 2026
I’ll give you real numbers instead of vague ranges, because vague ranges are how people end up shocked by a bid.
| Project tier | Typical installed cost | What’s included |
|---|---|---|
| Standard-custom, straight run | $15,000–$30,000 | Basic mono-stringer, wood treads, cable railing, single flight |
| Complex geometry / premium finish | $30,000–$60,000+ | Turns, landings, glass or rod railing, upgraded wood species |
| Luxury statement stair | $60,000–$100,000+ | Extensive glass, custom landings, advanced structural engineering |
Multiple fabricators land on the same rough national average: most residential floating staircases fall between $15,000 and $60,000, with the national average sitting around $20,000–$30,000 per flight, and railing scope — not step count — is usually the biggest swing factor in the final number.
One rule of thumb that’s held up surprisingly well across the projects I’ve watched: premium stair and railing packages tend to land around 3% of a home’s overall market value when the stair is a genuine design centerpiece rather than an afterthought. It’s a sanity check, not a formula — but if a quote comes in wildly above or below that ratio for a showpiece stair, ask why.
What actually drives the price up, in order of how often I see it surprise people:
- Railing scope, not the stair itself — glass and custom metalwork stack fast across landings and overlooks, not just the stair run.
- Retrofits, which run 15–25% higher than new construction because of demolition and structural reinforcement.
- Turns and winders, which multiply engineering hours even when the step count barely changes.
- Site access, especially in occupied homes where steel has to be carried through finished rooms.
Ask any bidder to itemize stringer fabrication, tread material, railing by the linear foot, engineering, permits, freight, and installation labor separately. Bundled quotes are where the surprises hide.
Code and Safety
Floating stairs don’t get a pass on code just because they look minimal — if anything, inspectors scrutinize them harder because there’s less structure to hide a mistake in. In the US, residential stairs fall under the International Residential Code, and Fine Homebuilding’s rundown of the current dimensional rules is one of the clearest plain-language summaries I’ve found for homeowners.
The numbers that actually get checked at inspection:
- Riser height: maximum 7¾ inches, with no more than ⅜ inch variation between any two risers on the same flight.
- Tread depth: minimum 10 inches with nosing, or 11 inches without.
- Nosing projection: between ¾ inch and 1¼ inch on solid-riser stairs.
- Stairway width: minimum 36 inches clear.
- Headroom: minimum 6 feet 8 inches, measured from the nosing line.
- Handrail height: 34–38 inches, required on at least one side for any flight of four or more risers.
- Guard height: minimum 36 inches on open sides, and no opening large enough to pass a 4-inch sphere.
Load requirements matter just as much as geometry. Individual treads have to support a 300-pound concentrated load over a small area, and guards and handrails must resist a 200-pound force in any direction, with infill panels rated to handle 50 pounds over a 12-by-12-inch area — these numbers exist specifically so a railing can’t fail under someone leaning or falling against it.
Glass gets its own layer of code.
Any glass used in a guard or handrail has to pass a recognized safety-glazing test — either Category II under CPSC 16 CFR 1201 or Class A under ANSI Z97.1 — and it typically needs to be laminated, not just tempered, so a broken panel stays in place instead of dropping out of the frame. Never accept a glass tread or panel without documentation of which standard it passed.
My honest take: the code minimums are a floor, not a target. On a stair I’m advising on, I push for 38-inch handrail height and treads sized closer to 11–12 inches deep even where 10 is technically legal, because the margin costs almost nothing at the design stage and matters enormously to how the stair feels underfoot.
How Installation Actually Unfolds
People picture floating stairs going in like flat-pack furniture. They don’t. Here’s roughly how a mono-stringer project actually moves:
- Site verification and shop drawings (1–2 weeks) — a fabricator measures the actual opening, not just the architect’s drawings, because floor-to-floor height is rarely exactly what the plans say.
- Structural prep (days to weeks, depending on scope) — this is where reinforced framing, steel backing plates, or a concrete ledge gets built into the surrounding structure before the stair ever arrives.
- Fabrication (4–8 weeks for custom steel and treads) — this is the long pole in most schedules, and it’s the stage most likely to blow past an optimistic timeline.
- Delivery and rigging — steel stringers are heavy and often have to come in through a window opening or before drywall goes up, which is why sequencing with the general contractor matters so much.
- Setting and leveling the structure (1–3 days) — the stringer gets bolted to its top and bottom connections and shimmed dead level before a single tread goes on.
- Tread and railing installation (2–5 days) — this is the visible, satisfying part, but it’s the smallest slice of total project time.
- Final inspection — riser/tread consistency, guard height, and load documentation for any glass all get checked before sign-off.
The single biggest scheduling mistake I see: homeowners treat the stair like a furniture delivery and don’t loop the fabricator into the framing schedule early enough. By the time drywall is up, it’s often too late to add the steel backing a cantilever design needs without tearing the wall back open.
DIY vs. Hiring a Fabricator
I’ll save you the suspense: I don’t recommend DIYing the structural portion of a floating stair, and I say that as someone who’s comfortable with a full DIY renovation in most other rooms of a house.
Here’s the honest reasoning. A mono-stringer or cantilevered floating stair often has exactly one load path per tread. Get that wrong and you don’t get a squeak — you get a failure.
Where DIY genuinely makes sense: finishing work.
Where to draw the line firmly: stringer fabrication, wall reinforcement, and any connection that’s carrying live load.
Mistakes I See Again and Again
- Skipping the engineer for “just a simple” cantilever. Every cantilever design I’ve seen fail cosmetically — visible flex, hairline cracks in drywall near the anchor points — traced back to a fabricator who eyeballed the wall reinforcement instead of getting a stamped calculation.
- Choosing tread depth by eye instead of by the walk line. A tread that looks fine standing still can feel cramped mid-stride if the depth is at the legal minimum.
- Underestimating railing cost. People budget for “the stairs” and forget the railing often costs as much as the structure itself, especially with glass.
- Ordering glass before confirming the safety-glazing certification. This is the single most expensive mistake to fix after the fact, because non-compliant panels usually have to be replaced entirely, not retrofitted.
- Not planning lighting during rough-in. Under-tread LEDs need wiring run before treads go on — retrofitting them later usually means visible conduit.
Maintenance
Wood treads need a fresh coat of finish every few years depending on foot traffic — high-use stairs in a family home wear faster than a formal staircase used occasionally. Steel stringers with a powder-coat finish hold up well for years without touch-ups, which is one practical argument for choosing powder-coated steel over a raw or lacquered finish in a busy household.
Where This Is All Heading
A few shifts I’m watching closely going into the next couple of years:
Warmer materials are replacing stark minimalism. The all-white, all-glass floating stair peaked a few seasons ago. What’s replacing it is thicker, richer wood tone paired with more restrained black steel — matte black used with more subtlety, as a refined architectural accent rather than the dominant statement it was during the industrial-loft phase.
Curved and sculptural forms are coming back. After years of strictly rectilinear mono-stringers, curved and helical floating staircases are re-emerging in open-plan homes, where the shape introduces flow rather than just connecting two floors.
Sustainability is becoming a real spec question, not a marketing line. More fabricators are fielding requests for reclaimed wood treads and recycled steel stringers, driven by clients who want the floating aesthetic without the embodied carbon of an all-new custom build.
Early collaboration is replacing late-stage “add a floating stairs” requests. The best outcomes I’ve seen consistently come from involving the stair fabricator during the architectural design phase — not after the opening is already framed — because a floating stair engineered from day one is cheaper and cleaner than one retrofitted onto a finished structure.
FAQs
Are floating stairs safe for kids and pets? Yes, when built to code — the guard height, sphere-passage rules, and load ratings exist specifically to make open-riser stairs safe for a household with children. The bigger practical concern is usually traction on smooth tread finishes, so consider a matte or lightly textured finish rather than high-gloss if young kids or older pets use the stairs daily.
Do floating stairs increase home value? Anecdotally, yes, in homes where the stair functions as a visible design feature rather than a hidden utility stair — but it’s a taste-driven upgrade, closer to a custom kitchen than a furnace replacement. It won’t universally appraise dollar-for-dollar against its cost, and an overly avant-garde design can even narrow your buyer pool in more traditional markets.
Can I retrofit floating stairs into an existing house? Usually, but budget 15–25% more than new construction because of demolition and the structural reinforcement required to open a wall or floor and add backing steel. A mono-stringer retrofit is generally more forgiving than a full wall-mounted cantilever, since it only needs two strong connection points rather than reinforcement along an entire wall.
How much weight can a floating stairs actually hold? Individual treads are engineered to handle a 300-pound concentrated load, and guards/handrails must resist 200 pounds of force — but “how much” ultimately depends on the specific engineering for your span, material, and connection design, so ask your fabricator for the actual load calculations rather than relying on general code minimums alone.
How long does installation take start to finish? For a straight-run custom project, plan on roughly 8–12 weeks total once you include shop drawings, fabrication, and site work — fabrication alone often takes 4–8 weeks, and that’s before structural prep and final installation.
Final Thoughts
A floating staircase is one of the few renovations where the thing you’re paying for is largely invisible. You’re not buying a beautiful tread you can get a beautiful tread on any staircase. You’re buying the engineering that makes the tread look unsupported without actually being unsupported, and that’s worth paying a real fabricator and a real structural review for, even when the quote stings.
If there’s one thing I’d tell anyone starting this process, it’s the same thing I wish someone had told that couple with the wobbly third step: talk to the person who’s going to weld or bolt the structure before you fall in love with a photo of the finished stair. The photo never shows you the part that actually holds it up — and that part is the whole project.
About the Author
This guide was researched and written by a residential design and structural-detailing researcher who has spent over a decade documenting custom stair and railing installations for architecture and construction publications, working directly with fabricators, structural engineers, and homeowners through the design, bidding, and installation process. The analysis here draws on current 2026 industry pricing, International Residential Code provisions, and manufacturer engineering documentation, cross-checked against real project outcomes rather than showroom marketing alone.