Think about the last shower caddy you owned. It probably rusted, slid down the pipe, or dropped a bottle of conditioner on your foot at the worst possible moment. Most of us have been there.
A niche solves that problem by tucking storage into the wall itself. Nothing hangs, nothing rusts, and nothing clutters the floor of a small bathroom. When it’s done well, it also becomes one of the few places in a bathroom where you can add a small moment of design, a framed pocket of contrasting tile or warm light.
The trouble is that a niche is also a hole in a wet wall. Placed carelessly, it can leak, look awkward, or be too small to hold the products you actually use. I’ve seen beautiful niches that couldn’t fit a standard shampoo bottle, and I’ve seen cheap ones that quietly rotted the studs behind them.
This guide covers the design decisions and the practical ones, so you can build something you’ll still like in ten years. If you’re new to this, you don’t need to be a tiler. You just need to know what to ask for.
Know Your Options
“Niche” gets used loosely, so it helps to separate the main types.
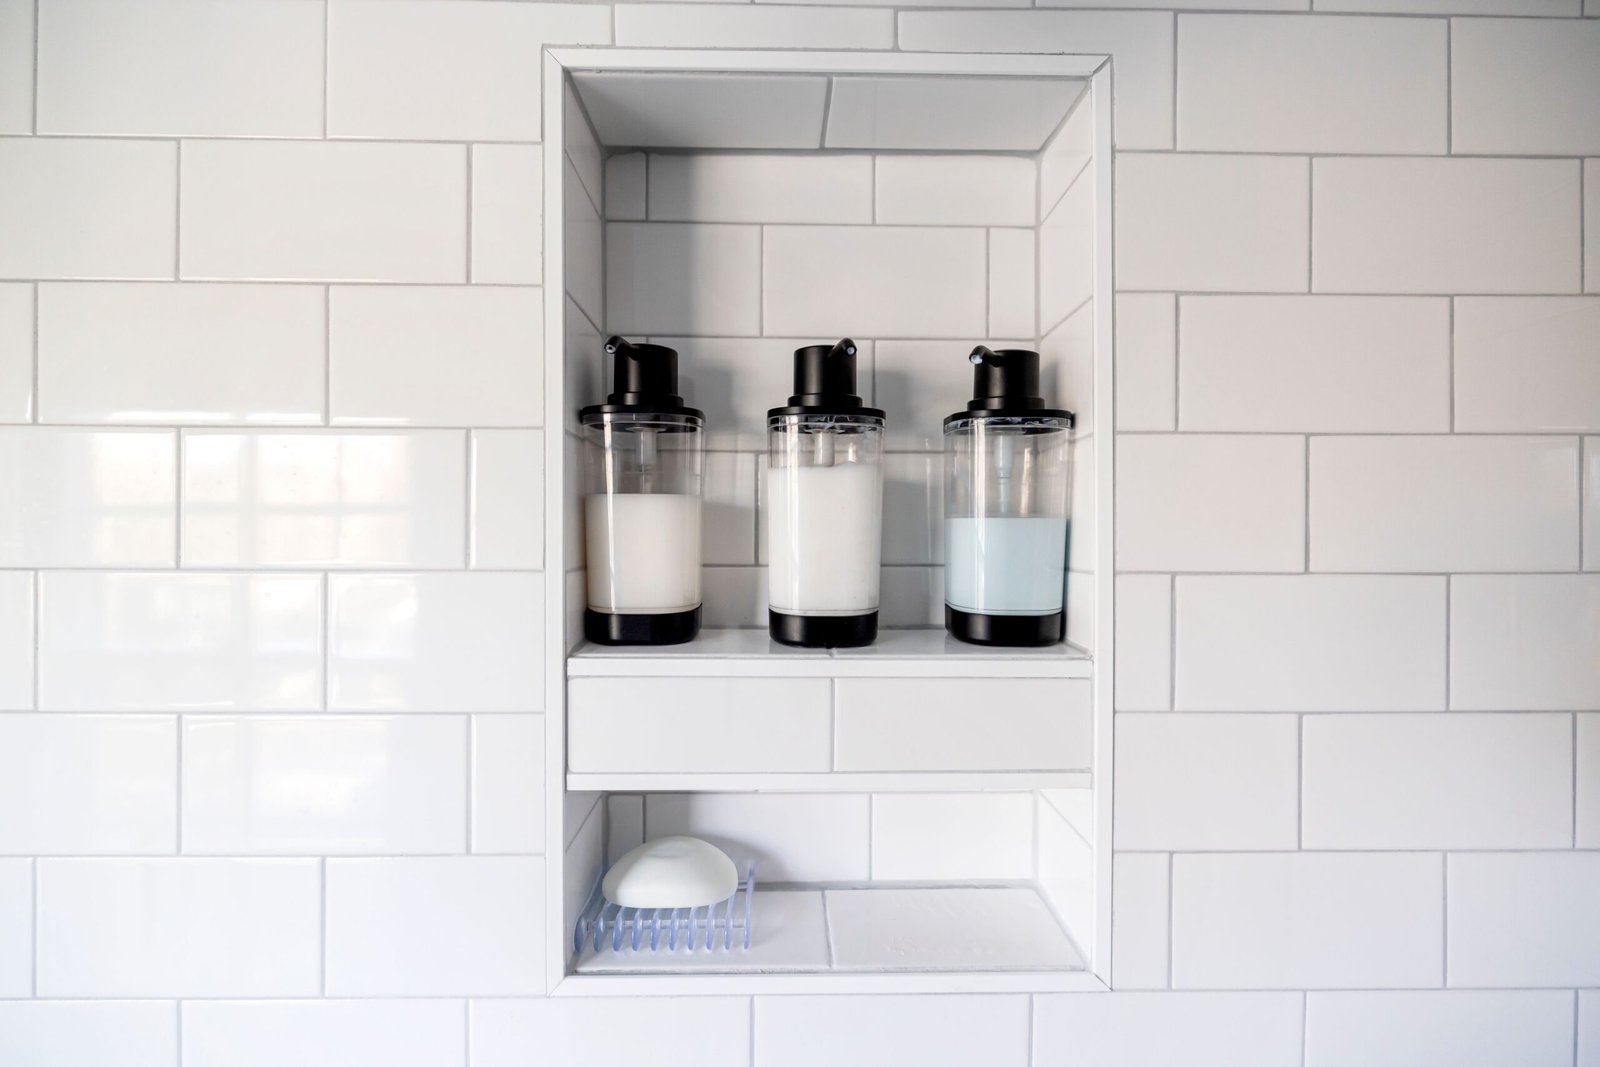
Shower niche. A recessed shelf inside the shower, usually between wall studs. It holds shampoo, soap, and razors. This is the most common type and the one with the highest stakes, because it’s in direct contact with water.
Vanity or dry-area niche. A recess in the wall near the sink or toilet, used for towels, toiletries, or decor. Water exposure is minimal, so the construction is simpler and the design options are wider.
Tub-surround niche. Similar to a shower niche, but placed at tub level for products you reach while bathing. It’s a good place for a candle or a small plant, though it still gets splashed.
Full-height wall recess. A tall, shelved recess, sometimes with a mirror or glass doors. It’s more architectural and works best when planned during a renovation.
Ledge or shelf (not recessed). Strictly speaking, this isn’t a niche. A built-out ledge runs across a shower wall and acts as a shelf. It’s useful where studs or plumbing prevent a true recess.
My opinion: if you’re building a shower from scratch, plan a niche. If you’re retrofitting and the wall is awkward, a ledge is often the smarter solution, and nobody will think less of it.
Size, Height, and Placement
This is where most regret starts, so it’s worth slowing down.
Standard sizes. Many niches are sized to fit between studs, which are commonly spaced 16 inches on center in North American framing, leaving roughly 14.5 inches of clear space. A frequently used niche is around 12 inches wide and 12 to 24 inches tall, but there’s no rule. Check your own framing, because older homes and other countries vary.
Depth. Most niches are about 3.5 inches deep, matching the depth of a standard 2×4 wall. That’s enough for most bottles but tight for larger ones, so measure your products before you build.
Height. A good rule of thumb is to put the niche where you can see and reach it without bending or stretching. Many people place the shelf somewhere between chest and shoulder height. Avoid placing it directly in the spray if you can, since it will collect water and soap scum faster.
Wall choice. Where possible, avoid putting a niche on an exterior wall. The wall cavity is usually insulated and carries the risk of cold surfaces and condensation. A good installer will advise on this.
Shelf count. A single tall niche with one shelf in the middle is flexible. Two stacked niches look neat but need more careful layout. More shelves aren’t always better, because dividers eat into usable space.
Think about the tile grid. The cleanest niches align with the tile layout. If the niche edges land mid-tile, you’ll get awkward cuts. Planning the niche around the tile size, or choosing the tile layout around the niche, makes everything look intentional.
A quick exercise I like: line up every bottle you currently use on a table, measure the tallest and widest, then add a couple of inches. That’s your real minimum size.
Built-In, Prefab, or Surface-Mounted
There are three realistic routes.
1. Custom-built niche. A framed recess lined with waterproofing and tiled to match the wall. Strengths: Fully customizable, seamless look, any size. Reality check: More labor and more skill, and mistakes can be costly.
2. Prefab niche. A ready-made insert, often made of foam board, plastic, or similar material, designed to be waterproof and fit between studs. Brands such as Schluter Systems and wedi offer these. Strengths: Consistent, quick to install, and designed as part of a waterproofing system. Reality check: Limited sizes, and you still need correct installation and compatible waterproofing around it.
3. Surface-mounted shelf or caddy. Not recessed, so it avoids cutting into the wall. Strengths: Renter-friendly, quick, low cost. Reality check: Less seamless, takes up shower space, and can look cluttered.
For most renovations, I think a prefab niche is the sweet spot. It removes a lot of the guesswork around waterproofing and gives you a clean, well-formed pocket to tile. If you’re a confident tiler or working with a skilled installer, custom gives you more freedom.
[Placeholder: add a photo of a niche mid-installation, such as the framed opening or a prefab insert before tiling.]
Materials and Finishes Compared
The niche is a chance to either blend in or stand out.
Finish
Look
Strengths
Honest drawbacks
Matching wall tile
Seamless, calm
Cohesive and timeless
Can look flat, and products fade into the background
Contrast tile or mosaic
Eye-catching
Adds personality and depth
Easier to overdo, and busy patterns can feel dated
Natural stone shelf (marble, granite)
Premium
Looks high-end, easy to clean when sealed
Needs sealing, and can stain or etch depending on stone
Solid-surface or quartz shelf
Sleek, uniform
Low maintenance, non-porous
Higher cost, needs fabrication
Porcelain slab
Modern, minimal
Few grout lines, very durable
Specialist cutting and a higher price
Glass or stainless inserts
Contemporary
Hygienic and sleek
Can show water spots, and not suited to every style
A trick I use often: choose the niche back and sides in the wall tile, but give the shelf itself a single piece of a different material. A slim marble or porcelain shelf has fewer grout joints, which means less cleaning and less mildew.
One more practical tip: minimize grout inside the niche. Grout is where soap scum and mold settle. Larger tiles, a single slab, or a solid shelf reduces the problem.
Waterproofing
If you take only one section from this article seriously, make it this one.
A niche creates extra corners and edges where water can penetrate. Water that gets behind tile and into the wall can cause rot and mold, and it often goes unnoticed until the damage is serious.
The basics, in plain language:
The niche must be part of the waterproofing system. Not just the wall, but the niche’s back, sides, and shelf all need to be covered by a continuous waterproof layer, whether that’s a membrane, a liquid-applied coating, or a prefab unit designed for the purpose.
Corners and seams need special attention. These are the weak points. Specialty corners, bands, or sealants are used here.
Slope the bottom. The bottom shelf should slope slightly toward the shower, so water drains out instead of pooling. Many installers build in a small slope, and some prefab units come pre-sloped.
Use compatible products. Waterproofing layers, adhesives, and sealants should be designed to work together. Mixing random products is a recipe for failure.
Whoever installs your niche, ask directly: “How is the niche waterproofed, and which system are you using?” A confident, specific answer is a good sign. A vague one isn’t.
This is also a job where I’d lean toward hiring a professional. A tiling mistake is annoying, but a waterproofing mistake can be hidden and expensive.
Design Ideas That Actually Look Good
Here are approaches I find work well in real bathrooms.
The tone-on-tone niche. Same tile as the wall, possibly in a slightly different finish. It disappears into the wall, which suits calm, minimal bathrooms.
The contrast pocket. A niche lined with a contrasting tile, such as deep green in a white shower, creates a focal point. Keep the contrast limited to the inside of the niche so it frames your products.
The mosaic backdrop. Small mosaic tiles on the niche back add texture, but remember the grout cleaning trade-off.
The wide horizontal niche. A long, shallow niche, sometimes spanning the width of the shower wall, works as a shelf and a design line. It’s more of a statement and needs careful planning around studs.
The stacked pair. Two small niches placed vertically can feel tidy and symmetrical.
The niche as a bench-side feature. In larger showers, a niche near a seat is convenient for sitting users and adds a relaxed, spa-like feel.
The dry-area display niche. Near the vanity, a niche with warm lighting can hold a plant, a candle, or a favorite object. It’s one of the easiest ways to add personality to a plain wall.
Natural stone shelf, simple surround. A thick stone shelf set into a plain tiled niche looks substantial and refined.
[Placeholder: add a photo of a contrast-lined niche and a tone-on-tone niche, with captions describing the difference.]
My recommendation: choose one idea and commit. Niches look best when they’re confident and simple. A crowded niche, with too many materials and too many products, defeats the purpose.
Lighting a Niche
A small, well-placed light turns a utility pocket into a feature.
LED strips. Thin, low-profile strips along the top or side edge can illuminate the niche gently. Use products rated for wet locations.
Waterproof or damp-rated fixtures. Anything inside a shower must be designed for it. This is not a place to improvise.
Warm light. A warm color temperature flatters tile, skin, and products. Very cool white can feel clinical.
Plan wiring early. Adding lighting after the wall is closed is far more difficult, so decide before the framing and waterproofing stages.
Electrical work in wet areas is regulated, and mistakes can be dangerous. A licensed electrician should handle the wiring, and your local code will have specific requirements.
Planning Tools Compared
Visualizing a niche before you build can help you test proportion, position, and tile alignment. Here’s an honest look at the main options. I haven’t listed exact pricing or features, since these change often. Check each site for current details.
My honest verdict: These tools are good for judging proportion and tile alignment, but none replace a physical mock-up. For niches, my favorite low-tech method is cutting a cardboard box to the planned niche size, taping it to the wall, and living with it for a few days. Put your actual bottles inside. You’ll quickly find out if it’s too small or in the wrong spot.
For real-bathroom inspiration, Houzz has a large library of photos you can filter by room and style.
[Placeholder: insert your own screenshots of the tools you tried, with captions describing what you tested.]
Cost and Practical Realities
Niche costs vary widely by region, materials, and whether you’re building during a full renovation or retrofitting.
Where costs rise:
Custom framing and construction
Premium shelf materials like natural stone or porcelain slab
Mosaic or intricate tile work, which is labor-intensive
Integrated lighting and electrical work
Retrofitting into an existing, finished wall
Where you can save:
Adding the niche during a planned renovation, while the wall is already open
Using a prefab niche
Matching the niche to the wall tile and keeping the design simple
Choosing standard sizes that fit between studs
My practical advice: if you’re renovating the shower anyway, the added cost of a niche is usually modest compared with the long-term benefit. If you’re retrofitting, ask your contractor for an itemized quote and a clear explanation of how they’ll handle the wall structure and waterproofing.
Mistakes I See Again and Again
1. Making it too small. Measure your actual products first.
2. Skipping the slope. A flat shelf holds water, which causes staining and mildew.
3. Neglecting waterproofing details. Corners and seams are where leaks begin.
4. Placing it in the spray zone. Products and the shelf get soaked and dirty faster.
5. Putting it on an exterior wall without advice. Insulation and condensation issues can arise.
6. Fighting the tile layout. Awkward cuts make a niche look unplanned.
7. Choosing high-maintenance finishes. Heavy grout, porous stone without sealing, and busy mosaics all take more work than people expect.
8. Forgetting accessibility. A niche that’s too high or too low is annoying every single day. Think about everyone who will use the shower.
9. Overstyling. If it’s crowded with decor, it stops being practical.
Where Bathroom Storage Is Heading
A few directions feel lasting rather than fashionable:
Larger, cleaner surfaces. Big-format tiles and slabs mean fewer grout lines, making niches easier to clean.
Integrated niches as a design feature. More designers treat the niche as a deliberate part of the composition, not an afterthought.
Better prefab systems. Waterproofing-focused prefab components keep improving, lowering the risk for both pros and confident DIYers.
Warm, spa-like bathrooms. Natural textures, soft lighting, and earthy palettes continue to shape bathroom design.
Accessible, universal design. Thoughtfully placed storage is increasingly part of designing bathrooms to last.
Sustainable materials. Low-emission products, durable finishes, and longer-lasting materials reduce waste over time.
Hidden and flush storage. Recessed, minimal solutions are popular in compact bathrooms.
Trends will change, but the underlying idea, storage that’s useful and doesn’t clutter, will stay relevant.
FAQs
What is a shower niche? A recessed shelf built into the shower wall, typically between studs, used to store toiletries without a hanging caddy.
What size should a shower niche be? It depends on your framing and your products. Many are around 12 inches wide, but measure your tallest bottle and add some room.
Can I add a niche to an existing shower? Often yes, but it depends on what’s inside the wall, such as studs, plumbing, or wiring. A professional should assess it, and the tile will need to be opened up.
Do niches leak? They can if they’re poorly waterproofed. When built with a proper waterproofing system and a sloped shelf, they’re reliable.
Should the niche match the wall tile? Either works. Matching is calm and timeless, while contrast adds personality. Choose based on your overall design.
What’s the best material for a niche shelf? Solid-surface, quartz, or porcelain slabs are low-maintenance. Natural stone is beautiful but needs sealing. Tile works well if you manage grout lines.
Are niches hard to clean? They’re easier to clean than hanging caddies, especially with fewer grout lines. Slope and good drainage prevent buildup.
Can I DIY a shower niche? Prefab niches make it more achievable, but waterproofing is critical. If you’re not experienced, hiring a professional is wise.
Is a niche worth it in a small bathroom? Often yes. It frees up floor and wall space and keeps the shower uncluttered.
Conclusion
A bathroom niche is a small feature with a large effect. It keeps the shower tidy, makes daily routines easier, and, with a little thought, can be one of the nicest design details in the room.
If you remember three things, make them these: size it around your real products, treat waterproofing as non-negotiable, and keep the design simple enough to clean. Everything else is a refinement.
Mock it up, measure twice, and ask your installer the hard questions. A niche you’ve planned carefully is the kind you stop noticing as a project and start appreciating as part of your day.








1 Comment