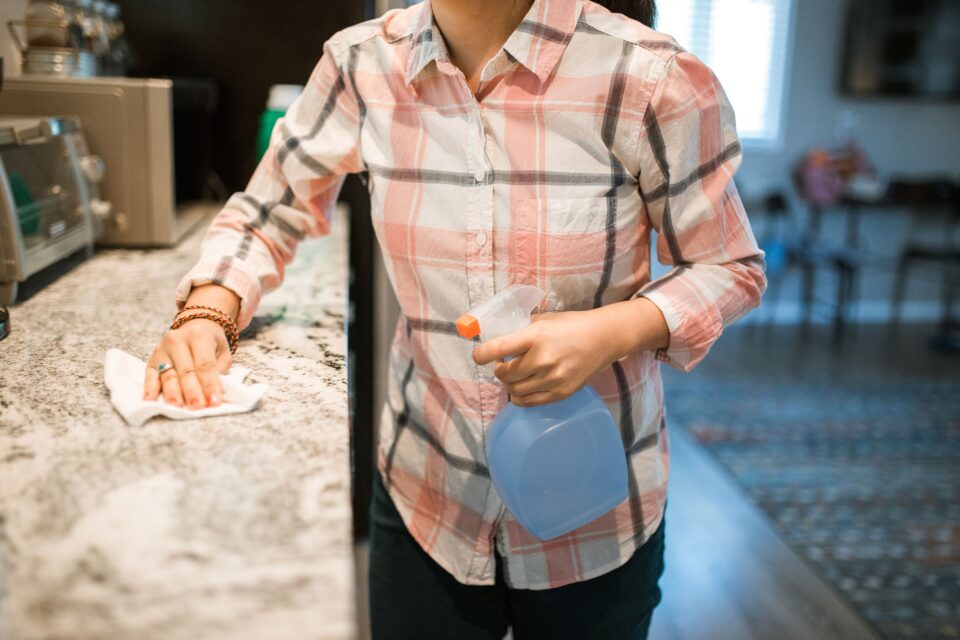
I put soapstone into a kitchen renovation almost entirely because I got tired of babying a marble counter that etched if I so much as looked at it wrong with a glass of wine nearby. Soapstone was sold to me as “the low-maintenance natural stone,” and after living with it for a few years now, I can say that’s mostly true but “low-maintenance” and “no-maintenance” are two very different things, and most articles online blur that line. Here’s what actually works, based on my own counters plus a deep dive into how fabricators and long-time soapstone dealers recommend caring for it.
Table of Contents
- Why Soapstone Cleans Differently Than Other Stone
- What You’ll Need
- Daily Cleaning: Step-by-Step
- Deep Cleaning: Step-by-Step
- The Mineral Oil Treatment: Step-by-Step
- Removing Specific Stains
- Fixing Scratches and Dings
- Mineral Oil vs. Wax vs. Leaving It Bare: A Real Comparison
- Soapstone Cleaning vs. Granite, Quartz, and Marble
- Mistakes I See People Make Constantly
- Where Soapstone Care Products Are Heading
- FAQs
- Final Thoughts
Why Soapstone Cleans Differently Than Other Stone
The single most important thing to understand about soapstone before you clean it is this: it’s non-porous and chemically inert. Unlike granite or marble, it has no pores for liquid to soak into, and it’s largely unaffected by acids or common household chemicals. That means you genuinely cannot etch it with lemon juice or wine the way you can marble, and you can’t stain it the way you can an unsealed porous stone.
This changes the entire cleaning conversation. With marble, half the battle is preventing acidic and abrasive damage. With soapstone, there’s really no “damage” from cleaning products to prevent — the only two things you’re actually managing are surface residue (oils, grease, water spots) and the mineral oil finish, if you’ve chosen to apply one. Everything below flows from that distinction.
What You’ll Need
- Mild dish soap (any basic brand Dawn, Palmolive, Dove all work fine)
- Soft sponge or microfiber cloth
- A few clean, lint-free cotton rags for oiling
- Warm water
- Food-grade mineral oil (not the fabricator-branded version if you want to save money — plain drugstore mineral oil works identically; specialty versions are just a lighter viscosity that spreads slightly easier)
- Fine-grit sandpaper (220–400 grit) for scratch repair, kept on hand but only used occasionally
- Baking soda, for the rare stubborn spot
That’s genuinely the entire kit. If a cleaning guide for soapstone is trying to sell you a specialty stone cleaner spray, know that it’s a convenience product, not a necessity.
Daily Cleaning: Step-by-Step
- Wipe up spills as they happen, especially oil-based ones (cooking oil, butter, sauces). Soapstone won’t stain from this, but oil left sitting will darken that specific spot faster than the surrounding stone, creating uneven patina if you’re not oiling the whole counter regularly.
- Wash with warm water and a small amount of mild dish soap, using a soft sponge in circular motions.
- Rinse thoroughly. Soap residue left to dry can create a dull, slightly streaky film over time — this is the single most common reason people think their soapstone “looks cloudy,” and it’s just soap buildup, not damage to the stone.
- Dry with a clean towel rather than air-drying. Air-drying is fine occasionally, but a quick towel dry prevents water spots and keeps the surface looking consistent.
That’s the whole daily routine. It takes under two minutes per session, which is honestly less fuss than I was putting into my old marble counters.
Deep Cleaning: Step-by-Step
For a more thorough clean — say, once a week, or after heavier cooking sessions with a lot of grease splatter:
- Wipe down the entire surface with warm water and dish soap, paying particular attention to edges, the area around the sink, and behind the stove where grease tends to accumulate unnoticed.
- For greasy film that soap alone won’t cut, a mild degreaser (like diluted Simple Green) is safe on soapstone and won’t damage the stone — though note that degreasers will also strip mineral oil finish faster, so only use this where you’re comfortable re-oiling afterward.
- Rinse completely to remove all soap and degreaser residue.
- Dry thoroughly with a cotton towel.
- Inspect for light areas where oil finish has worn thin (usually around the sink and stove, from repeated water contact and washing) and note them for your next oiling session.
The Mineral Oil Treatment: Step-by-Step
This is optional — soapstone doesn’t need oil to resist stains or damage, since that resistance is inherent to the stone. Oiling is purely cosmetic: it deepens and evens out the natural charcoal patina soapstone develops over time. That said, most owners (myself included) do it because unoiled soapstone develops a blotchy, uneven look faster, especially around high-use zones.
- Make sure the countertop is completely clean and dry before oiling — any residue will get sealed under the oil layer.
- Pour a small amount of mineral oil directly onto the surface or onto a clean cotton rag.
- Rub it into the stone in circular motions, covering the entire surface evenly, including edges and any exposed sides.
- Let it sit for 20–30 minutes so it has time to darken the stone.
- Wipe off all excess oil with a clean, dry rag. The stone doesn’t absorb the oil the way a porous material would — it sits on the surface and gradually evaporates or wears off with use, which is why reapplication is needed.
Frequency that actually makes sense: Oil every 2–3 weeks for the first couple of months after installation to build up an even base patina, then taper off to once every 4–8 weeks as the stone’s natural use-patina (from cooking oils, water, and daily handling) takes over more of that job. Some owners eventually stop oiling altogether once the counter reaches a consistent dark color they’re happy with — there’s no wrong answer here, it’s purely aesthetic preference.
Removing Specific Stains
Because soapstone is non-porous, “stains” are really almost always surface residue rather than something that’s penetrated the stone which makes them much easier to deal with than a true stain in marble or unsealed granite.
- Grease or oil spots: Blot immediately with a paper towel, then clean with dish soap and warm water. If a shadow remains, it will usually even out once you next oil the whole surface.
- Water spots or mineral deposits (hard water): Wipe with a damp cloth; for stubborn deposits, a small amount of baking soda on a damp sponge, rubbed gently, will lift it without scratching.
- Dark residue buildup: A baking soda paste (baking soda plus a little water) left on the spot for a few minutes, then wiped clean, handles most everyday buildup without needing anything harsher.
- Stubborn or unknown residue: Rubbing alcohol on a soft cloth is safe on soapstone and handles most things soap alone won’t, since the stone’s chemical resistance means you have a lot of room to experiment without fear of damage.
Fixing Scratches and Dings
This is the part that surprises new soapstone owners the most: scratches are just part of owning this stone, and they’re genuinely easy to deal with rather than something to panic over.
- Light scratches: Rub a small amount of mineral oil directly into the scratch with your thumb or a soft cloth. Because the surrounding stone is oiled and darkened, a light scratch often blends in almost immediately.
- Deeper scratches: Sand the area with coarse sandpaper in circular motions until the scratch is mostly gone, then switch to a finer grit and repeat with a little water. This will remove the local patina, so the spot will look lighter than the surrounding counter.
- Blend the repair: Reapply mineral oil to the sanded area — it may take a few coats over subsequent oilings to match the surrounding color exactly, since older sections have built up patina over months.
The honest takeaway here, and something I wish someone had told me before I installed mine: don’t chase perfection on every mark. Most long-time soapstone owners let normal scratches and dings become part of the character of the stone rather than sanding out every single one — sanding too often actually creates more color inconsistency than it fixes.
Mineral Oil vs. Wax vs. Leaving It Bare: A Real Comparison
| Approach | Look | Maintenance Effort | Best For |
|---|---|---|---|
| Mineral oil | Deep charcoal-to-black patina, rich and uniform | Moderate — reapply every few weeks initially, then monthly or less | Homeowners who want that classic dark soapstone look immediately |
| Wax-based sealer | Similar dark look, holds slightly longer between applications per some manufacturers | Moderate, similar frequency to oil but marketed as longer-lasting | Owners wanting a slightly lower reapplication frequency who don’t mind the added product cost |
| Left bare (no treatment) | Light gray, develops natural patina unevenly over months to years through actual use | Lowest — literally zero extra steps | Owners who like a lighter, more rustic, evolving look and don’t mind initial unevenness around the sink and stove |
My honest verdict: I oil mine. I like the dark, almost slate-like look immediately rather than waiting a year or two for natural use to even out the color, and the actual time cost is a few minutes every few weeks — trivial compared to the sealing schedule a marble counter would demand. If you’re someone who genuinely won’t keep up with periodic oiling, though, leaving it bare isn’t a mistake the stone will look fine either way, just lighter and less uniform at first.
Soapstone Cleaning vs. Granite, Quartz, and Marble
| Stone | Sealing Required? | Acid/Etch Risk | Stain Risk | Daily Cleaning Effort |
|---|---|---|---|---|
| Soapstone | No (oil is cosmetic only) | None | Very low | Low |
| Granite | Yes, periodically | Low | Moderate if unsealed | Low–Moderate |
| Marble | Yes, periodically | High | Moderate–High | Moderate–High |
| Quartz (engineered) | No | Low | Very low | Low |
Soapstone and quartz end up neck-and-neck on day-to-day cleaning ease, which surprises people who assume “natural stone” automatically means more work. The real difference between them is aesthetic and tactile — soapstone has that soft, matte, almost soap-like feel (hence the name) and develops character over time, where quartz stays visually static for its entire life.
Mistakes I See People Make Constantly
- Using bleach. It won’t necessarily damage the stone structurally, but it can cause discoloration and is simply unnecessary given how easily soap and water handle everything soapstone throws at you.
- Skipping the rinse step. Soap film left on the surface is the number one reason people think their soapstone has gone dull or hazy.
- Panicking over the first scratch. New owners often reach for aggressive sanding on day one. Give it time — light scratches often soften into the patina on their own with regular oiling.
- Inconsistent oiling. Oiling once and then forgetting about it for a year creates a blotchy, two-tone look that’s more noticeable than if you’d never oiled at all. Pick a routine — even “twice a year, whenever it starts looking light” — and stick to it.
Where Soapstone Care Products Are Heading
A few things worth watching if you’re maintaining soapstone long-term:
Wax-based alternatives to mineral oil are gaining real traction. Several fabricators now sell dedicated soapstone wax or sealer products marketed as longer-lasting than traditional mineral oil, with some early positive feedback from long-time soapstone dealers who’ve tested them over the past several years — though mineral oil remains the time-tested default most fabricators still recommend first.
“Living finish” marketing is catching up to how people already use the stone. More fabricators are explicitly selling the natural patina process as a feature rather than something to manage away, which matches what long-time owners have said for decades — the scratches and color variation are part of the appeal, not a flaw to engineer around.
Food-grade, fragrance-free mineral oil is becoming the standard recommendation over scented or lower-grade options, largely because kitchen counters are food-prep surfaces and the FDA already recognizes soapstone as food-safe — the oil should meet the same bar.
FAQs
Can I use regular dish soap on soapstone every day? Yes — it’s genuinely the recommended daily cleaner. There’s no need for a specialty stone cleaner for routine use.
Do I have to oil my soapstone countertops? No. Oiling is purely cosmetic. Un-oiled soapstone is just as stain- and heat-resistant as oiled soapstone; it simply stays lighter gray and develops patina more slowly and unevenly through normal use.
Is soapstone actually scratch-proof? No, and any guide claiming otherwise is overselling it. Soapstone is softer than granite or quartz and will scratch with enough pressure, but scratches are shallow, easy to fix with light sanding and oil, and often blend into the patina on their own over time.
Can I put hot pots directly on soapstone? Yes — it’s highly heat-resistant, one of the material’s genuine advantages over quartz, which can be damaged by direct high heat.
Will bleach or vinegar ruin my soapstone? They won’t structurally damage it the way acid would etch marble, but bleach in particular can cause discoloration over repeated use, so it’s best avoided in favor of simple soap and water.
How do I know when it’s time to re-oil? Watch for the countertop looking noticeably lighter than when you last oiled it, or for water forming visible dark spots that don’t match the surrounding surface — both are signs the oil layer has worn thin.
Final Thoughts
After a few years of living with soapstone, the thing that’s stuck with me most is how little actual anxiety it removes from daily kitchen life. I don’t flinch when someone sets a hot pan down without a trivet, and I don’t panic over a splash of lemon juice near the sink. The maintenance that does exist — the periodic oiling, the occasional light sanding of a scratch — feels more like a ritual you opt into for the look you want, rather than damage control you’re forced into. That’s a genuinely different relationship with a countertop than I had with marble, and it’s the main reason I’d choose soapstone again without hesitation.
If you’re new to owning it, my honest advice is to under-manage it for the first few months rather than over-manage it. Clean with soap and water, oil on a loose schedule if you want the dark look, and let scratches happen — you’ll end up with a counter that looks intentionally lived-in rather than one you’re constantly fussing over.
About the Author
Author bio: This guide was researched and written by a materials and home-maintenance researcher with direct, ongoing experience living with and maintaining soapstone countertops, combined with a review of care guidance from soapstone fabricators and quarries across the United States. Their work focuses on separating genuine maintenance necessities from cosmetic upsells in natural stone care, drawing on both firsthand household experience and documented fabricator best practices to give homeowners a realistic picture of what day-to-day ownership actually requires.