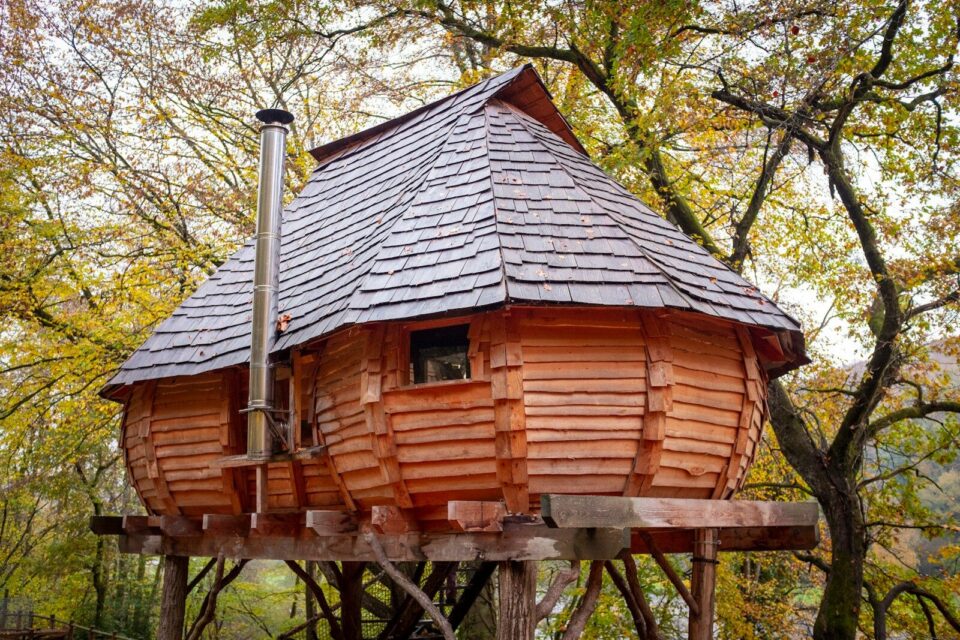
I built my first tree house in a leaning silver maple when I was eleven, using scrap plywood and roofing nails I “borrowed” from my dad’s garage. It lasted exactly one summer before a storm knocked half the platform loose. Twenty-some years and a dozen client builds later, I still think about that maple mostly because it taught me the lesson that took me the longest to actually learn: the tree is not lumber. It’s a living structural partner, and it will outlast whatever you bolt to it if you respect how it moves, grows, and heals.
This guide pulls together what I wish someone had handed me back then — the real trade-offs between attachment systems, which species actually hold up, what tools are worth the money, and the maintenance rhythm that keeps a tree house standing for decades instead of seasons.
Table of Contents
- Why Tree Houses Are Having a Moment Again
- Choosing the Right Tree (Not Every Tree Qualifies)
- Three Structural Approaches, Compared
- The Attachment System Debate: TAB vs. GL vs. Lag Bolts
- Framing Materials: What Actually Holds Up Outdoors
- Essential Tools — Real Comparisons
- Step-by-Step Build Process
- Permits, Setbacks, and Insurance
- Safety Features That Aren’t Optional
- Realistic Cost Breakdown
- Maintenance Schedule by Season
- Mistakes I See Over and Over
- Future Trends in Tree House Design
- FAQs
- Final Thoughts
Why Tree Houses Are Having a Moment Again
For a while, tree houses got filed away as a kids’ novelty something you built once and let rot. That’s changed. I’ve spent the last few years fielding calls that have nothing to do with children at all: a couple in Vermont wanting a writing studio suspended above their property line, a landscaping client in North Carolina converting an old oak platform into a guest suite they now rent out on weekends, a tech founder in the Pacific Northwest who just wanted somewhere with no Wi-Fi to think.
Part of this is the “glamping” economy. Properties like Treehouse Point near Seattle and Cedar Creek Treehouse in Washington proved there’s real commercial demand for elevated, tree-integrated architecture. Part of it is simpler: after years of screens, an elevated wooden room with a view genuinely scratches an itch that a home office in the basement doesn’t.
Whatever your motivation, the fundamentals don’t change based on intent. A kid’s fort and a rentable guest suite both live or die on the same three things: tree selection, attachment method, and honest maintenance.
Choosing the Right Tree (Not Every Tree Qualifies)
This is where most first-time builders go wrong — they pick the most convenient tree instead of the most capable one. Trunk diameter matters, but wood density and root structure matter more.
| Species | Suitability | Why |
|---|---|---|
| White Oak / Red Oak | Excellent | Dense hardwood, deep taproot, exceptional load tolerance |
| Sugar Maple | Excellent | Strong, slow-growing wood with tight grain |
| Douglas Fir | Very Good | Common choice in Pacific Northwest builds; strong vertical grain, tall clean trunks |
| American Beech | Good | Strong wood, but shallower root plate — check for lean and soil drainage |
| Norway Maple | Good | Fast-growing but still structurally reliable if trunk diameter is sufficient |
| Silver Maple | Use Caution | Deceptively large but brittle wood, prone to internal decay and limb failure |
| Poplar / Aspen | Avoid | Fast growth equals soft, weak wood that decays quickly around fasteners |
| Willow | Avoid | Weak wood, shallow roots, short lifespan, splits easily |
A rule I give every client: the tree needs a minimum trunk diameter of about 12 inches (30 cm) at the attachment point for a basic single-tree platform, and considerably more — often 18 to 24 inches — for anything with a roof, walls, and adult foot traffic. Below that, you’re not building on a structural member, you’re building on a sapling that hasn’t finished deciding what it wants to be.
Just as important: hire a certified arborist to assess the tree’s health before you drill anything. I’ve walked away from beautiful, thick-trunked trees because a resistance drill test showed internal rot that wasn’t visible from the ground. A tree house is only as strong as the wood you can’t see.
Three Structural Approaches, Compared
There isn’t one “correct” way to build a tree house — there are three broad structural philosophies, and picking the wrong one for your site is the single most expensive mistake you can make.
Tree-Supported (Traditional) The platform bears directly on the tree via attachment bolts or brackets. Lightest footprint, most romantic, but limited by the health and size of a single tree or small cluster.
Pole-Supported (Freestanding) The platform is built on auxiliary posts sunk into the ground near the tree, with the tree providing partial support or none at all. This is what most commercial treehouse hotels actually use — it sidesteps a lot of the growth and sway complications of pure tree-supported builds.
Hybrid (Tree-Assisted) A combination: posts carry the majority of the vertical load, while the tree contributes lateral stability and aesthetic integration. This is my default recommendation for anything larger than a simple kids’ platform, because it lets the structure outlive tree growth cycles without stressing the tree.
My honest verdict: if you’re building something a family will use for ten-plus years, or something you plan to rent out, go hybrid. Pure tree-supported structures look more “authentic,” but they demand more monitoring, more retrofitting as the tree grows, and more risk if that one tree develops problems. Freestanding structures are the safest engineering choice but can feel disconnected from the tree itself — you’re building near a tree, not with one.
The Attachment System Debate: TAB vs. GL vs. Lag Bolts
This is the part nobody explains well, and it’s the single biggest factor in whether your tree survives the build.
| System | How It Works | Pros | Cons | Best For |
|---|---|---|---|---|
| Treehouse Attachment Bolt (TAB) | Large-diameter steel bolt drilled into heartwood; platform beam slides on a floating collar, allowing tree growth and sway | Strong, engineered for real loads, allows the tree to move and grow without girdling | Requires precise drilling, higher cost per unit, needs periodic inspection | Larger, permanent structures; multi-story builds |
| Garnier Limb (GL) | Patented bracket system originally developed by treehouse pioneer Michael Garnier; floating limb design distributes load and lets the tree grow around it over time | Extremely well-tested in commercial treehouse hotels, minimizes long-term damage | Proprietary parts, more expensive, sourcing can be slower | Commercial-grade or rental treehouses expecting decades of use |
| Traditional Lag Bolts | Standard construction lag screws driven directly into the trunk, sometimes several per platform | Cheap, available at any hardware store, easy for DIYers | Doesn’t accommodate growth, multiple holes increase decay risk, weaker single-point load | Small, temporary kids’ platforms only |
| Strapping / Cabling | Structure suspended or braced using tension straps and cables around the trunk, no drilling at all | Zero permanent tree damage, reversible | Limited load capacity, more prone to shifting, not suitable for enclosed structures | Treehouse-adjacent platforms, temporary installations, protected/heritage trees |
Honest verdict: if budget allows, TAB or GL systems are worth every extra dollar. The floating design is the whole point — trees add roughly an inch of girth per year in good growing conditions, and a rigid lag bolt doesn’t accommodate that. Over five or six years, a fixed bolt can start to girdle the tree from the inside, cutting off nutrient flow exactly where you can’t see it happening. I’ve cut into “healthy-looking” trees during a retrofit and found compartmentalized rot forming right at old lag bolt sites.
For a one-summer kids’ fort in a healthy, thick tree, lag bolts sized appropriately (and not overtightened) are genuinely fine. For anything meant to last, TAB is the standard I default to now.
Framing Materials: What Actually Holds Up Outdoors
| Material | Cost | Durability | Weight | Notes |
|---|---|---|---|---|
| Pressure-Treated Pine | $ | Good (15–20 yrs) | Heavy | Affordable and strong, but chemical treatment means it shouldn’t touch bare skin regularly (railings, decking) without sealing |
| Western Red Cedar | $$$ | Excellent (25–30 yrs) | Light | Naturally rot- and insect-resistant, ages beautifully, my top pick for visible framing and siding |
| Redwood | $$$$ | Excellent (30+ yrs) | Light | Comparable to cedar, often pricier depending on region, gorgeous grain |
| Cypress | $$ | Very Good (20–25 yrs) | Medium | Underrated — naturally resistant to rot, more budget-friendly than cedar in many regions |
| Standard Douglas Fir (untreated) | $ | Poor outdoors (5–8 yrs) | Medium | Fine for interior framing under a roof, not for exposed structural members |
I frame the platform and structural skeleton in pressure-treated lumber for strength and cost efficiency, then use cedar or cypress for anything visible, walked on barefoot, or in direct contact with the elements — decking, railings, siding. It’s a hybrid approach that balances budget against longevity, and it’s what most professional builds actually do, regardless of what the glossy magazine photos suggest.
Essential Tools Real Comparisons
You don’t need a full contractor’s trailer, but you do need a handful of things done right.
Cordless Impact Driver: I’ve run Milwaukee M18 Fuel, DeWalt 20V Max, and Makita XDT on various builds. Milwaukee edges ahead on raw torque for driving long structural screws into hardwood trunks — genuinely useful when you’re sinking a 6-inch lag into oak. DeWalt is a close second with better battery ecosystem compatibility if you already own their tools. Makita is quieter and lighter, which matters more than people expect when you’re working one-handed on a ladder 15 feet up.
Track Saw vs. Circular Saw: For platform decking, a track saw (Festool TS 55 or the more budget-friendly Makita SP6000) gives you dead-straight cuts without clamping a guide rail every time. A standard circular saw works fine for framing lumber where perfect edges don’t matter as much. If you’re only buying one, get a good circular saw and a cheap clamp-on guide — the track saw is a luxury, not a necessity.
Laser Level: Non-negotiable for platform framing. A basic self-leveling cross-line laser (Bosch and DeWalt both make reliable mid-range models) saves you from the classic mistake of a platform that looks level on one side and is visibly off by the time you frame the far wall.
Ratchet Straps or a Come-Along: For lifting and holding heavy beams in position while you bolt them — a come-along is slower but gives you far more control than trying to muscle a beam into place with a helper and hope.
Tree Climbing Harness: If you or your crew will be working above 6–8 feet without a completed platform underneath, a proper arborist-rated harness isn’t optional. This is the one category where I’d never recommend cutting cost — a $40 hardware store harness is not rated for the same fall forces as a $200 arborist harness, and the difference matters in exactly the moment you’d need it.
Step-by-Step Build Process
- Site and tree assessment — arborist inspection, soil drainage check, sun/wind exposure evaluation.
- Design and load calculation — sketch the platform footprint, calculate estimated live load (people, furniture) plus dead load (materials), and size beams accordingly. For anything beyond a simple platform, this is worth having an engineer sign off on, especially if permits are involved.
- Attachment installation — drill and install TAB, GL brackets, or bolts at the calculated height and angle, following manufacturer torque and clearance specs precisely.
- Primary beam placement — the main support beams get set first, checked for level, then secured.
- Platform framing — joists go in on 16-inch centers (standard residential spacing), with joist hangers rather than toe-nailing for real structural integrity.
- Decking — lay decking boards with small gaps (roughly 1/8 inch) for drainage and wood movement.
- Wall framing and roof — standard stick framing works fine at this scale; keep the structure as light as reasonably possible to reduce ongoing load on the tree.
- Railings and access — build railings to at least 36 inches per typical residential deck code, even if not legally required for your structure.
- Weatherproofing — roofing, flashing, and sealant on any exposed end grain.
- Final load test and inspection — walk it, jump on it (carefully), check every connection before anyone else uses it.
Permits, Setbacks, and Insurance
Rules vary enormously by municipality, so treat this as a starting point, not a substitute for calling your local building department. In many U.S. jurisdictions, structures under a certain footprint (commonly around 120 square feet) and height are classified as accessory structures and may be exempt from a full building permit — but setback requirements from property lines almost always still apply, and electrical work typically requires separate permitting regardless of the structure’s size.
If you plan to rent the space out, even occasionally, call your homeowner’s insurance provider before you build. Standard policies often don’t cover injury liability for a structure being used commercially, and a single incident without proper coverage can be financially devastating. This is the least glamorous part of the process and the part people skip most often.
Safety Features That Aren’t Optional
- Railings at 36+ inches on any platform edge, full stop, regardless of intended user age.
- Baluster spacing under 4 inches to prevent a small child from slipping through.
- Non-slip decking treatment, especially in climates with regular rain or frost.
- A properly built staircase or ladder rather than improvised rungs — falls during access are more common than falls from the platform itself.
- Weight capacity signage if the structure will host guests or renters who don’t know its engineered limits.
Realistic Cost Breakdown
| Build Type | Typical Cost Range | Notes |
|---|---|---|
| Simple DIY kids’ platform | $1,500 – $4,000 | Basic lumber, lag bolts, weekend build |
| Mid-size family tree house | $8,000 – $20,000 | Framed walls, roof, electrical, professional attachment system |
| Luxury or rental-grade tree house | $30,000 – $150,000+ | Engineered design, plumbing, insulation, commercial-grade finishes |
Labor typically accounts for 40–60% of total cost on professionally built structures — the materials themselves are rarely the budget bottleneck.
Maintenance Schedule by Season
| Season | Tasks |
|---|---|
| Spring | Inspect all bolts and brackets for looseness after winter freeze-thaw cycles; check for new tree growth pressure points; clear debris from roof and gutters |
| Summer | Reseal decking if water no longer beads on the surface; trim any branches now growing into the structure; check for insect activity |
| Fall | Clear leaves from platform and roof before they trap moisture; inspect flashing and seals before winter; check railing stability |
| Winter | Monitor for ice buildup on stairs and platforms; visually inspect for storm damage after high winds; avoid heavy snow load accumulation on the roof |
I tell every client the same thing: a five-minute bolt check twice a year prevents the kind of five-figure repair that comes from ignoring a slowly loosening connection for three years.
Mistakes I See Over and Over
Building on a tree that’s too young. Enthusiasm outruns trunk diameter more often than you’d think.
Ignoring drainage on the platform. Flat decking with no gap between boards turns into a swimming pool, and standing water is the fastest route to rot.
Overtightening lag bolts. Cranking a bolt down “for extra security” crushes the wood fibers around it and actually weakens the hold over time.
Skipping the arborist consultation to save money. This is almost always the most expensive shortcut anyone takes, because it shows up as a structural problem two or three years later, not immediately.
Underestimating wind load. An enclosed tree house with walls and a roof catches wind very differently than an open platform — bracing needs to account for that, not just vertical weight.
<a id=”future-trends”></a>
Future Trends in Tree House Design
A few shifts I’m watching closely:
Living roofs and reclaimed materials are moving from novelty to genuine standard practice, particularly on rental-grade builds where sustainability is part of the appeal, not just a footnote.
Off-grid tech integration — small solar arrays, low-voltage LED systems, and smart locks — has become common on rental treehouses, letting owners manage bookings remotely without running heavy electrical infrastructure up a tree.
Modular, tree-adjacent design is gaining ground over pure tree-supported structures, largely because insurers and engineers increasingly prefer designs where the tree contributes stability rather than bears full structural load. I expect this to keep accelerating as commercial treehouse stays become a bigger part of the hospitality industry.
Growth-accommodating hardware like TAB systems is becoming the default rather than the premium option, as more builders learn the hard way what fixed bolts do to a trunk over a decade.
FAQs
Will bolting into a tree kill it? Not if done correctly. A single, properly sized bolt drilled into healthy heartwood causes localized, manageable damage that a healthy tree compartmentalizes. Multiple oversized or poorly placed bolts are what cause real harm.
How much weight can a tree actually support? It depends entirely on species, trunk diameter, and root health — there’s no universal number. This is exactly why an arborist assessment and proper load calculation matter more than any rule of thumb.
Do I need a permit for a tree house? Often not for very small, low structures, but setback rules and electrical permitting frequently still apply. Always check with your local building department directly.
How long do well-built tree houses last? With proper attachment hardware, rot-resistant materials, and biannual maintenance checks, 20 to 30 years is realistic. Poorly maintained builds with basic lag bolts often need major work within 5 to 8 years.
Can I build one myself without hiring a contractor? For a simple kids’ platform, yes, with reasonable carpentry skills. For anything multi-story, enclosed, or intended for rental use, I strongly recommend at minimum an engineering consultation, even if you do the physical building yourself.
What’s the best age or size for a tree before building? Most mature hardwoods over 12 inches in trunk diameter, with visibly healthy bark and canopy, are candidates — but size alone isn’t enough. A thorough health check matters more than age.
Final Thoughts
The best tree houses I’ve worked on all share one quality that has nothing to do with the wood or the hardware: someone treated the tree as a collaborator rather than a fixture. That mindset shows up in small decisions — leaving room for growth, choosing the slower and more expensive attachment system, checking bolts every spring instead of forgetting about them for a decade. None of it is complicated. Most of it just requires patience most builders don’t naturally have when they’re excited to finish the project.
If you take one thing from this guide, let it be this: build for the tree’s timeline, not your weekend’s. Do that, and the structure you put up this year has a real shot at still being someone’s favorite place to sit twenty years from now.
About the Author
Daniel Ashford is a residential structural consultant specializing in elevated and tree-integrated construction, with over a decade of field experience assessing tree health, engineering attachment systems, and consulting on both private and commercial tree house projects across North America. His work focuses on the intersection of arboriculture and residential design — helping builders create structures that are as sustainable for the tree as they are safe for the people using them. He holds ongoing continuing education in arborist-informed construction practices and regularly consults with certified arborists on load-bearing assessments for client projects.