



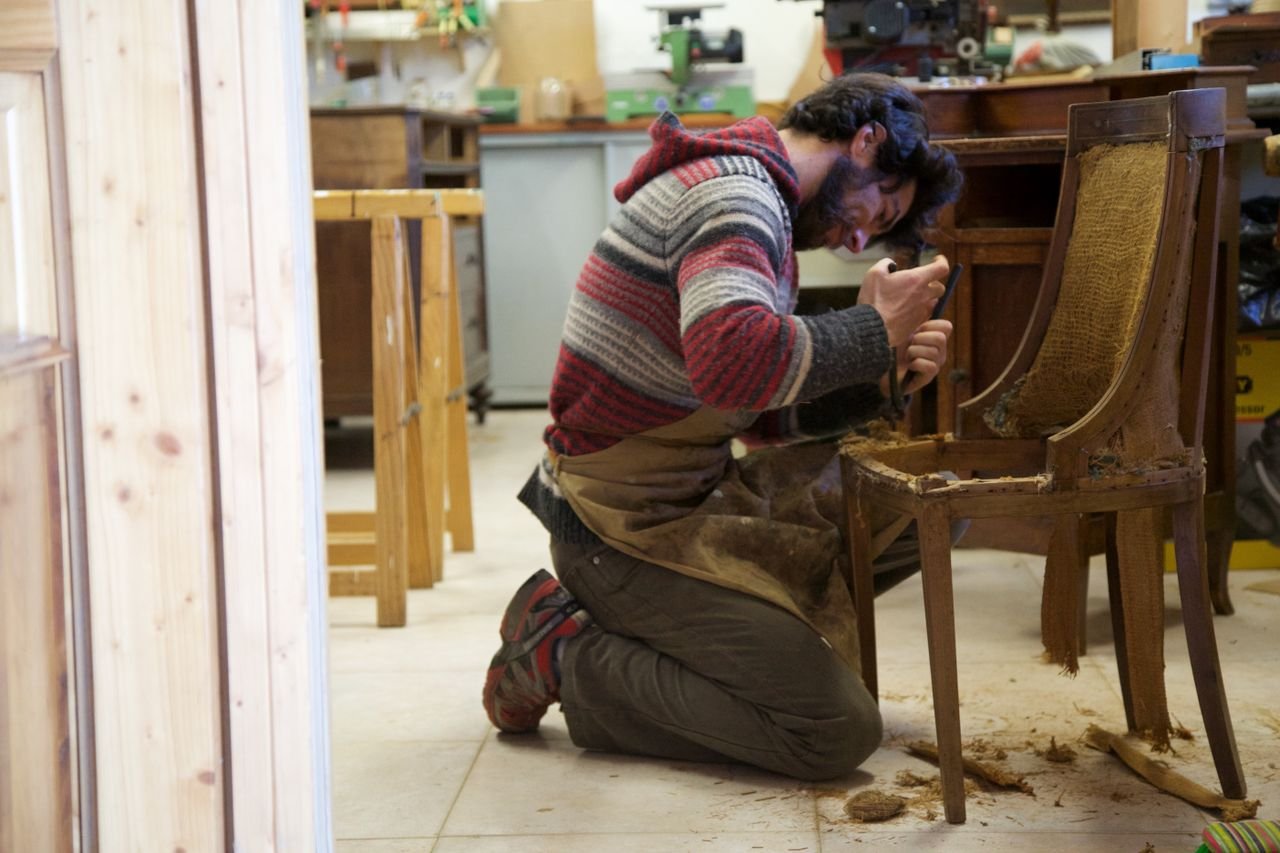
I’ve been repairing and reupholstering furniture for over fifteen years starting with thrift-store chairs in a garage and eventually handling client sofas, antique settees, and commercial booth seating. The number of pieces I’ve seen thrown out because of a torn seam, a sagging cushion, or a few broken springs still surprises me. Most of those problems are fixable with basic skills, the right tools, and a bit of patience. You don’t need a full workshop to make furniture look and feel solid again.
This guide walks through the most common repairs I encounter, the tools that actually earn their keep, fabric and leather techniques that hold up, structural fixes for cushions and springs, cost realities, and the point at which calling a professional makes more sense. I’ll share what has worked in real living rooms and what I’ve learned the hard way.
Table of Contents
- Why Repair Instead of Replace
- Assessing the Damage Before You Start
- Essential Tools and Honest Comparisons
- Fixing Fabric Tears, Holes, and Seams
- Leather and Vinyl Repairs
- Restoring Sagging Cushions and Foam
- Springs, Webbing, and Structural Support
- When to Reupholster Completely
- Cost Breakdown: DIY vs. Professional
- Prevention Tips That Actually Work
- Frequently Asked Questions
- Final Thoughts
- About the Author
Why Repair Instead of Replace
Good furniture frames often outlast their fabric and padding by decades. A solid hardwood or quality plywood frame can support new cushions and covers for another generation. Repairing also lets you keep a piece that fits your space perfectly or carries sentimental value. I’ve restored family sofas that would have cost twice as much to replace with something of equal quality.
There’s a practical side too. New sofas in the mid-range often use particleboard frames and thin foam that compress within a few years. A well-executed repair on older furniture frequently produces a better long-term result.
Assessing the Damage Before You Start
Start by flipping the piece over and examining the underside. Look for broken or detached springs, stretched or torn webbing, and loose frame joints. On the top side, note the type of fabric or leather, the location of tears (along a seam versus in the middle of a panel), and whether the foam has collapsed or the batting has shifted.
Take photos from multiple angles. If the frame is cracked or the joints are completely loose, address those first—otherwise the new fabric will fail quickly. For cushions, remove the covers if possible and press the foam. If it doesn’t rebound, plan on replacement.
A quick rule I use: if more than 40 percent of the covering is damaged or the foam is shot throughout, a full reupholstery job is usually more efficient than multiple patches.
Essential Tools and Honest Comparisons
You can begin with a modest kit. Here’s what I keep in my basic repair bag and how the options compare.
Curved upholstery needles (various sizes, especially 3- to 6-inch) are non-negotiable for hand sewing seams and attaching patches from the outside. Straight mattress needles help with through-stitching. A package of Osborne curved needles costs little and lasts years.
Staple guns: A heavy-duty manual staple gun works for occasional jobs, but a pneumatic (air-powered) long-nose stapler is dramatically faster and less tiring on larger projects. I’ve used both Arrow and Fasco pneumatic models. The pneumatic wins for speed and consistent staple depth; the manual is fine if you only repair one or two pieces a year. Pair the pneumatic with a small compressor.
Staple and tack removers: An Osborne 120½ staple lifter or similar claw tool saves endless frustration. Wire cutters help with stubborn staples.
Webbing stretcher: A gooseneck or plier-style stretcher pulls jute or synthetic webbing tight. Trying to tension by hand almost always leaves the support loose.
Foam tools: An electric carving knife or dedicated foam saw produces clean cuts. Scissors alone leave ragged edges that show under fabric.
Regulator: This thin pointed tool is surprisingly useful for adjusting stuffing and guiding fabric into place without leaving marks.
Other basics: Heavy-duty upholstery thread (nylon or polyester), fabric scissors (never used on paper or webbing), pliers, thimble, measuring tape, and a quality staple remover.
My honest verdict after years of use: start with curved needles, a good manual stapler, staple remover, and webbing stretcher. Upgrade to pneumatic only when the volume justifies it. A mid-range kit under $150 covers most home repairs; professional pneumatic setups run several hundred dollars more but pay for themselves on repeated jobs. For a thorough tool overview, the detailed guide at The Girl with a Hammer is excellent.
Fixing Fabric Tears, Holes, and Seams
Small seam splits are the easiest win. Turn the fabric under cleanly, apply a bit of Fray Check if the edges are loose, and stitch with a curved needle using a ladder or slip stitch. Match the original thread color as closely as possible. Pull the stitches snug but not so tight that the fabric puckers.
For mid-panel tears, the classic approach is an iron-on or sewn patch from underneath. Cut a patch larger than the damage, slip it under the tear, and secure with fabric glue or careful stitching. On the surface you can then close the edges with tiny stitches or a visible mend if the style allows.
Larger holes benefit from piece weaving or a carefully matched fabric insert. Salvage material from a hidden area (the underside of a skirt or the back of a cushion) whenever possible. True reweaving—pulling individual threads and interweaving them—is time-intensive but nearly invisible on patterned fabrics. I’ve used this on wool and tightly woven cottons with good results; on loose weaves it is less practical.
Visible mending with contrasting thread or decorative darning has become popular and can turn a repair into a design feature. It works especially well on casual or mid-century pieces.
Always support the fabric from behind while sewing so the tension stays even. Test your stitch on a scrap first.
Helpful step-by-step examples appear in the Makezine tutorial on mending torn upholstery and various visible-mending approaches shared by practitioners.
Leather and Vinyl Repairs
Leather behaves differently. Small cuts and scratches often respond well to a quality repair kit that includes filler, colorant, and finish. Clean the area thoroughly, apply filler in thin layers, let it cure, then color-match and seal. Brands such as those from Furniture Clinic or Leather Magic produce respectable results on minor damage when instructions are followed carefully.
Larger tears usually need a sub-patch (thin leather or strong fabric glued underneath) followed by careful edge closing and color blending. Heat and pressure help the filler bond. Vinyl is more forgiving with adhesive patches but can look plasticky if overdone.
I’ve tested several consumer kits. The better ones deliver solid results on surface damage under two inches. Beyond that, or on high-wear areas like seat fronts, professional color matching and finishing still look cleaner. A good overview of kit performance versus pro work can be found in independent tests such as those discussed by Fibrenew.
Restoring Sagging Cushions and Foam
Collapsed foam is one of the most common complaints. Remove the old foam, measure carefully, and cut new high-density foam to size. Wrap it in polyester batting for a smoother, more durable surface, then recover. Density matters—look for foam rated for seating (usually 1.8 lb or higher) rather than craft foam.
If the cushion covers are still good, simply replace the inserts. For loose-fill cushions, adding more polyester fiber or a foam core often restores loft.
A quick temporary fix for sagging seats is a thin plywood support board cut to fit under the cushions. It is not elegant, but it works surprisingly well while you plan a proper repair. I have used this on client pieces when they needed the sofa usable the same day.
Springs, Webbing, and Structural Support
Flip the piece and inspect the support system. Broken S-springs can often be replaced individually with pliers and new clips. Sagging webbing needs to be removed and replaced with new jute or synthetic webbing stretched tightly and stapled securely.
Coil springs that have come loose can be re-tied with spring twine using traditional eight-way hand-tying for the best long-term result. This is more advanced and time-consuming; many DIYers opt for modern sinuous springs or additional webbing instead.
Webbing stretchers and a solid staple gun make this job far more manageable. Take photos before disassembly so you can replicate the original pattern.
Detailed spring and webbing techniques appear in practical guides such as those from Miller Waldrop and related repair resources.
When to Reupholster Completely
If the fabric is worn thin across large areas, the foam is degraded throughout, and the springs need major work, stripping everything and starting fresh is usually cleaner. Full reupholstery lets you update the style, improve the padding, and correct previous poor repairs.
Measure carefully for fabric yardage, choose a durable upholstery-weight material (look at double rub counts for high-use pieces), and decide whether to keep or replace the existing decking and padding layers.
Cost Breakdown: DIY vs. Professional
DIY fabric and foam repairs often cost $20–$150 in materials for a typical sofa section. Spring and webbing work adds another $50–$100. Tools are a one-time investment.
Professional minor repairs (seams, small leather fixes) commonly run $50–$200. Full sofa reupholstery in 2026 typically ranges from $900 to $2,500 for a standard piece, with averages around $1,500–$1,800 depending on fabric and region. Labor usually accounts for more than half the total. Antique or complex pieces cost more.
Repair makes clear financial sense when the frame is sound and the piece has good proportions. If the frame is particleboard or heavily damaged, replacement is often smarter.
Prevention Tips That Actually Work
Rotate cushions regularly. Keep furniture out of direct sunlight to reduce fading and drying. Use fabric protectors on new or cleaned covers. Address small tears immediately before they grow. For leather, condition periodically with a product suited to the type of finish.
Pets are a major source of damage—consider throw blankets or dedicated pet covers on favorite spots.
Frequently Asked Questions
Can I repair upholstery without a sewing machine?
Yes. Most structural and seam repairs are done by hand with curved needles. A machine helps with new cushion covers but is not required for basic fixes.
How do I match fabric for a patch?
Check the underside, skirt, or inside of cushions first. If nothing matches, take a sample to a fabric store or online supplier that offers remnants. Solid colors are easier than bold patterns.
Is it worth fixing a cheap sofa?
Only if the frame is solid wood or quality plywood. Particleboard frames rarely justify significant repair.
What’s the hardest part for beginners?
Achieving even tension on fabric and webbing without creating wrinkles or loose spots. Practice on a less visible area or an old piece first.
How long do repairs last?
A well-executed seam or patch on quality material can last many years. Foam and spring repairs restore comfort for a decade or more under normal use.
Final Thoughts
Upholstery repair sits at a satisfying intersection of practical skill and creative problem-solving. The first time you close a long seam or feel a sagging seat firm up again, the effort feels worthwhile. Start small—practice on a thrift chair or a hidden tear—and build confidence. Most furniture fails gradually; catching problems early keeps the work manageable and the results invisible or intentionally attractive.
Good frames deserve second lives. With the right approach, the furniture you already own can continue serving well for years.
About the Author
Elena Vargas is a professional upholsterer and furniture restorer based in the Pacific Northwest. She has repaired and reupholstered residential and commercial pieces for more than fifteen years, taught introductory workshops, and focuses on practical techniques that deliver durable results without unnecessary complexity. Her work emphasizes solid construction, thoughtful material choices, and repairs that respect the original design of each piece.