



Ask ten roofers what a “roof jack” is, and you’ll likely get two different answers pointing at two completely different products. I ran into this mix-up firsthand while digging through flashing failure reports for a roofing trade piece: a homeowner had called a supply house asking for “a roof jack” to fix a leak around her bathroom vent, and the counter staff handed her a box of steel work-platform brackets the kind roofers stand on, not the kind that seals a pipe. She drove home, opened the box, and had no idea what to do with it.
That confusion isn’t rare, and it’s exactly why most articles on this topic fall short they pick one meaning and ignore the other, leaving half their readers with the wrong information. This guide covers both, in full, with real products, honest pros and cons, and the installation and safety details that actually matter on a job site.
Table of Contents
- What Is a Roof Jack, Really?
- Type 1: Pipe and Vent Roof Jacks (Flashing Boots)
- Material Showdown: Which Pipe Jack Actually Lasts?
- Type 2: Roof Safety Jacks (Work-Platform Brackets)
- Bracket Comparison: Which Safety Jack Should You Buy?
- How to Choose the Right Roof Jack for Your Project
- Installing a Pipe Roof Jack, Step by Step
- Installing Roof Safety Brackets, Step by Step
- Safety Tips and the OSHA Rules That Actually Apply
- Common Mistakes That Cause Leaks or Falls
- Cost Breakdown
- Where Roof Jacks Are Headed
- FAQs
- Final Thoughts
- About the Author
What Is a Roof Jack, Really?
In plain terms, “roof jack” refers to two unrelated products that happen to share a name:
1. A pipe flashing (the water-sealing kind). This is the rubber, plastic, or metal collar that wraps around a plumbing vent stack, furnace flue, or other pipe where it pokes through your roof. Its whole job is keeping rain out of that hole.
2. A safety bracket (the standing-platform kind). This is a steel or aluminum bracket that gets nailed or clamped to a steep roof so a worker can slide a wooden plank across it and have somewhere stable to stand, kneel, or set a bucket of shingles.
If you’re a homeowner dealing with a ceiling stain near a bathroom vent, you almost certainly need the first kind. If you’re a contractor prepping to re-shingle a 9:12 pitch roof, you need the second. Both get called “roof jacks” in casual conversation, catalogs, and — frustratingly — sometimes on the same supply house shelf. We’ll cover both properly, starting with the one that stops leaks.
Type 1: Pipe and Vent Roof Jacks (Flashing Boots)
A pipe jack (also called a vent boot, pipe flashing, or pipe collar) is a pre-formed assembly with three working parts: a flat base flange that lies against the roof deck and sheds water, a raised collar or “throat” that hugs the pipe, and — on better products — a separate top seal or rain collar that clamps the collar to the pipe itself.
Here’s the part beginner DIYers usually miss: the pipe boot isn’t a standalone patch you glue on top of your shingles. It’s meant to be woven into the shingle courses, with the top of the flange tucked under the shingles above it and the bottom flange laid over the shingles below. Water runs down the roof, hits the top of the flashing, and sheds over it — the same shingle-lap logic that keeps the rest of your roof dry. If a pipe boot is caulked on top of the shingles instead of integrated into them, it’s only a matter of time before water finds a way behind it.
The materials you’ll actually encounter
- Rubber/EPDM boots. The most common option on new-construction asphalt shingle roofs. Cheap, flexible, and quick to install — but the rubber gasket is also the first thing to fail, since constant UV exposure eventually dries it out and cracks it around the pipe.
- Silicone boots. A newer generation of “lifetime” boots (Perma-Boot is probably the best-known name here) built from UV-stabilized, high-impact plastic and silicone rather than rubber. They’re marketed with lifetime or life-of-roof warranties, and unlike rubber, silicone resists hardening in extreme heat.
- Metal-base boots (aluminum, galvanized steel). Products like Oatey’s All-Flash No-Calk line pair a rigid metal base with a flexible internal collar that self-seals around the pipe without caulk. The metal base resists denting and holds its shape on wood shake or tile roofs better than an all-plastic base does.
- Lead flashing. The old-school choice, still specified on historic homes and by some municipal codes. Lead is soft enough to hand-form tightly around a pipe and doesn’t corrode, so it can genuinely outlast the roof around it. The tradeoffs: it’s heavier, pricier, requires more skill to form correctly, and — this sounds like a joke but it isn’t — squirrels and other rodents will gnaw on exposed lead collars.
- Split or retrofit boots. Designed to wrap around a pipe that’s already installed, without removing the old flashing or lifting shingles. Handy for repairs, less ideal as a first installation.
Material Showdown: Which Pipe Jack Actually Lasts?
| Material | Real-World Lifespan | Typical Cost per Unit | Best For | Honest Downside |
|---|---|---|---|---|
| Rubber/EPDM boot | 10–15 years, less in hot/high-UV climates | $8–$20 | Budget re-roofs, standard asphalt shingle jobs | UV cracking is basically guaranteed eventually |
| Silicone “lifetime” boot | 20–25+ years, often warrantied for the roof’s life | $25–$60 | Hot climates, metal roofs, anyone who hates re-doing this job | Higher upfront cost, and “lifetime” claims still deserve a skeptical eye |
| Metal-base boot (aluminum/galvanized) | 20–30 years | $15–$35 | Wood shake, tile, and standard shingle retrofits | Base holds up well, but the internal rubber collar still ages |
| Lead flashing | 25–40+ years | $30–$80 | Historic homes, code-mandated installs, custom pipe sizes | Costly, harder to source, and yes — rodents chew it |
| Split/retrofit boot | Matches the base product it’s paired with | $20–$45 | Fixing a cracked boot without tearing into shingles | Doesn’t fix a failed base flange underneath |
My honest verdict: for a standard residential re-roof, I’d skip the bargain-bin rubber boot every time. The $10–15 you save upfront disappears the moment you’re paying a roofer to come back out in year 11 and replace a cracked collar — and that’s before you count any water damage that went unnoticed in the attic. A metal-base boot with a self-sealing collar, like Oatey’s design, or a silicone “lifetime” boot, is the better trade for most homes. Save actual lead flashing for the pipes and situations where local code requires it or where a historic roof calls for period-correct materials.
One real complaint worth flagging honestly: even premium boots aren’t magic if the base flange itself gets punctured, walked on repeatedly, or installed with the water-shed direction backwards. Material quality matters less than installation quality — a point we’ll come back to.
Type 2: Roof Safety Jacks (Work-Platform Brackets)
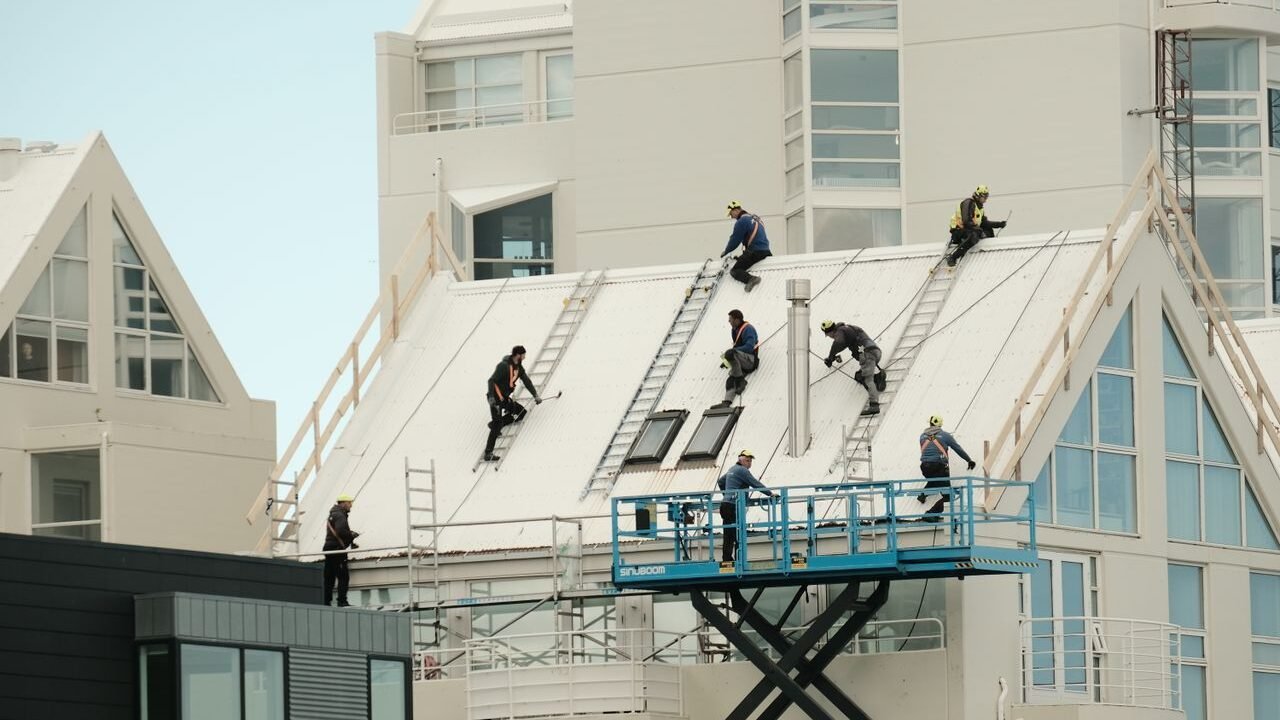
The other “roof jack” is a load-bearing bracket that gives roofers a flat, stable surface to work from on a pitched roof. A plank (commonly a 2×8 or 2×10) is set across two or more brackets, creating a temporary walking platform partway up the slope. Without them, a steep roof is essentially a plywood ramp — doable for a few minutes, exhausting and dangerous for a full day of tear-off and shingling.
The main styles
- Adjustable wood/steel brackets. The classic jobsite bracket — think the Qualcraft/Guardian 2510, built from 15-gauge galvanized steel with a wood insert, adjustable between roughly a 45° and 60° working angle. Cheap, durable, and the most common bracket on residential jobs.
- Fixed-angle steel brackets. Simpler, single-angle versions like the Guardian Fixed Roof Bracket, built from heavier 11-gauge steel. Less flexible on pitch, but tougher and often slightly cheaper.
- Multi-position adjustable brackets. Higher-end versions that fold to several angles (commonly 33°, 45°, 60°, and 90°) and accept a wider range of plank sizes, from 2×6 up to 2×12.
- Standing seam roof jack adapters. A newer category built specifically for metal roofs, where you can’t just nail a bracket through the panel. Products like the SSRA2 adapter clamp onto the vertical seams of a standing-seam metal roof instead of penetrating the panel, with adjustable stabilizer legs that accommodate different seam heights.
Bracket Comparison: Which Safety Jack Should You Buy?
| Product Type | Adjustability | Load Rating (per manufacturer specs) | Best Roof Type | Verdict |
|---|---|---|---|---|
| Qualcraft/Guardian 2510 (wood/steel) | 2 positions (45°/60°) | 1 worker + 40 lb per 8 ft of staging | Asphalt shingle, wood shake | Solid, affordable all-rounder — the one most crews already own |
| Guardian Fixed 2501 (steel, 11-gauge) | Fixed 45° | Same OSHA-referenced capacity as above | Standard-pitch shingle roofs | Tougher steel, less flexible — good for repeat jobs on similar pitches |
| Acro-style multi-position bracket | 4 positions (33°/45°/60°/90°) | OSHA-referenced capacity | Steep slopes to near-flat terraces | Best pitch versatility, worth the extra cost on mixed-pitch crews |
| SSRA2 standing seam adapter | Adjustable leg height for 1″–3″ seams | Independently tested for OSHA/ANSI compliance | Standing seam metal roofs only | The only sensible option once you’re on metal — not cheap, but there’s no real substitute |
My honest verdict: for the vast majority of asphalt shingle jobs, a basic adjustable steel bracket does the job and does it well — there’s a reason it’s been the industry standard for decades. Where I’d spend more is on standing seam metal roofs. Trying to improvise a bracket setup on a metal panel roof, or worse, driving fasteners through panels to fake it, is how you end up with both a fall hazard and a leak. A purpose-built, non-penetrating adapter is worth the premium there.
How to Choose the Right Roof Jack for Your Project
Start by asking which category you actually need — flashing or platform — since that alone eliminates half the confusion. From there:
- For pipe flashing: match the material to your roof type first, climate second, budget third. Metal roofs generally want a heat-rated silicone or metal-base boot; standard shingle roofs have more flexibility.
- For safety brackets: match to your roof’s pitch and surface material. Standing seam metal always needs the clamp-style adapter — never a nail-through bracket.
- Match pipe diameter exactly. Pipe boots are sized to a range (say, 1.5″ to 3″ or 3″ to 4″), and stretching a collar to its outer limit is a common cause of poor seals.
- Don’t assume brackets equal fall protection. More on this below — it’s one of the most misunderstood parts of this whole topic.
Installing a Pipe Roof Jack, Step by Step
- Expose the area. Carefully lift the shingles surrounding the pipe to access the underlayment, and pull any nails blocking where the new flashing needs to sit.
- Slide in the base. Tuck the top flange of the boot under the lifted shingle course, and let the bottom flange rest on top of the shingles below — this preserves the water-shedding lap.
- Seat the collar around the pipe. Trim the throat if needed for a snug fit; for metal-base units, gently shape the base to the roof’s contour with a mallet.
- Fasten through the top flange only. Nail or screw along the upper flange into the deck — never through the lower flange, where fasteners would sit directly in the water path.
- Seal strategically. Run a thin bead of compatible sealant at the pipe-to-collar joint and along the top flange edge under the shingles to block capillary action, then dab roofing cement over exposed nail heads.
Installing Roof Safety Brackets, Step by Step
- Locate the framing. Brackets need to be fastened into solid rafters or trusses, not just the roof deck sheathing, to hold real weight.
- Slide the bracket under a shingle course at the marked rafter location, keeping it square to the roof edge.
- Fasten per the manufacturer’s spec, driving nails or screws through every slotted hole provided — skipping holes is a common shortcut that weakens the whole setup.
- Space brackets no more than 8 feet apart, matching the load rating most manufacturers build their brackets around, and set at least two per plank.
- Set the plank (commonly a 2×10) across the brackets, confirming it seats fully in the bracket’s lip before anyone steps on it.
- Remove cleanly when the job’s done. Lift the shingle edge, pull the fasteners, and seal every nail hole with roofing cement so you haven’t traded a fall hazard for a future leak.
Safety Tips and the OSHA Rules That Actually Apply
This is where I want to correct a genuinely common misconception: installing roof brackets does not, by itself, satisfy
OSHA fall protection requirements.
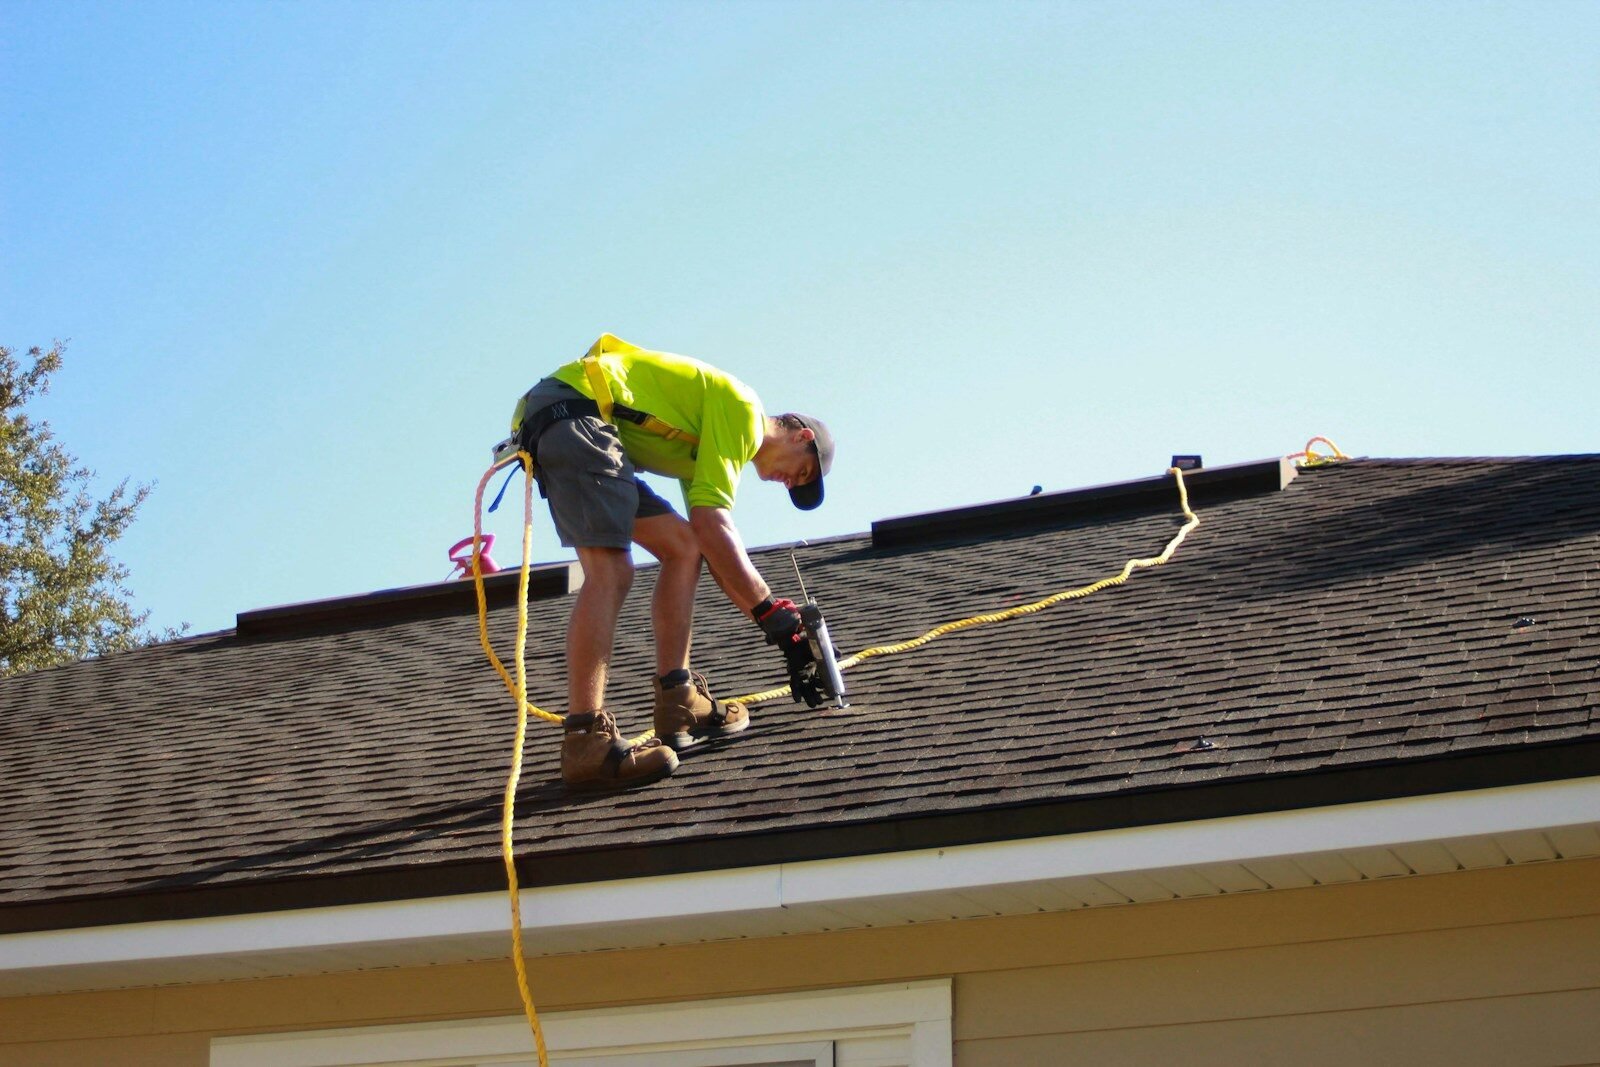
A compliance specialist interviewed on this exact question for a trade publication made the point plainly — most basic adjustable roof brackets don’t include integral guardrails, and unless a bracket system specifically does, it isn’t a substitute for a real fall protection system. That means a harness connected to a shock-absorbing or retractable lanyard, anchored to a point rated to hold a serious load per worker, as detailed in that JLC roof jack safety discussion. Brackets give you footing. They don’t arrest a fall.
The actual federal rule sits in 29 CFR 1926.501, and the split that matters most for residential work is pitch-based:
Low-slope roofs (4:12 or less):
Guardrails, safety nets, personal fall arrest systems, or — on roofs 50 feet wide or less — a warning line paired with a safety monitor.
Steep roofs (steeper than 4:12, which covers most shingle roofs): guardrails with toeboards, safety nets, or a personal fall arrest system. Warning lines and safety monitoring alone are not permitted on steep roofs — full stop.
The trigger height for all of this is six feet above a lower level. If you’re a homeowner hiring out roof work, this is a fair, non-confrontational question to ask a contractor: what fall protection system are they using on your specific pitch? A reputable crew will answer without hesitation.
A few more field-tested habits worth adopting:
- Inspect pipe boots twice a year and after major storms — cracking usually starts small, on the sun-facing side of the collar.
- Never rely on a single bracket for a plank; two is the practical minimum, spaced properly.
- Check the roof deck’s structural integrity before working on it, especially on older homes — a rotted deck won’t hold a fastener no matter how good the bracket is.
- Wear a hard hat and slip-resistant footwear even when brackets are in place; they reduce risk, they don’t eliminate it.
Common Mistakes That Cause Leaks or Falls
- Caulking a boot on top of shingles instead of weaving it into the courses. This is the single most common cause of pipe jack leaks, and it looks fine for the first year or two before it fails.
- Fastening through the bottom flange of a pipe boot. Every nail hole below the water line is a future leak point.
- Using a bracket rated for one pitch on a steeper roof than it’s designed for. Check the angle rating before you buy, not after you’re up there.
- Trusting brackets alone as fall protection on a steep roof. As covered above, this is a compliance gap that shows up in OSHA citations regularly.
- Ignoring pipe diameter mismatches. A boot stretched past its rated range loses its seal integrity almost immediately.
- Skipping the sealant on lower-quality boots. Even “no-calk” designs often benefit from a supplemental bead of sealant in harsh climates, despite what the name implies.
Cost Breakdown
| Item | Typical Price Range | Notes |
|---|---|---|
| Rubber pipe boot | $8–$20 | Widely available, shortest lifespan |
| Silicone/lifetime pipe boot | $25–$60 | Higher cost, longest realistic warranty coverage |
| Metal-base pipe flashing | $15–$35 | Good middle ground for most re-roofs |
| Lead pipe collar | $30–$80 | Material and labor both run higher |
| Adjustable steel roof bracket (each) | $12–$25 | Buy in sets; most jobs need several |
| Standing seam roof jack adapter (pair) | $150–$250+ | Includes anchor hardware; metal roofs have no cheap shortcut here |
| Professional pipe boot replacement (labor + material) | $150–$400 | Varies heavily by roof access and pitch |
| Professional bracket setup for a full re-roof | Usually bundled into the roofing labor quote | Rarely billed as a standalone line item |
Where Roof Jacks Are Headed
A few shifts are worth watching if you follow roofing materials closely, as I do:
Standing seam metal roofing keeps gaining residential market share, and that’s quietly reshaping the safety-bracket category. Traditional nail-through brackets simply don’t work on those panels, which is why clamp-style adapters like the SSRA2 have moved from a niche commercial product to something more roofers keep in the truck.
Pipe boot manufacturers are leaning harder into “lifetime” silicone products. The economics make sense for homeowners: paying more once, during a re-roof, beats paying a service call later to fix a cracked rubber collar hidden three feet from a chimney.
Solar installations are adding new penetration points to roofs that weren’t designed with them in mind, which is pushing demand for higher-temperature, higher-durability flashing at mounting points — not exactly a traditional pipe jack, but built on the same sealing principles.
Thermal drone inspections are starting to catch failed boots before they cause visible ceiling stains, by spotting the moisture signature in attic insulation before it migrates. That’s still more common on commercial roofs than residential ones, but the cost of that technology keeps dropping.
None of this changes the fundamentals covered in this guide — but it does mean the “best” product in each category five years from now probably won’t be the cheapest one on the shelf today.
FAQs
Is a roof jack the same thing as roof flashing? A pipe jack is one specific type of flashing — built for round pipe penetrations. General roof flashing also covers valleys, chimneys, walls, and skylights, which use different products entirely.
How long does a standard rubber pipe boot really last? Realistically 10 to 15 years, sometimes less in hot, high-UV climates. If your roof is older than that and you’ve never replaced the boots, it’s worth a look before a leak forces the issue.
Can I install roof safety brackets myself? Mechanically, yes — they’re not complicated hardware. The bigger question is whether you have proper fall protection to back them up, since brackets alone aren’t a complete safety system on a steep roof.
Do roof jacks damage shingles when they’re removed? Done carefully, no. Lifting the shingle edge, pulling fasteners cleanly, and sealing the holes leaves the roof in good shape. Rushed removal is what causes cracked shingles.
What size pipe jack do I need? Measure the outside diameter of the pipe and buy a boot rated for that range — most collars are sold in ranges like 1.5″–3″ or 3″–4″ rather than exact sizes.
Are roof brackets alone enough to meet OSHA requirements? No. Unless the bracket system has integral guardrails, it needs to be paired with a proper personal fall arrest system on steep roofs, per OSHA’s fall protection standard.
Final Thoughts
The humble roof jack in either of its forms is one of those components nobody thinks about until it fails, and by then the fix usually costs more than the part itself would have. A ten-dollar rubber boot that cracks in year eleven can mean a five-hundred-dollar drywall repair. A bracket setup treated as a full safety system, instead of just a foothold, can mean a lot worse than that.
If there’s one thing worth carrying away from this guide, it’s that “good enough” pricing on either type of roof jack is rarely actually good enough over the life of a roof. Spend the extra on the flashing material suited to your climate, and never mistake a work platform for fall protection. Both of those habits are cheap insurance against the two things a roof jack exists to prevent: water where it doesn’t belong, and a fall where there shouldn’t be one.
About the Author
This guide was researched and written by a construction and building-science content specialist who focuses on translating technical roofing standards, manufacturer specifications, and OSHA regulations into practical, plain-language guidance for homeowners and working contractors. Research for this piece drew on manufacturer documentation, OSHA’s published fall protection standards under 29 CFR 1926, and interviews and technical write-ups from licensed roofing professionals. All product comparisons reflect publicly available manufacturer specifications at the time of writing; always confirm current specs and local code requirements directly with the manufacturer or a licensed contractor before purchasing or installing.