



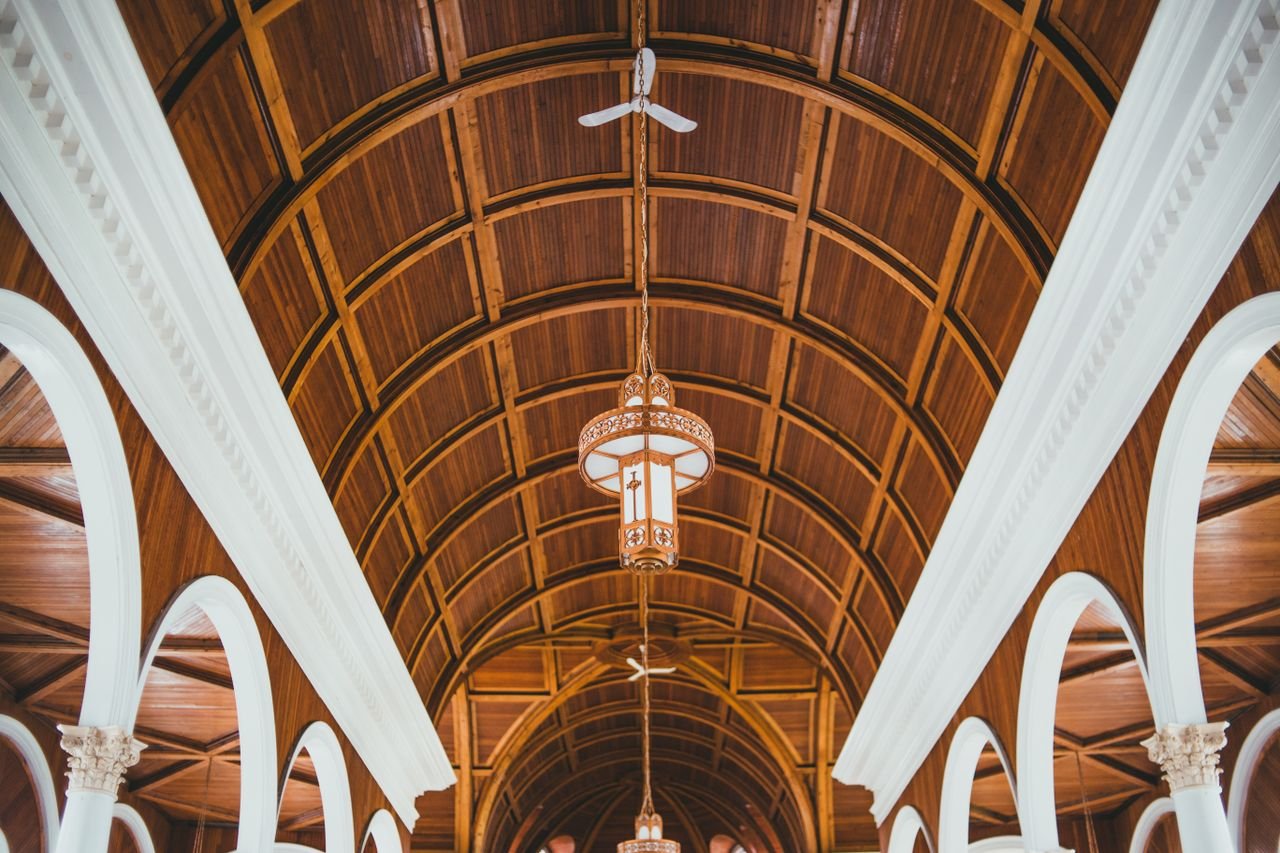
The first time I paid real attention to a vaulted wood ceiling, I was lying on the floor of a rented cabin in a Colorado’s mountains staring straight up at it, half because the room was that beautiful and half because the altitude had wrecked me for the day. Knotty pine, tongue-and-groove, running up to a ridge beam maybe eighteen feet overhead. I went home and spent the next several months researching whether I could do something similar in my own 1970s split-level, and that research turned into a lot more nuance than the Pinterest boards let on.
This guide is the version of that research I wish I’d had at the start: what a vaulted wood ceiling actually costs, what it does to your heating bill, which wood holds up and which doesn’t, and where the real tradeoffs are hiding.
Table of Contents
- Vaulted vs. Cathedral vs. Tray: Getting the Terms Right
- Why People Fall for Vaulted Wood Ceilings
- The Honest Downsides Nobody Puts in the Photos
- Wood Species Comparison: What to Actually Put Up There
- Tongue-and-Groove vs. Shiplap vs. Panel Systems
- Real Wood Beams vs. Faux Beams: An Honest Comparison
- The Insulation Problem Nobody Explains Clearly
- What It Actually Costs
- Lighting and Ceiling Fans for Vaulted Spaces
- Design Ideas by Style
- Installation: DIY vs. Professional
- Maintenance and Longevity
- Where This Trend Is Heading
- Frequently Asked Questions
- Final Thoughts
Vaulted vs. Cathedral vs. Tray: Getting the Terms Right
These terms get used interchangeably in marketing photos, but they describe genuinely different structures, and the distinction affects both cost and what’s possible in your specific home.
A cathedral ceiling follows the exact pitch of the roof, rising symmetrically from both side walls to meet at a center ridge. There’s no attic space above it — the ceiling and roof structure are effectively the same assembly, as explained in this comparison from NIH Homes. It’s the more traditional, formal-looking option, and it’s what most people picture first.
A vaulted ceiling is any ceiling that rises above the standard flat plane but doesn’t have to follow the roofline. It can be asymmetrical, single-sloped (a “shed” ceiling), curved, or even domed, and it sits below the roof structure as a self-supporting element, according to Angi’s breakdown of the two styles. This gives it more design flexibility but generally means more complex framing.
A tray ceiling, worth mentioning since it’s often confused with the other two, is a flat ceiling with a recessed center section — it adds visual height without touching the roof structure at all, which makes it dramatically cheaper and simpler to add to an existing home.
For the rest of this guide, I’m using “vaulted” the way most homeowners and contractors actually use it in conversation — any sloped, raised, open-to-the-rafters ceiling, cathedral-style or not.
Why People Fall for Vaulted Wood Ceilings
The appeal isn’t just aesthetic, though it starts there. A few things are genuinely happening structurally and psychologically when you’re in a room like this:
Perceived space without added square footage. Vaulting a ceiling increases the cubic volume of a room without changing its floor plan, which is why a vaulted living room can feel dramatically larger than an identically-sized room with a standard 8-foot ceiling, per Fixr’s overview of vaulted ceiling benefits.
More opportunity for natural light. Because a vaulted ceiling opens up the wall space above standard window height, it’s common to add clerestory windows or skylights that a flat ceiling simply can’t accommodate, bringing daylight deeper into the room.
The wood itself does something a flat drywall ceiling can’t. This is the part that’s harder to quantify but real: warm-toned wood overhead reads as inviting rather than cold in a way white drywall doesn’t, especially at the kind of height where a plain ceiling would otherwise feel institutional or barn-like.
Resale appeal, with caveats. Multiple industry sources note vaulted ceilings can boost a home’s perceived value and buyer interest, though Fixr also cautions that market appeal varies significantly by region and buyer taste — this isn’t a universal value-add the way a kitchen remodel tends to be.
The Honest Downsides Nobody Puts in the Photos
This is the section that separates a useful guide from a listicle, so let’s be direct about it.
Heating and cooling costs go up. Hot air rises, and a vaulted ceiling gives it a lot more room to rise into. Several sources, including Bob Vila’s cost breakdown, note this directly: expect higher energy bills unless you compensate with a properly sized ceiling fan and, ideally, better insulation than a standard flat-ceiling attic assembly (more on that below).
Contrary to popular belief, wood doesn’t fix your acoustics — it can make them worse. I’ve seen multiple blog posts claim that “wood absorbs sound better than drywall,” and it’s a myth worth correcting directly. Solid wood tongue-and-groove boards are still a hard, dense, reflective surface acoustically. Acoustic specialists who work specifically on vaulted spaces note that ceilings 20 feet or taller are notorious for creating persistent echo, precisely because sound waves scatter off hard, angled surfaces with nowhere to be absorbed, according to Acoustical Solutions’ analysis of vaulted ceiling noise. If you’re vaulting an open-plan living or dining space, budget mentally for a large rug, upholstered furniture, and possibly acoustic panels or a wood slat system with felt backing — not just for the ceiling material itself.
Changing a lightbulb becomes a production. It sounds minor until you’re the one renting a ladder or calling a handyman for a fixture 16 feet up. Factor this into your fixture choice — LED fixtures rated for decades of life are worth the upcharge here specifically.
Insulation is genuinely harder to get right, and gets its own full section below because it’s the single most commonly botched part of this project.
It’s expensive, especially as a retrofit rather than something planned into new construction — also covered in detail below.
Wood Species Comparison: What to Actually Put Up There
Material choice affects cost, durability, and how much maintenance you’re signing up for. Here’s how the common options actually stack up, based on pricing data from D&G Flooring’s material guide and The Wood Carpenter’s comparison:
| Wood | Material Cost (per sq. ft.) | Best For | Honest Verdict |
|---|---|---|---|
| Knotty Pine | $1.50–$4 | Rustic, cabin, farmhouse looks; painted ceilings | The default choice for a reason — cheap, widely available, and takes both paint and stain beautifully. Visible knots read as charming to some, busy to others; look at a large sample before committing. |
| Clear Pine | Slightly above knotty pine | Cleaner, more modern spaces that still want warmth | Same practical benefits as knotty pine with a calmer grain; harder to source in bulk from big-box stores. |
| Red Cedar | $3–$7 | Porches, sunrooms, bathrooms, anywhere with humidity | Naturally rot- and insect-resistant, and it genuinely smells fantastic when freshly installed. Worth the premium specifically in damp-prone rooms. |
| Cypress | $5–$8 | Hot, humid climates; coastal homes | Resists decay and doesn’t warp the way pine can in swings of humidity. A strong pick in the Gulf South specifically. |
| Hardwoods (oak, walnut, cherry) | $10.50+ | Formal or luxury interiors | Beautiful and genuinely durable, but the cost and weight escalate fast — this is where you start needing a real conversation about structural support for the ceiling material itself. |
My honest take after comparing actual retail listings: a real, sellable product worth knowing about is Armstrong’s WoodHaven rustic pine tongue-and-groove ceiling plank, which runs about $4.80 per square foot prefinished — it’s a good benchmark for what a mid-tier, no-fuss pine option actually costs at a big-box store versus a specialty lumber yard.
Tongue-and-Groove vs. Shiplap vs. Panel Systems
Tongue-and-groove is the classic choice, where each board interlocks with the next via a matching groove and ridge, creating a tight, seamless surface with no visible gaps. It’s the most labor-intensive to install correctly but gives the cleanest finished look.
Shiplap uses overlapping rather than interlocking edges, which leaves small visible shadow lines between boards — a look plenty of people now choose deliberately for its more casual, farmhouse character. It’s generally easier and faster to install than true tongue-and-groove.
Prefinished panel systems, like the WoodHaven line mentioned above, skip the on-site staining and sealing entirely. This meaningfully cuts labor costs and eliminates the fumes and dry time that come with finishing wood at height, according to AdvantageLumber’s breakdown of prefinished vs. raw lumber costs — a real consideration if you’re working in an occupied home.
Fully installed, expect $4 to $10 per square foot for any of these approaches, according to HomeGuide’s cost data, with premium hardwoods and complex vaulted geometry pushing well past $15.
Real Wood Beams vs. Faux Beams: An Honest Comparison
Exposed beams are often paired with a vaulted wood ceiling, and this is one area where the “fake” option isn’t actually a compromise for most homeowners.
| Real Wood Beams | Faux Wood Beams | |
|---|---|---|
| Cost | Oak beams can run up to roughly $10 per linear foot, per Decorative Ceiling Tiles’ cost data | Typically $6–$12 per linear foot for the beam itself, though total project cost is usually far lower once labor is factored in |
| Weight & Installation | Heavy — often requires a crew and, if load-bearing, structural engineering | Hollow polyurethane, light enough that one person can often install it solo |
| Structural role | Can be genuinely load-bearing if engineered for it | Purely decorative; cannot bear weight, full stop |
| Maintenance | Can warp, crack, or attract pests over time; needs occasional refinishing | Effectively maintenance-free; resistant to moisture and insects |
| Authenticity up close | Real grain, real weight, real material | Convincing from a normal viewing distance; texture can read as slightly uniform on close inspection |
My honest verdict: if the beam needs to actually hold anything up — structurally integrated into a timber-frame vault — real wood isn’t optional. But for the extremely common case of decorative beams added purely for visual weight and rhythm across a vaulted ceiling, faux beams are a legitimately smart choice, not a downgrade. The money saved on structural reinforcement and labor is often better spent on higher-quality ceiling plank material instead.
The Insulation Problem Nobody Explains Clearly
This is the part of vaulted ceiling projects that causes the most regret, and it deserves real attention rather than a passing mention.
A flat ceiling with attic space above it can hold as much fiberglass or blown insulation as you want — the attic cavity is essentially unlimited in depth. A vaulted ceiling has none of that luxury. The insulation has to fit inside the rafter cavity itself, which might only be 9 to 12 inches deep, and that space also often needs to accommodate a ventilation channel to prevent moisture problems.
This is exactly why closed-cell spray foam has become the standard recommendation for vaulted and cathedral ceilings specifically. It delivers roughly R-6 to R-7 per inch, compared to fiberglass batts at roughly R-3 to R-3.5 per inch, according to The Hayes Company’s insulation guide — meaning it can hit code-required R-values in a shallow rafter bay where batts simply can’t. It also acts as an air and vapor barrier in a single step, which matters more here than in almost any other part of a house.
Here’s a real cautionary example worth knowing: a homeowner posting on a building forum described exactly this failure mode — a tongue-and-groove pine vaulted ceiling installed with no vapor barrier over standard R-30 fiberglass batts, which led to water vapor condensing against the cold roof deck on freezing days, turning to ice, and then dripping as it melted, as documented in this discussion on Building Advisor. It’s a well-known enough failure pattern that building scientists have a name for the fix: “flash and batt,” where a layer of closed-cell foam is sprayed directly against the roof deck to control moisture, topped off with cheaper batt insulation to hit the total R-value needed.
My honest take: if you’re vaulting an existing flat ceiling in a cold or mixed climate, do not let a contractor talk you into a straightforward batt-insulation approach without also asking directly how they’re handling the vapor barrier and ventilation. This is the single highest-consequence technical decision in the entire project, and it’s invisible until the first cold winter reveals whether it was done right.
What It Actually Costs
Costs vary enormously depending on whether you’re building new or retrofitting an existing flat ceiling, and the gap between those two paths is the most important number in this whole guide.
| Scenario | Typical Cost | Notes |
|---|---|---|
| New construction, vaulted ceiling built in from the start | $16,000–$21,000 for framing, plus 5–20% for finishing | By far the cheapest path, since roof structure is designed around it from day one, per HomeAdvisor’s cost data |
| Converting an existing flat ceiling (bedroom or kitchen) | $12,000–$18,000 | Smaller rooms with simpler roof modifications, per Bob Vila |
| Converting a living room ceiling | $18,000–$25,000 | Larger square footage drives up both structural and finishing costs |
| Full attic-raise vaulting | $64,000–$112,000 | The most invasive option, essentially removing the attic entirely, per HomeGuide’s breakdown |
| Wood ceiling material and finishing only (structure already vaulted) | $4–$10 per sq. ft. installed | The relatively affordable part of the project, assuming the vault itself already exists |
The uncomfortable truth: the wood ceiling material itself is rarely the expensive part. Structural modification — potentially involving a structural engineer, new ridge beams, rerouted electrical, and re-insulation of the entire roof assembly — is where most of the budget goes on a retrofit. If your home doesn’t already have unused attic space with adequate structural capacity above the room you want to vault, get a structural engineer’s assessment before you fall in love with a Pinterest board; Angi specifically recommends this step before any contractor bid.
Lighting and Ceiling Fans for Vaulted Spaces
Standard lighting and fan hardware assumes a flat 8-to-10-foot ceiling, and vaulted spaces break most of those assumptions.
Ceiling fans need a proper downrod, not the stock one in the box. Most fans ship with a short downrod meant for standard ceilings; on a sloped ceiling you’ll need one at least 12 inches long, longer for steeper pitches or larger fan spans, per DelMar Fans’ installation guide. The general target is keeping the blades 7 to 9 feet above the floor and at least 18 inches from the nearest wall — get this wrong and you’ll either lose airflow efficiency or end up with a fan that wobbles.
Recessed lighting needs to be rated for angled installation. Standard recessed cans aimed straight down on a sloped ceiling throw light at an odd angle; sloped-ceiling-rated fixtures adjust the trim so the beam still points where you actually want it.
Pendant lights and chandeliers benefit from the extra drop, which is part of why vaulted great rooms so often become the home for a statement fixture — you finally have the vertical room to let one hang properly instead of cramming it against an 8-foot ceiling.
Design Ideas by Style
Farmhouse and cottage: Knotty pine tongue-and-groove, left natural or lightly whitewashed, paired with exposed (often faux) beams and simple black iron light fixtures.
Mountain modern / rustic: Darker stained wood — walnut tones or a deep charcoal wash over pine — combined with larger structural-looking beams and black-framed windows for contrast.
Coastal: Whitewashed or bleached shiplap-style boards, lighter and airier, often paired with skylights to maximize the bright, beachy feel.
Mid-century and contemporary: Clear (knot-free) pine or engineered wood panels in a clean plank pattern, often left unfinished or with a subtle matte clear coat rather than heavy staining — the goal is texture without visual noise.
Moody and dramatic: A near-black or deeply saturated stain across the entire vaulted plane, which sounds like a big commitment but reads as genuinely striking in bedrooms and dens where you want an enveloping, cozy feel rather than an airy one.
Installation: DIY vs. Professional
The line here is pretty clear once you separate the two very different projects hiding under “vaulted wood ceiling.”
Genuinely DIY-friendly: Installing prefinished tongue-and-groove or shiplap planks onto an already-vaulted ceiling structure. With a finish nail gun, a miter saw, and a lot of patience working overhead, this is a realistic weekend-to-week project for a reasonably handy homeowner, and it’s where most of the material cost savings in this guide actually live.
Not a DIY project, full stop: Any structural vaulting of an existing flat ceiling. This involves altering roof framing, potentially removing load-bearing elements, re-insulating, and rerouting electrical — every cost guide referenced in this article, including Angi’s, explicitly recommends a structural engineer’s inspection before work begins, and for good reason. Get bids from a licensed contractor, and don’t skip the engineer’s assessment to save a few hundred dollars up front.
Maintenance and Longevity
Wood ceilings are lower-maintenance than people expect, but not zero-maintenance. A properly sealed and finished wood ceiling mainly needs occasional dusting (a soft broom or extendable duster works fine) and, in humid or bathroom applications, an eye kept on the finish for any signs of moisture damage. Unfinished or lightly finished pine will darken slightly with UV exposure over years, which most people find adds character rather than detracting from it. If you ever need to refinish, expect it to be a bigger job than refinishing a floor, purely because of the overhead working position — budget for professional help unless the room is small.
Where This Trend Is Heading
A few shifts worth watching if you’re planning a project in the next year or two rather than right now. Reclaimed and salvaged wood is gaining real traction, both for sustainability reasons and because reclaimed barnwood or old-growth lumber often has a richness of grain and patina that new-growth wood simply can’t replicate quickly. Engineered wood ceiling panels with acoustic backing are becoming more mainstream, directly addressing the echo problem covered earlier — essentially giving you the visual warmth of a wood ceiling with felt or mineral wool bonded to the back to actually absorb sound rather than just look good. And as building science around unvented “hot roof” assemblies matures, expect closed-cell spray foam to keep becoming the default rather than the upsell for any vaulted ceiling project in a cold or mixed climate, simply because the ice-dam and condensation failures it prevents are so well documented at this point.
Frequently Asked Questions
Can any flat ceiling be converted to vaulted? Only if there’s usable attic space above it with adequate structural capacity, and even then it typically requires a structural engineer’s sign-off. Homes without extra roof height above the room in question usually can’t be vaulted without a much larger (and pricier) roof-raising project.
Does a vaulted wood ceiling increase home value? It can improve buyer perception and perceived space, but the return varies significantly by region and local buyer taste — it’s not a guaranteed value-add the way a kitchen or bathroom remodel tends to be.
Will a wood ceiling make my room echo more? Potentially, yes — solid wood is still a hard, reflective surface. Pair it with soft furnishings, rugs, and upholstery, or consider acoustic-backed wood panels if the room is large or used for conversation-heavy gatherings.
Is pine or cedar better for a vaulted ceiling? Pine for cost-effective interior rooms; cedar specifically for bathrooms, porches, or anywhere humidity is a real factor, since it naturally resists rot and insects that pine doesn’t.
Do I need a ceiling fan in a vaulted room? Strongly recommended. Vaulted ceilings let warm air collect well above head height, and a properly sized fan on the right downrod length helps push that air back down rather than losing it to a purely decorative peak.
What’s the biggest mistake homeowners make with this project? Underestimating the insulation and moisture-control side of the job. The wood ceiling itself is the fun, visible part; the vapor barrier and ventilation strategy behind it is the part that determines whether you have problems in five winters.
Final Thoughts
A vaulted wood ceiling is one of those upgrades where the photos genuinely don’t lie about the payoff — the sense of space and warmth is real, and it’s easy to see why it keeps showing up on every mountain house and modern farmhouse mood board. What the photos leave out is that most of the real decision-making happens in places you’ll never see once it’s finished: the rafter cavity, the vapor barrier, the strike zone. Get the invisible parts right — structural feasibility, insulation strategy, and honest expectations about acoustics and cost — and the wood on top is, genuinely, the easy part.
About the Author
Elena Marsh is a residential design researcher and writer focused on architectural renovation, building science, and material selection for home interiors. Her work draws on cost and construction data from licensed contractors, insulation and building-science documentation, and hands-on comparison of ceiling and millwork products. She writes to help homeowners separate genuinely load-bearing decisions from purely cosmetic ones before they sign a contractor’s bid.