


Table of Contents
- Why Remodel Your Guest Room? My Personal Wake-Up Call
- Planning and Budgeting: Setting Realistic Expectations
- Step 1: Clearing the Space and Assessing the Room
- Step 2: Painting and Wall Treatments – Color Choices That Matter
- Step 3: Flooring and Underfoot Comfort
- Step 4: Lighting – Layers That Transform the Mood
- Step 5: Furniture Selection and Layout
- Step 6: Bedding, Linens, and Guest Essentials
- Step 7: Smart Tech and Thoughtful Touches
- Step 8: Finishing Details, Storage, and Maintenance
- Tool Comparisons and Honest Verdicts
- Common Pitfalls and How to Avoid Them
- Budget Breakdowns and ROI Insights
- Future Trends in Guest Rooms
- FAQs
Conclusion
Author Bio
I still remember the first time my in-laws stayed in our old spare room. The mattress sagged like an old hammock, the walls were a faded beige that felt more institutional than inviting, and the single overhead light cast harsh shadows that made everyone look exhausted. After they left, my wife and I looked at each other and said, “Never again.” That’s when I dove headfirst into remodeling our guest room. What started as a weekend paint job turned into a full transformation that I’ve now helped friends replicate in their homes. Over the past few years, I’ve remodeled three guest spaces—mine and two for family—and learned what truly makes guests feel welcome without breaking the bank or your back.
This isn’t a glossy magazine fantasy. It’s a practical, battle-tested guide from someone who’s measured twice, cut once (and sometimes twice more), and dealt with the dust, the decisions, and the delightful “wow” moments when guests arrive.
Why Remodel Your Guest Room? My Personal Wake-Up Call
A well-remodeled guest room does more than provide a bed. It signals care. In an era where people book boutique hotels for experiences, turning your spare space into a mini-retreat builds memories and strengthens relationships. It can also boost your home’s resale value—thoughtful updates in secondary bedrooms often yield solid returns, especially with versatile, high-comfort designs.
From my experience, the biggest payoff is emotional. Guests who feel pampered linger longer, relax deeper, and remember your home fondly.
Planning and Budgeting: Setting Realistic Expectations
Start with a vision. Walk into the empty (or nearly empty) room at different times of day. Note natural light, traffic flow, and any awkward corners. Measure everything—twice.
Budget Ranges (2026 estimates, based on average U.S. costs):
- Budget DIY Refresh: $1,500–$4,000 (paint, new bedding, minor furniture flips, basic lighting).
- Mid-Range Overhaul: $5,000–$12,000 (new flooring or carpet, quality mattress, some built-ins, smart features).
- High-End Transformation: $15,000+ (custom millwork, luxury finishes, full smart integration).
Factor in 15-20% contingency for surprises like outdated wiring or subfloor issues. I always create a spreadsheet with categories: demolition, materials, tools, labor (if hiring), and finishing touches.
Prioritize: Comfort (mattress and bedding) > Lighting and paint > Furniture layout > Decor.
Step 1: Clearing the Space and Assessing the Room
Empty the room completely. This is cathartic and necessary. Sort items into keep, donate, trash, and “maybe for storage.”
Inspect walls for cracks, water damage, or mold. Check outlets, switches, and ceiling fixtures. Test for level floors. In my first remodel, I discovered a hidden leak behind baseboards—catching it early saved a bigger headache.
Pro Tip: Take detailed photos from every angle before and during. They become your reference goldmine.
Step 2: Painting and Wall Treatments – Color Choices That Matter
Paint is the single highest-impact, lowest-cost change. In 2026, warm neutrals and soft, grounded tones dominate guest rooms. Think Sherwin-Williams’ Universal Khaki or Turkish Coffee for depth, Benjamin Moore’s Shoji White for airiness, or soft sage greens and pale blues for calm.
I painted my guest room in a warm off-white with a subtle green undertone (similar to Benjamin Moore’s Cushing Green in lighter application). It photographs beautifully and adapts to any bedding.
Application Tips: Use quality primers, especially over dark or patchy walls. Two coats minimum. For texture, consider board-and-batten or picture-frame molding on an accent wall—inexpensive but adds architecture. I did this in one weekend with basic miter cuts; it elevated the room dramatically.
(Imagine a before/after photo here: Dull beige walls vs. crisp, layered neutrals with subtle molding.)
Step 3: Flooring and Underfoot Comfort
Nothing kills comfort like cold, noisy, or dated floors. Options:
- Carpet: Soft underfoot, great for sound absorption, but harder to clean.
- Luxury Vinyl Plank (LVP): My favorite for durability, water resistance, and realistic wood looks. Easy DIY install with click-lock systems.
- Hardwood Refinish: If you have it, sand and stain for timeless appeal.
- Area Rugs: Layer over existing floors for instant coziness.
In my remodel, I installed LVP over old carpet pads. It took two weekends but transformed the feel.
Step 4: Lighting – Layers That Transform the Mood
Ditch the single harsh ceiling fixture. Layer three types: ambient, task, and accent.
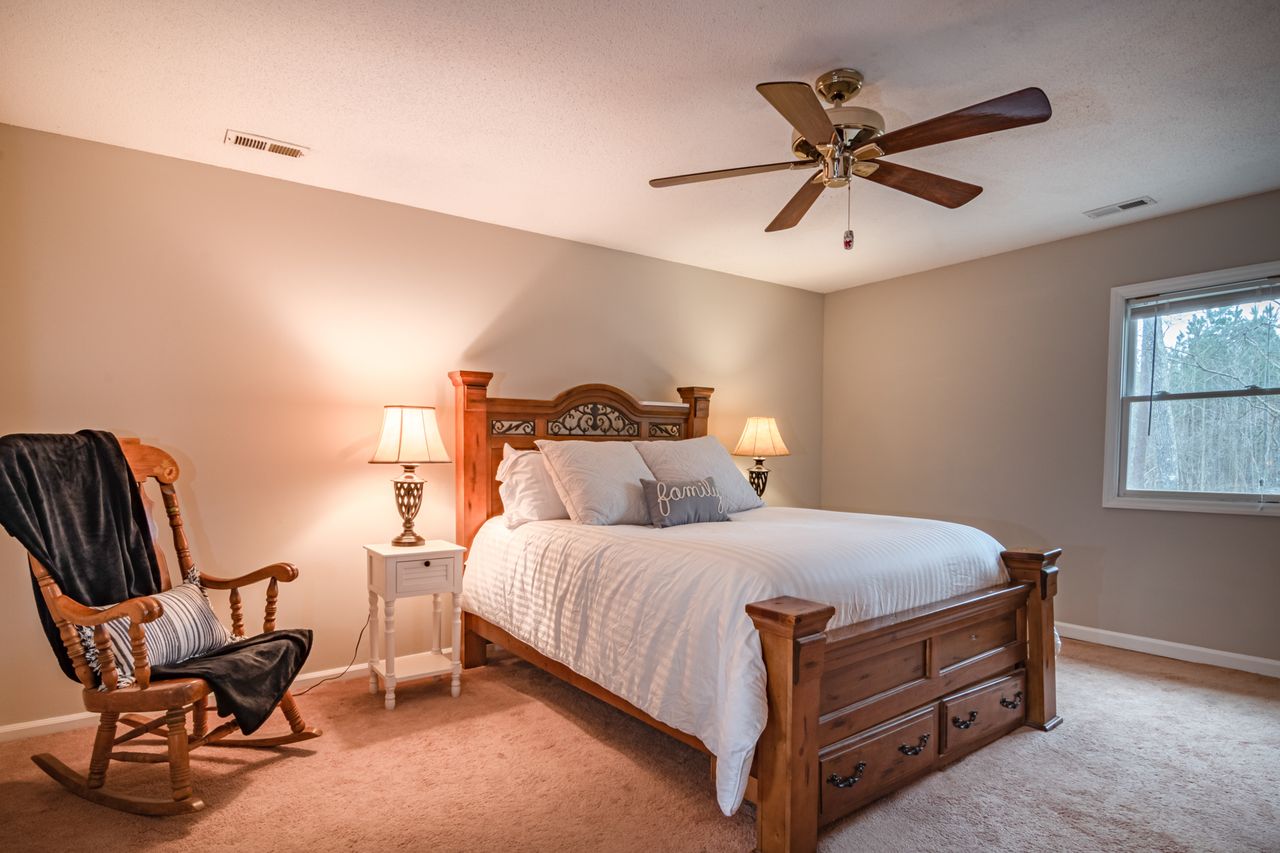
- Ceiling fan with light (quiet DC motor models).
- Bedside lamps with warm LEDs (2700K).
- Wall sconces or picture lights.
Smart bulbs (Philips Hue or similar) let guests control via app or voice—huge hit in my experience.
I added dimmable bedside sconces; guests rave about reading in bed without disturbing a partner.
Step 5: Furniture Selection and Layout
Keep the layout simple: Bed centered or against the longest wall, nightstands on both sides, a comfortable chair or bench, and a dresser or wardrobe.
Prioritize a quality mattress—hybrid or memory foam in queen or king. Test in-store or use generous return policies.
For small rooms, opt for multifunctional pieces: storage ottomans, sofa beds, or wall-mounted desks. I found a slim wardrobe on wheels that tucks away when not needed.
(Screenshots of floor plans: Simple 12×14 ft layout vs. optimized with traffic flow arrows.)
Step 6: Bedding, Linens, and Guest Essentials
Hotel-style layering: Crisp sheets (100% cotton or Tencel for breathability), duvet with insert, throw blanket, and multiple pillows (mix firm and soft).
Stock the room with: Blackout curtains, extra blankets, hangers, full-length mirror, charging stations (USB ports everywhere), water carafe, snacks, toiletries basket, and local guidebook or Wi-Fi info card.
I include a small welcome note and reusable water bottle—small gestures that feel luxurious.
Step 7: Smart Tech and Thoughtful Touches
2026 guest rooms shine with subtle tech: Smart thermostat (Nest or Ecobee), voice assistant on low volume, smart lock for private entry, and Bluetooth speaker.
Keep it optional—provide instructions but don’t force it. Add plants (low-maintenance like snake plant), artwork with personal but neutral appeal, and blackout curtains for jet-lagged visitors.
Step 8: Finishing Details, Storage, and Maintenance
Add hooks, over-door organizers, and under-bed storage. Seal everything for easy cleaning. Schedule annual touch-ups: touch-up paint, mattress rotation, filter changes.
Tool Comparisons and Honest Verdicts
No remodel happens without tools. Here’s what I’ve tested:
Paint Sprayer vs. Roller/Brush: Wagner Flexio sprayer for large walls—fast but messy and requires masking. Verdict: Rollers for beginners; sprayer if you have experience and ventilation. Saved me hours on the second room.
Cordless Drill/Driver (DeWalt 20V vs. Ryobi): DeWalt is bulletproof for heavy use; Ryobi sufficient and cheaper for occasional DIY. I own both—DeWalt for pros, Ryobi for value.
Miter Saw (budget Harbor Freight vs. Dewalt): For trim work, a good compound miter saw is essential. The budget one did fine for one project but lacked precision; invested in DeWalt for repeat accuracy.
Laser Level vs. Traditional: Bosch self-leveling laser—game-changer for molding and shelves. Worth every penny.
Stud Finder (Franklin Sensors vs. basic): Multiple-stud models rarely lie. Saved me from disastrous mounting.
Honest verdict: Buy quality where it counts (drill, saw, level). Rent specialty tools like floor sanders.
(Tool comparison table image: Pros/cons, prices, my star ratings.)
Common Pitfalls and How to Avoid Them
- Underestimating dust: Seal doors with plastic sheeting.
- Ignoring acoustics: Add rugs, curtains, and upholstered pieces.
- Over-personalizing: Keep it neutral with pops of personality.
- Skipping ventilation: Crucial during painting/finishing.
Budget Breakdowns and ROI Insights
My mid-range remodel came in at ~$7,800: $1,200 paint/walls, $2,500 flooring, $1,800 furniture/bedding, $1,000 lighting/tech, rest misc. ROI? Guests stay longer, and realtors note it as a standout feature.
Future Trends in Guest Rooms
Expect more biophilic design (plants, natural materials), adaptive smart lighting that mimics circadian rhythms, modular furniture for flexibility, and wellness touches like air purifiers and sound machines. Sustainability—recycled materials, low-VOC paints—will be standard.
FAQs
How long does a guest room remodel take?
DIY: 2-6 weekends. With pros: 1-3 weeks.
What’s the best mattress for guests?
Medium-firm hybrid—appeals to most.
Can I remodel on a tiny budget?
Absolutely. Paint, deep clean, new bedding, and thrifted finds go far.
Should I hire professionals?
For electrical, plumbing, or complex flooring—yes. Painting and decor? DIY.
Conclusion
Remodeling a guest room isn’t just about aesthetics; it’s about creating a space where people feel seen, rested, and valued. From the first sketch to the final welcome basket, every decision compounds into an experience. My guest room has hosted family milestones, old friends, and new colleagues—and each time, the feedback is the same: “I didn’t want to leave.” That’s the ultimate verdict. Start small, stay thoughtful, and enjoy the process. Your future guests (and your future self) will thank you.
Author Bio
Alex Rivera is an independent home renovation researcher and enthusiast with over a decade of hands-on experience transforming everyday spaces. A former data analyst turned DIY advocate, Alex has documented and shared practical remodels for family homes, focusing on functional, guest-friendly designs that blend comfort with modern living. When not swinging a hammer or testing tools, Alex enjoys hosting friends, studying interior trends, and exploring sustainable building practices. Their approach emphasizes real-world testing, honest feedback, and making high-impact changes accessible to homeowners everywhere.