



I’ve installed moulding wainscoting in more than a dozen rooms over the past decade—my own 1920s bungalow, a client’s Victorian dining room that had suffered decades of chair scrapes, and a modern farmhouse entry that needed something more interesting than plain drywall. Each project taught me something new about proportions, materials that actually hold up, and the small details that separate a DIY job that looks “okay” from one that feels built-in and intentional. This guide pulls those lessons together so you can plan, choose, and install with confidence.
Table of Contents
- What Moulding Wainscoting Actually Is (and Why It Still Matters)
- Popular Styles Explained with Real-World Use Cases
- Material Choices: Wood, MDF, PVC, and Beyond
- Tools You’ll Need—and Honest Comparisons
- Step-by-Step Installation That Avoids the Usual Pitfalls
- Design Ideas That Work in Real Homes
- Common Mistakes and How to Sidestep Them
- Emerging Trends Worth Watching
- Frequently Asked Questions
- Final Thoughts
What Moulding Wainscoting Actually Is (and Why It Still Matters)
Wainscoting is the decorative treatment applied to the lower portion of an interior wall. Historically it protected plaster from chairs, boots, and everyday wear. Today most of us install it for visual interest and a sense of craftsmanship. When people say “moulding wainscoting,” they usually mean a system of rails, stiles, panels, and cap moulding rather than simple beadboard sheets alone.
The classic proportion follows the rule of thirds: the top of the chair rail or cap sits roughly one-third of the way up the wall. On an eight-foot ceiling that lands around 32–36 inches including the moulding. In rooms with nine- or ten-foot ceilings, many of us push it higher—sometimes to 42 or even 48 inches—without breaking the visual balance. Going past halfway almost always looks top-heavy unless you are deliberately creating full-height paneling.
I still prefer the protective function in high-traffic areas. In my own hallway the lower walls no longer show the scuffs that used to appear every few months. The moulding also creates a natural break for paint colors or wallpaper, which is why designers keep returning to it.
Popular Styles Explained with Real-World Use Cases
Raised Panel
This is the formal, traditional look with beveled edges that create a three-dimensional panel. It works beautifully in dining rooms and libraries. The components are a bottom rail (often doubling as baseboard), stiles, a raised center panel, top rail, and a cap moulding. I once installed a double-height version in a room with twelve-foot ceilings by adding a middle rail; the result felt grand rather than fussy.
Flat or Recessed Panel
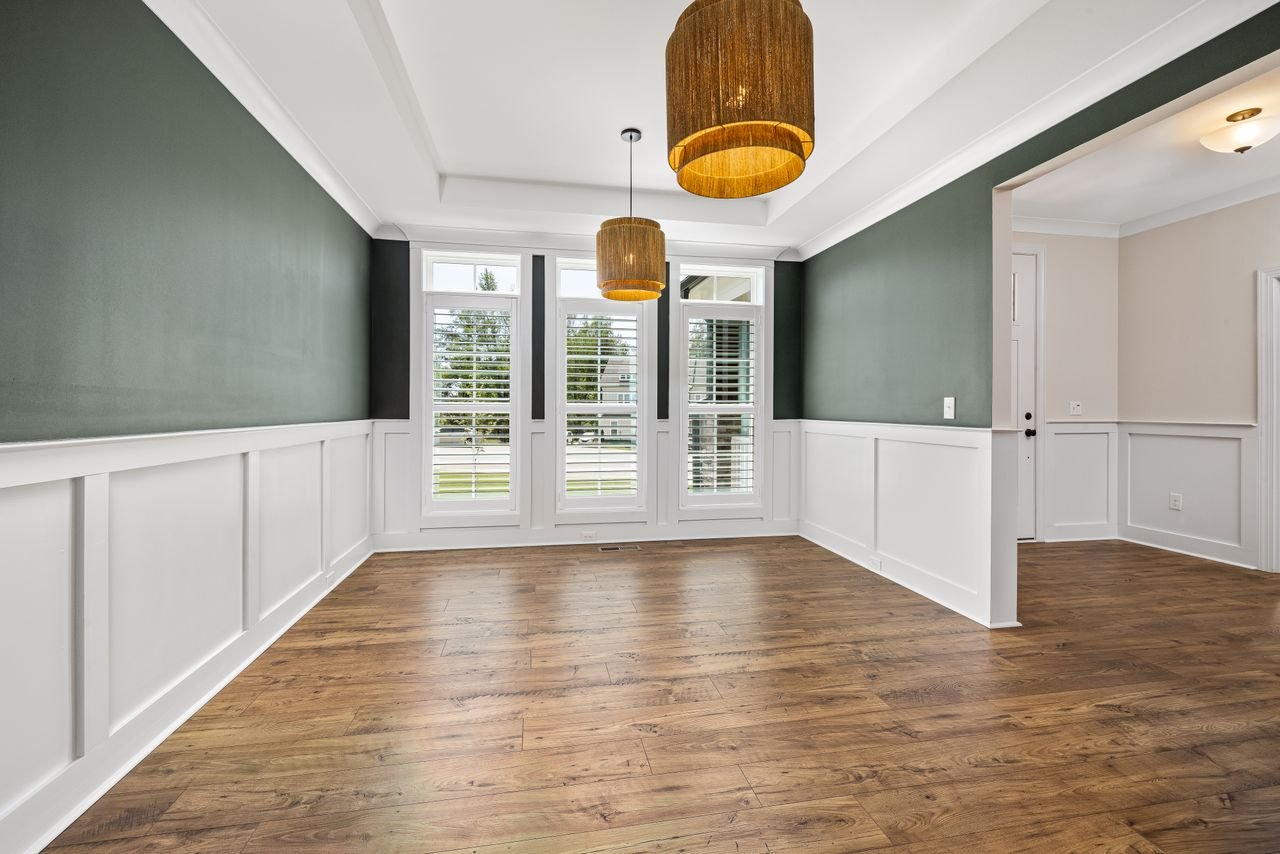
Clean geometric frames with flat centers. Common in Arts and Crafts and more contemporary spaces. You can build it from individual pieces or glue thin plywood or MDF to the wall and apply the moulding on top—the latter method is faster and still looks solid if you use good adhesive and nail into studs.
Board and Batten
Vertical boards or a full sheet of plywood with narrower battens covering the seams. It reads more casual and Craftsman. Many people run it higher than traditional wainscoting—sometimes to picture-rail height—because the vertical lines draw the eye upward. In a recent mudroom project we used 1×4 battens over painted plywood and topped it with a wide plate rail for keys and mail.
Beadboard
Vertical grooves that echo Victorian and cottage styles. It is forgiving of imperfect walls and pairs well with a simple chair rail. I often combine beadboard in the lower section with flat panels above the middle rail for a hybrid look that feels both traditional and fresh.
Overlay and Shadow-Box Styles
These create deeper recesses by applying an extra layer of moulding or a thin panel inside a larger frame. They give the richness of raised paneling without the specialized milling. In modern interiors, people are using thinner profiles and sharper corners for a more geometric effect.
You can mix these. A board-and-batten base with a raised-panel upper section or beadboard framed by flat stiles both work when the scale stays consistent.
Material Choices: Wood, MDF, PVC, and Beyond
Solid wood (poplar, pine, oak) feels authentic and accepts stain or paint equally well. Poplar is my go-to for painted work because it is stable and takes a smooth finish. Hardwoods cost more and expand and contract with humidity, so you must leave small gaps and seal all surfaces before installation.
MDF is dimensionally stable, inexpensive, and available pre-primed or with embossed designs. The downside is water sensitivity—never use it for the baseboard that touches the floor in a bathroom or laundry. Tom Silva of This Old House has made the same point for years: keep MDF away from moisture and use real wood at the bottom.
PVC and other plastics shine in wet areas. They will not rot or warp, though they expand more than wood with temperature changes. Leave expansion gaps and follow the manufacturer’s fastening schedule. Embossed metal or ceramic tile versions exist for bathrooms and kitchens if you want something completely different.
For most painted residential projects I still recommend a combination: solid wood or quality MDF for the rails and stiles, and either solid wood or moisture-resistant MDF for the panels.
Tools You’ll Need—and Honest Comparisons
You can install basic wainscoting with a hammer, nails, and a hand saw, but the results improve dramatically with the right power tools. Here is what I actually use and why.
Miter Saw
A sliding compound miter saw is non-negotiable for clean 45-degree cuts on chair rail and base. I have used both a basic 10-inch Ryobi and a higher-end Dewalt. The Ryobi is adequate for occasional DIY; the Dewalt holds accuracy longer and handles wider stock. If you already own a circular saw, you can get by for straight cuts, but miters will suffer.
Nail Guns
This is where people get confused.
- 18-gauge brad nailer: Best all-around choice for most moulding. The nails are thin enough that holes fill easily yet strong enough to hold chair rail and stiles securely when combined with construction adhesive.
- 23-gauge pin nailer: Excellent for very thin or delicate profiles and for temporarily holding pieces while glue dries. The pins are nearly invisible, but they lack holding power on their own.
- 15- or 16-gauge finish nailer: Overkill for typical wainscoting and leaves larger holes. I keep one for heavier baseboards only.
My honest verdict after years of use: buy a quality 18-gauge brad nailer first (cordless models from Milwaukee, Makita, or Dewalt are excellent). Add a 23-gauge pinner later if you do a lot of fine decorative work. Pneumatic guns are cheaper upfront but require a compressor; cordless is more convenient for most homeowners.
Other Essentials
Laser level or a good four-foot spirit level, stud finder, tape measure, pencil, caulk gun, wood filler, and a jigsaw for outlet cutouts. A random-orbit sander speeds finishing. Construction adhesive (I prefer the heavy-bodied formulas that grab quickly) is as important as the nails.
For layout, some pros use specialized calculators or apps that divide a wall into equal panel widths automatically. I still prefer marking the wall by hand after calculating the spacing, but the digital tools reduce cumulative error on long runs.
Step-by-Step Installation That Avoids the Usual Pitfalls
- Plan the height and layout. Measure the wall height and decide on the finished top of the cap. Mark a level line around the room. Then calculate panel widths so the end panels are roughly equal. Avoid tiny leftover panels at corners.
- Locate and mark studs. Nail into studs whenever possible. Use a reliable stud finder and verify by tapping or probing.
- Prepare the wall. Repair major holes and ensure the surface is reasonably flat. On very wavy walls, install horizontal furring strips first.
- Install the baseboard or bottom rail if it is not already in place. Shim as needed for uneven floors. Leave a small expansion gap if using solid wood or PVC.
- Install the top rail or chair rail next. This establishes the height and gives you a visual reference. Glue and nail.
- Add the stiles and panels. Work from one corner outward. Use spacer blocks for consistent gaps. Dry-fit everything before final fastening. For flat-panel styles, many people apply the full sheet first, then the moulding.
- Cut around outlets and switches. Measure carefully, cut with a jigsaw, and leave a little clearance. The cover plates will hide the edges.
- Fill, caulk, sand, and paint. Fill nail holes, caulk all seams, sand smooth, prime if needed, and apply two coats of quality paint. Pre-painting the backs and edges of the moulding reduces the chance of unfinished wood showing if the material moves later.
The entire process for a typical dining room can be done over a long weekend if you have the tools and a helper for the longer pieces.
Design Ideas That Work in Real Homes
- Monochromatic: Paint the wainscoting and upper wall the same color for a subtle, sophisticated effect. Slight sheen difference (eggshell below, flat above) still defines the moulding.
- Contrast: Classic white or soft gray wainscoting against a deeper wall color. This is still one of the most reliable ways to add architecture.
- Two-tone within the wainscoting itself: Darker panels and lighter rails for depth.
- Wallpaper above: A quiet patterned paper above crisp white moulding feels tailored.
- High board-and-batten in an entry or staircase: Extending it up the stair stringer creates continuity.
- Modern geometric: Thin, sharp-profile moulding arranged in squares or rectangles on a painted wall. No traditional raised panels required.
- Bathroom and kitchen versions: Use PVC or tile for the wet zones and keep the style consistent with the rest of the house.
In my own living room I used flat-panel poplar painted a warm off-white, topped with a simple ogee chair rail. Above it sits a soft sage green. The combination has held up for six years of daily life and still looks intentional.
Common Mistakes and How to Sidestep Them
- Installing too high. Better slightly low than awkwardly tall.
- Ignoring the baseboard. Board-and-batten can sometimes skip a traditional base, but most styles look unfinished without one.
- Uneven spacing or panels that get progressively smaller toward the end of a wall. Calculate and adjust before cutting.
- Skipping adhesive. Nails alone can work loose over time, especially on drywall.
- Forgetting expansion gaps with solid wood or PVC.
- Poor corner treatment. Practice miters on scrap. For out-of-square corners, measure the actual angle and bisect it.
- Painting without proper prep. Caulk and filler make more difference than most people realize.
Emerging Trends Worth Watching
Full-height paneling is gaining ground in living rooms and primary bedrooms, blurring the line between classic wainscoting and complete wall treatments. Geometric and asymmetrical layouts are appearing in more contemporary projects. Painted finishes remain dominant, but people are experimenting with subtle color blocking and even soft metallic accents on the moulding itself. Moisture-resistant materials continue to improve, making bathroom and laundry applications more reliable. The overall direction feels less rigid and more about using moulding as a flexible design tool rather than a strict historical reproduction.
Frequently Asked Questions
How high should wainscoting be?
Roughly one-third of the wall height for traditional looks. Adjust for ceiling height and room scale.
Can I install it myself?
Yes, if you are comfortable with basic measuring, cutting, and nailing. Complex raised-panel work or very large rooms may be better left to a trim carpenter.
How much does it cost?
Materials for a simple painted MDF or pine job often run $5–15 per linear foot. Solid hardwood and custom milling raise the price significantly. Labor, if hired, can double or triple that figure.
Does it work in modern homes?
Absolutely. Clean flat panels or board-and-batten with minimal profiles fit contemporary spaces well.
What about stairs?
The same principles apply, but the layout becomes more complex as the height changes. Many people run the chair rail parallel to the stair stringer.
Final Thoughts
Moulding wainscoting rewards careful planning more than expensive materials. When the proportions are right, the joints are tight, and the finish is clean, even a modest installation adds a layer of substance that paint alone cannot achieve. I still get a quiet satisfaction walking past the rooms where I installed it years ago and noticing that the walls still look deliberate and well cared for. That is the real value creating something that feels permanent in a world of temporary trends.
If you take the time to measure twice, choose materials suited to the room’s conditions, and finish the details properly, you will end up with a result that looks like it has always belonged there.
Author Bio
Elena Marlowe is a residential design researcher and hands-on renovator with more than fifteen years of experience documenting and installing architectural millwork. She has written extensively on traditional and contemporary trim techniques, contributed field notes to several home-improvement publications, and continues to test materials and methods in real client projects and her own historic home. Her focus remains practical durability paired with timeless proportion.