


From someone who killed three batches of sunflower microgreens before figuring out why and grew a side income from the fourth.
The first time I harvested a full tray of broccoli microgreens vibrant, dense, and faintly smelling of fresh rain I understood immediately why people get hooked on them. It had taken me twelve days. It occupied a space roughly the size of a laptop. And what I cut that morning went straight into lunch, sharper in flavor than anything I’d bought at a market.
That early success also masked a learning curve that most beginners don’t anticipate. Microgreens look simple and in some ways, they are but growing them consistently, without mold, without patchy germination, and without the peculiar disappointment of a tray that just… gives up on you, requires understanding a few things that most guides quietly skip.
This article won’t skip them.
What Microgreens Actually Are (And Why the Distinction Matters)
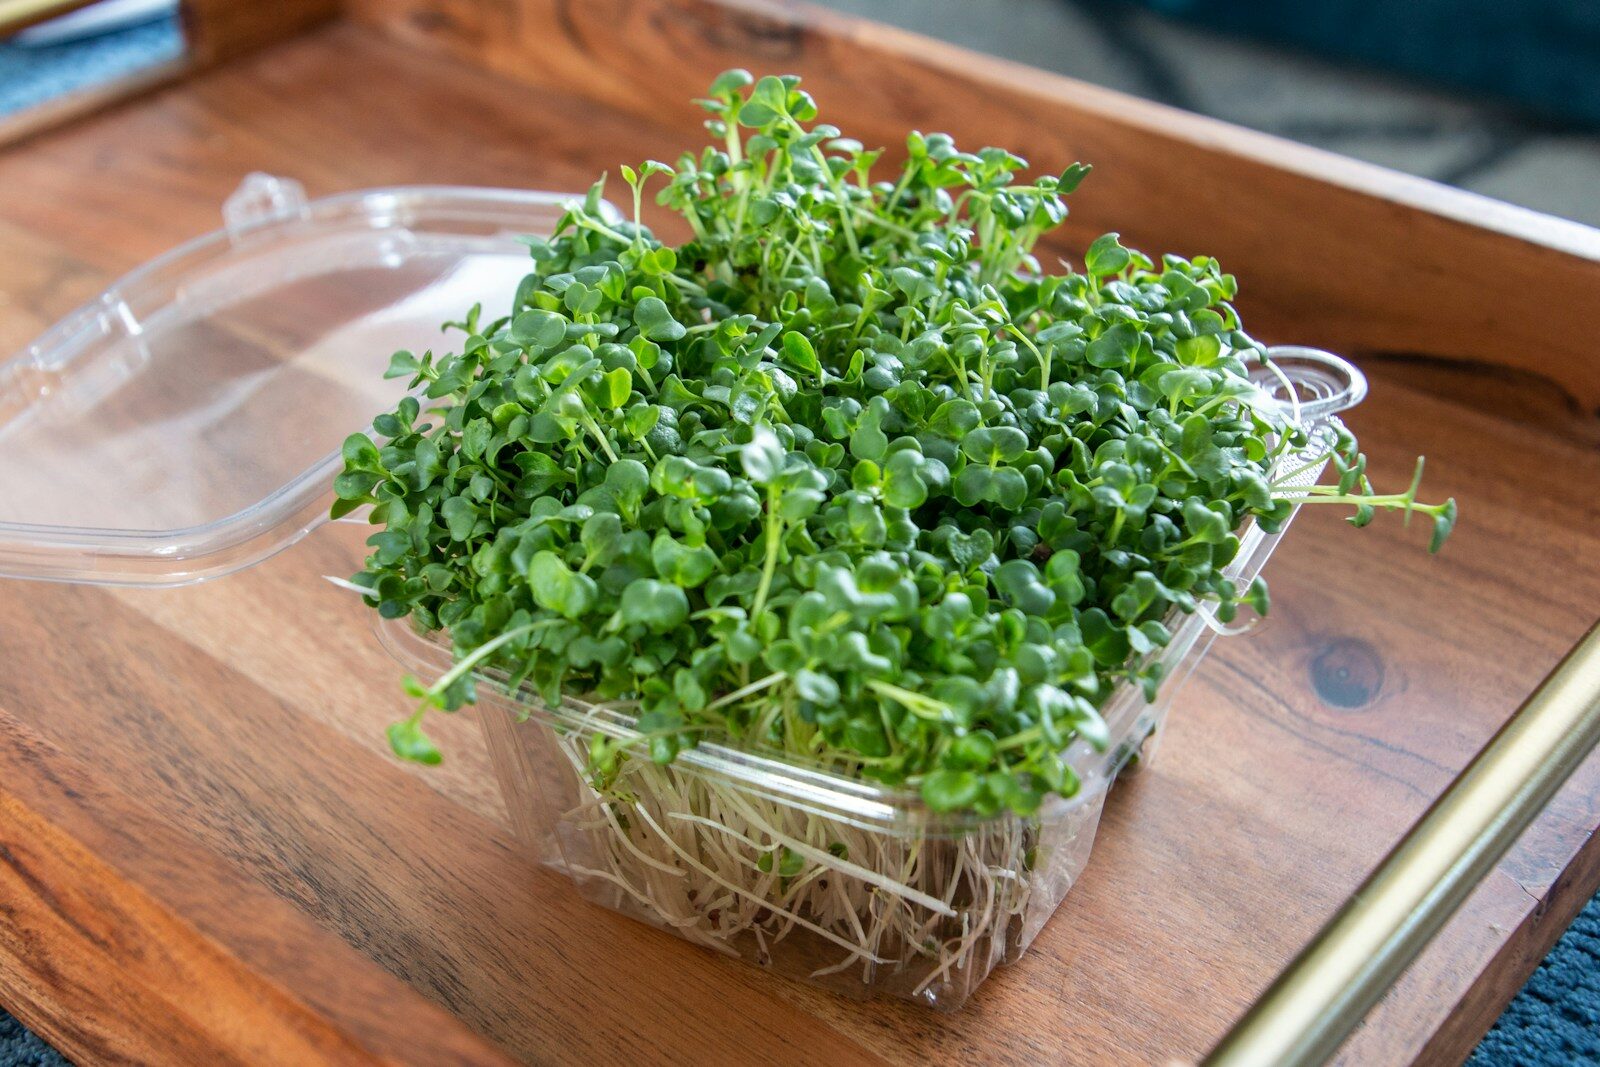
Microgreens are vegetable or herb seedlings harvested at the cotyledon stage — that is, after the seed leaves (cotyledons) have fully emerged but typically before the first true leaves develop. They stand between one and three inches tall at harvest and are consumed stem, leaf, and all, cut cleanly above the growing medium.
They are not sprouts. Sprouts are germinated seeds eaten whole, roots and all, typically grown in water with no growing medium. The distinction matters for safety as much as flavor: microgreens, grown in soil or a substrate and harvested above root level, carry far lower microbial risk than sprouts while offering exceptional nutritional density.
The nutritional claim most often quoted — that microgreens contain dramatically higher concentrations of vitamins and antioxidants than their mature counterparts — has been supported by multiple research studies. A widely cited USDA study found that red cabbage microgreens contained 40 times more vitamin E and 6 times more vitamin C than mature red cabbage. Whether those differences translate into significant health effects at the portions most people eat is a fair question, but the concentration point stands.
What’s not in dispute is the flavor. Mature arugula is peppery. Arugula microgreens are intensely peppery, a quality that can completely alter a dish.
Choosing What to Grow: The Honest Guide
Every beginner article tells you to start with radish and sunflower. Radish advice is sound. Sunflower advice — while ultimately correct — glosses over the fact that sunflower microgreens are among the most mold-prone you’ll encounter, and beginning with them often leads to discouragement that has nothing to do with your competence as a grower.
Here’s a more honest starting breakdown:
Easiest for Beginners
- Radish (especially ‘Daikon’ and ‘China Rose’): Fast — harvestable in 8–10 days. Tolerant of minor temperature swings. Striking red stems. Strong, spicy flavor that chefs and home cooks love equally.
- Broccoli: Mild, slightly sweet, nutritionally dense. Germinates reliably. Forgives a missed watering. A genuinely excellent first crop.
- Mustard: Even faster than radish in warm conditions. Intense, wasabi-adjacent heat that makes it a restaurant favorite as a finishing garnish.
- Peas: Sweet, tender shoots that work well in Asian dishes and salads. Benefit from soaking 8–12 hours before sowing, but otherwise largely look after themselves.
Intermediate Level
- Sunflower: Hulled seeds sow more cleanly but cost more; unhulled seeds are cheaper but need more vigilance against mold during the blackout phase. Worth mastering — the flavor is nutty and satisfying, and they sell well.
- Basil: Slow to germinate (10–14 days minimum), mucilaginous seeds that clump when wet, requiring a light touch during sowing. Don’t bottom-water basil — it gets root problems. But the aroma and flavor payoff is unmatched.
- Cilantro: Crush the seed before sowing (it’s actually a fruit containing two seeds) to improve germination rates. Slower than brassicas but delivers that distinctive herbal punch in a usable format, even for people who struggle to grow cilantro to maturity.
Worth the Learning Curve
- Amaranth: Tiny seeds that need very careful, even distribution. Vivid magenta stems in some varieties. Visually stunning on a plate.
- Wheatgrass: Grown primarily for juicing. Needs soaking, good airflow, and patience. A different product category from most microgreens.
- Beet: Slow-growing (16–18 days). Beautiful, deep red stems. Earthy flavor that divides opinion but commands attention on a plate.
Setting Up Your Growing Space
One of the genuine advantages of microgreens is their spatial flexibility. A spare bathroom shelf, a basement rack with grow lights, a south-facing kitchen counter — all of these work. But “works” and “optimized” are different things.
The Tray System
The standard industry setup uses 10×20-inch trays — either solid-bottom or drainage-holed, depending on the watering method. Most serious growers run a two-tray system: a solid “reservoir” tray below and a drainage tray above. This enables bottom-watering, which is one of the most important practices you can adopt.
Bottom-watering means pouring water into the lower reservoir tray and allowing the growing medium to absorb moisture upward through capillary action. The surface of the growing medium remains drier, dramatically reducing the risk of mold. Top-watering — especially with force — disturbs seeds, promotes surface fungal growth, and makes it easier to overwater. Once you switch to bottom-watering, you’ll wonder why you ever watered from above.
Light Requirements
Microgreens are not heavy light users compared to fruiting crops, but they need adequate light to develop properly pigmented, upright stems. A windowsill with genuine south-facing sun can work, but most growers find that purpose-built LED grow lights produce more consistent results — and allow stacking multiple growing levels on a single shelving unit.
Full-spectrum LED panels positioned 2–4 inches above the canopy, run 12–16 hours daily, and cover almost every microgreen variety adequately. The technology has matured considerably; quality options are available at price points that make sense even for hobbyists growing a handful of trays.
Temperature and Humidity
The sweet spot for most microgreens is 65–75°F (18–24°C). Above 80°F, mold risk increases substantially, and germination can become erratic. Below 60°F, growth slows to a crawl — frustrating when you’re waiting on a tray for a specific date.
Humidity is the trickier variable. You want enough moisture for germination during the covered phase, but once seedlings emerge, stagnant humid air is your enemy. Aim for 50–60% relative humidity in the grow space. A small oscillating fan running a few hours a day — positioned to move air near but not directly onto the canopy — is arguably the single most impactful investment a serious microgreens grower can make.
The Growing Process, Step by Step
Step 1: Pre-Soaking
Not every seed needs pre-soaking, but larger seeds benefit significantly from it. Peas, sunflower (unhulled), corn, and wheatgrass should be soaked in cool water for 8–12 hours. Mucilaginous seeds like basil and chia should never be soaked — they gel and become impossible to distribute evenly.
Brassicas (broccoli, radish, cabbage, mustard) don’t require soaking but can benefit from a brief rinse.
Step 2: Prepare Your Growing Medium
The medium question is where growers often overcomplicate things. A 50/50 blend of quality potting mix and coconut coir gives you excellent drainage, adequate moisture retention, and a neutral base that doesn’t compete with the seeds.
Fill your tray to about an inch deep — no need to go any deeper. The roots don’t have far to go in a 10-day crop.
One non-negotiable: never reuse growing medium for microgreens. The root mass, leftover organic matter, and potential pathogens from a previous crop make it a liability. Start fresh each time.
Step 3: Seeding
Seeding density is one of the most frequently misunderstood variables in microgreens growing. The intuition to sow thickly — to get maximum yield from minimum space — is right, but only up to a point. Over-dense seeding traps moisture, inhibits airflow, and leads to a canopy that molds from the bottom up before anything is ready to harvest.
Different varieties have different ideal densities. As a rough guide: Brassicas like broccoli and radish work well at about 1–1.5 oz of seed per 10×20 tray. Peas need 8–10 oz. Sunflower: 3–4 oz hulled. Basil: half an ounce or less.
Spread seeds evenly — this is worth taking time over. Patchy trays are almost entirely due to uneven seeding. Mist lightly from above after sowing to settle the seeds into contact with the growing medium.
Step 4: The Blackout Phase
Most microgreens benefit from covering and darkness for the first 2–4 days of germination. The darkness drives etiolation — the seedlings stretch upward searching for light, producing longer, more tender stems. Covering also maintains the humidity needed for germination without the need for constant misting.
Stack a second tray on top with some weight (an empty water bottle works) to provide gentle pressure that encourages even root development and prevents seeds from being lifted by sprouting hypocotyl tension.
Check daily. As soon as the majority of seeds have germinated and you see consistent green emergence — typically day 3–5 depending on variety — expose them to light.
Step 5: Growing Under Light
Once the trays are under light, the main daily tasks are watering (by bottom method, usually once a day, sometimes less) and monitoring for any issues. Most problems become visible within 24–48 hours of onset, so daily observation is time well spent.
Rotate trays if your light source isn’t perfectly even — this prevents the characteristic lean toward light that produces uneven canopies.
Step 6: Harvest
Harvest timing is genuinely critical, and most guides either understate or overcomplicate it. The practical rule: harvest when the cotyledons are fully open and before the first true leaves are significantly developed. For most varieties, this is 7–14 days after sowing.
Taste as you go. Radish at 9 days may be perfect; at 12 days in warm conditions, the flavor can sharpen into something harsh. Broccoli is more forgiving.
Use clean, sharp scissors — kitchen shears work perfectly — and cut just above the growing medium. Cut what you’ll use immediately. Microgreens stored at the root, still in the tray, have a longer shelf life than harvested greens. If you must harvest in advance, cut, spin dry gently in a salad spinner, and store in a sealed container lined with a slightly damp paper towel in the refrigerator. Properly handled, most varieties keep 5–7 days post-harvest.
The Mold Problem: An Honest Breakdown
Mold is the defining challenge of microgreens growing, and it deserves direct treatment rather than a footnote.
White fuzz appearing at or near the soil level sends many first-time growers into a panic — but not all of it is mold. Radish and sunflower microgreens develop prominent white root hairs that, at first glance, look disturbingly similar to mold. The tell: root hairs are uniform, appear throughout the root zone of the entire tray, and disappear when misted. True mold is irregular, often appears at the soil surface or in concentrated patches, and has a flat, matted quality distinct from the vertical fuzz of root hairs.
When mold does appear, the causes are almost always one or more of the following: overwatering, inadequate airflow, excessive seeding density, or contaminated growing medium.
A small fan set to low, positioned near (not directly at) the trays, and run 4–6 hours daily can reduce mold incidence by a remarkable margin — some growers report cutting mold problems by 80% with this single change. The principle is straightforward: stagnant moisture doesn’t evaporate. Moving air does.
If you’re struggling with mold on a specific crop, lower the seed density, reduce watering frequency, improve airflow, and check the source of your growing medium. New or unfamiliar growing media from unknown suppliers can harbor mold spores — some experienced growers have lost entire racks of trays from a single contaminated bag of coco coir. Buy from established, reputable sources, and test new materials at a small scale before committing to full production.
Selling Microgreens: What the Numbers Look Like
For those interested in microgreens beyond personal consumption, the commercial landscape is genuinely encouraging. The global microgreens market continues to expand, driven by restaurant demand, health food retail, and the rise of local food culture.
Restaurants are the most reliable buyers — fine-dining chefs in particular prize the flavor intensity and visual appeal of fresh microgreens, qualities that frozen or processed garnishes can’t replicate. If you’re considering approaching restaurants, arrive with samples at a quiet time (not during service), know your varieties and their flavor profiles, and be consistent. A chef who builds a dish around your sunflower microgreens needs to know you’ll deliver on the same day every week.
Farmers’ markets offer another strong channel, particularly for mixes and specialty varieties. Pricing varies considerably by region, but premium varieties in direct-to-consumer settings commonly sell for significantly more per ounce than commodity pricing would suggest.
One practical note: building a staggered seeding schedule — planting new trays every 2–3 days — ensures continuous harvest availability rather than the feast-and-famine cycle that kills many small operations. Treat it like a production schedule from the start.
Future Trends Worth Watching
Microgreens growing is evolving alongside broader shifts in urban agriculture and food technology.
Biofortification — growing microgreens in media enriched with specific minerals, such as selenium, iron, and zinc — is an active research area. The theory is that nutrient uptake during the brief growth window can be meaningfully enhanced through the growing medium. Early results are promising, and commercially fortified microgreens may become a distinct product category within the next few years.
Reusable growing substrates — silicone pads, hemp mats, and other washable alternatives to single-use soil — are gaining traction among growers concerned about waste and input costs. The quality results are increasingly competitive with traditional soil-based growing.
Vertical farm integration has made microgreens a cornerstone crop for indoor farming operations, where their short growth cycle and high value per square foot make them one of the most economically viable crops in a controlled environment. The economics that work at a small scale translate remarkably well to larger operations, which is unusual in agriculture.
Frequently Asked Questions
Do I need grow lights, or will a windowsill work? A south-facing windowsill with strong, direct sun can work for personal growing, particularly in summer months. Grow lights give you consistency, speed, and the ability to stack multiple trays — making them worth the investment for anyone growing more than a few trays at a time.
How long do microgreens take to grow? Most varieties are harvest-ready in 7–14 days. Fast growers like radish and mustard are often ready by day 8–9. Slower crops, such as beets or amaranth, may take 16–18 days.
Can I reuse the growing medium? No. The tangled root mass and residual organic matter from a completed tray make reuse impractical and risky from a pathogen standpoint. Always start with a fresh substrate.
How many microgreens do you yield per tray? It varies significantly by variety and seeding density. A standard 10×20 tray of broccoli might yield 3–6 oz of greens. Sunflowers, being larger and denser, can yield considerably more. Track your yields by variety from the start — the data becomes valuable as you optimize.
What’s the best way to water? Bottom-watering via a reservoir tray is the clear preference among experienced growers. Pour water into the lower tray and let the growing medium absorb it upward. The surface stays drier, mold risk drops substantially, and seeds aren’t disturbed.
Are microgreens the same as sprouts? No. Sprouts are germinated seeds grown in water and eaten whole. Microgreens are grown in a medium, harvested above root level by cutting, and carry much lower microbial risk than sprouts.
A Note on Patience and Observation
The growers who consistently produce excellent microgreens share one quality above all: they pay attention. Not compulsively, not with expensive monitoring equipment — just the daily habit of looking closely at what’s happening in each tray, noticing what’s different from yesterday, and responding early.
A mold patch caught on day two can be managed in 5 minutes. The same patch ignored until day five has destroyed the tray. A tray that’s slightly root-bound is harvested today rather than tomorrow. Seeds that look patchy at day three might need a gentle misting, or they might need nothing at all.
Microgreens reward a kind of attentive patience that feels different from most other farming. The feedback loop is fast — sometimes uncomfortably fast — but that same speed means you’re never far from your next attempt. Each tray is a complete experiment, twelve days long, offering another chance to refine.
Closing Thoughts
There’s something quietly radical about growing your own food in twelve days on a kitchen shelf. Not because it replaces a garden or a farm it doesn’t but because it collapses the distance between seed and plate in a way that most food systems actively obscure.
Microgreens also have an honesty to them. They don’t hide their growing conditions. Neglect shows up immediately. Good practice shows up just as fast. You can see in the color of a stem, the density of a canopy, the aroma at harvest, exactly what you put in.
The global market for microgreens is growing steadily, and research into their nutritional properties continues to develop. But the most compelling reason to grow them is simpler: they taste extraordinary, they take almost no space, and the feedback — visual, aromatic, culinary — arrives before you’ve had time to lose interest.
Start with broccoli and radish. Get the bottom-watering right. Put a small fan near your setup. Then, once you’ve harvested that first clean tray and tasted what you grew, you’ll understand why this particular small practice tends to stick.