


By Daniel Hargrove | Outdoor Construction Specialist & Home Improvement Researcher | Cedar Fence Panels
1. Why Cedar? The Case for This Wood Above All Others
I’ve helped a lot of homeowners think through fencing decisions over the years, and the conversation almost always circles back to the same question: why cedar over pressure-treated pine, vinyl, or composite? The honest answer is that cedar earns its popularity in a way those alternatives simply don’t.
Cedar contains natural oils primarily thujaplicins, a group of antimicrobial compounds — that make it inherently resistant to rot, insects, and moisture without any chemical treatment. That’s not marketing language. It’s organic chemistry. The heartwood of Western Red Cedar, in particular, has been independently tested and documented to resist decay for decades under proper conditions.
But cedar isn’t just practical. It’s genuinely beautiful. The grain is tight and straight, the reddish-brown color weathers gracefully to a distinguished silver-grey, and it takes stain and sealant uniformly. If you’ve ever stood next to a well-maintained cedar fence that’s five or six years old, you know what I mean. It has a warmth that pressure-treated lumber and vinyl can’t replicate.
Beyond aesthetics, cedar is dimensionally stable. It doesn’t warp, cup, or twist the way wetter species do. It’s lightweight, which makes handling and installation easier. And unlike chemically treated woods, you don’t need to wait for a dry-out period before applying finish.
This guide is designed to take you from that initial “I need a fence” moment all the way through making a confident purchase — knowing exactly what you’re buying, what it should cost, and what will make it last.
2. Understanding Cedar Fence Panel Types
The phrase “cedar fence panel” covers an enormous range of products. Let’s break down the main styles so you can align your choice with your actual goals — privacy, aesthetics, security, or some combination.
Shadowbox (Board-on-Board)
One of the most popular panel styles in North America. Boards are alternated on both sides of the horizontal rails, overlapping slightly. This creates a fence that looks identical from both sides (important if your neighbors will be looking at it too), allows some airflow, and resists wind loading better than solid panels. A solid 6-foot shadowbox panel is often the go-to for suburban privacy fencing.
Solid Privacy Panel
Boards placed tightly side by side on one set of rails, with no gaps. Maximum privacy and visual blocking, but the solid face catches wind rather than letting it through. In high-wind areas, solid panels require more robust post installation — typically 4×4 posts set 24–30 inches deep in concrete. These look clean and formal from the front but plain from the back.
Picket Fence Panel
The traditional look: spaced boards with pointed or flat tops, attached to horizontal rails. Low profile (typically 3–4 feet), more decorative than functional for privacy. Cedar picket panels are popular for front yards, garden borders, and properties where aesthetic charm matters more than enclosure.
Split Rail Panel
Rustic, open design using round or half-round cedar rails fitted into drilled post holes. Minimal material, minimal installation complexity. Primarily decorative or for delineating property lines, as it offers no privacy or animal containment on its own. Common in rural and semi-rural settings.
Lattice-Top Panel
A privacy panel with a decorative lattice section across the upper 12–18 inches. The lattice adds visual interest, allows climbing plants to grow up the fence line, and softens the visual mass of a solid panel. Popular in cottage gardens and with homeowners who want a slightly softer look than a flat-topped privacy fence.
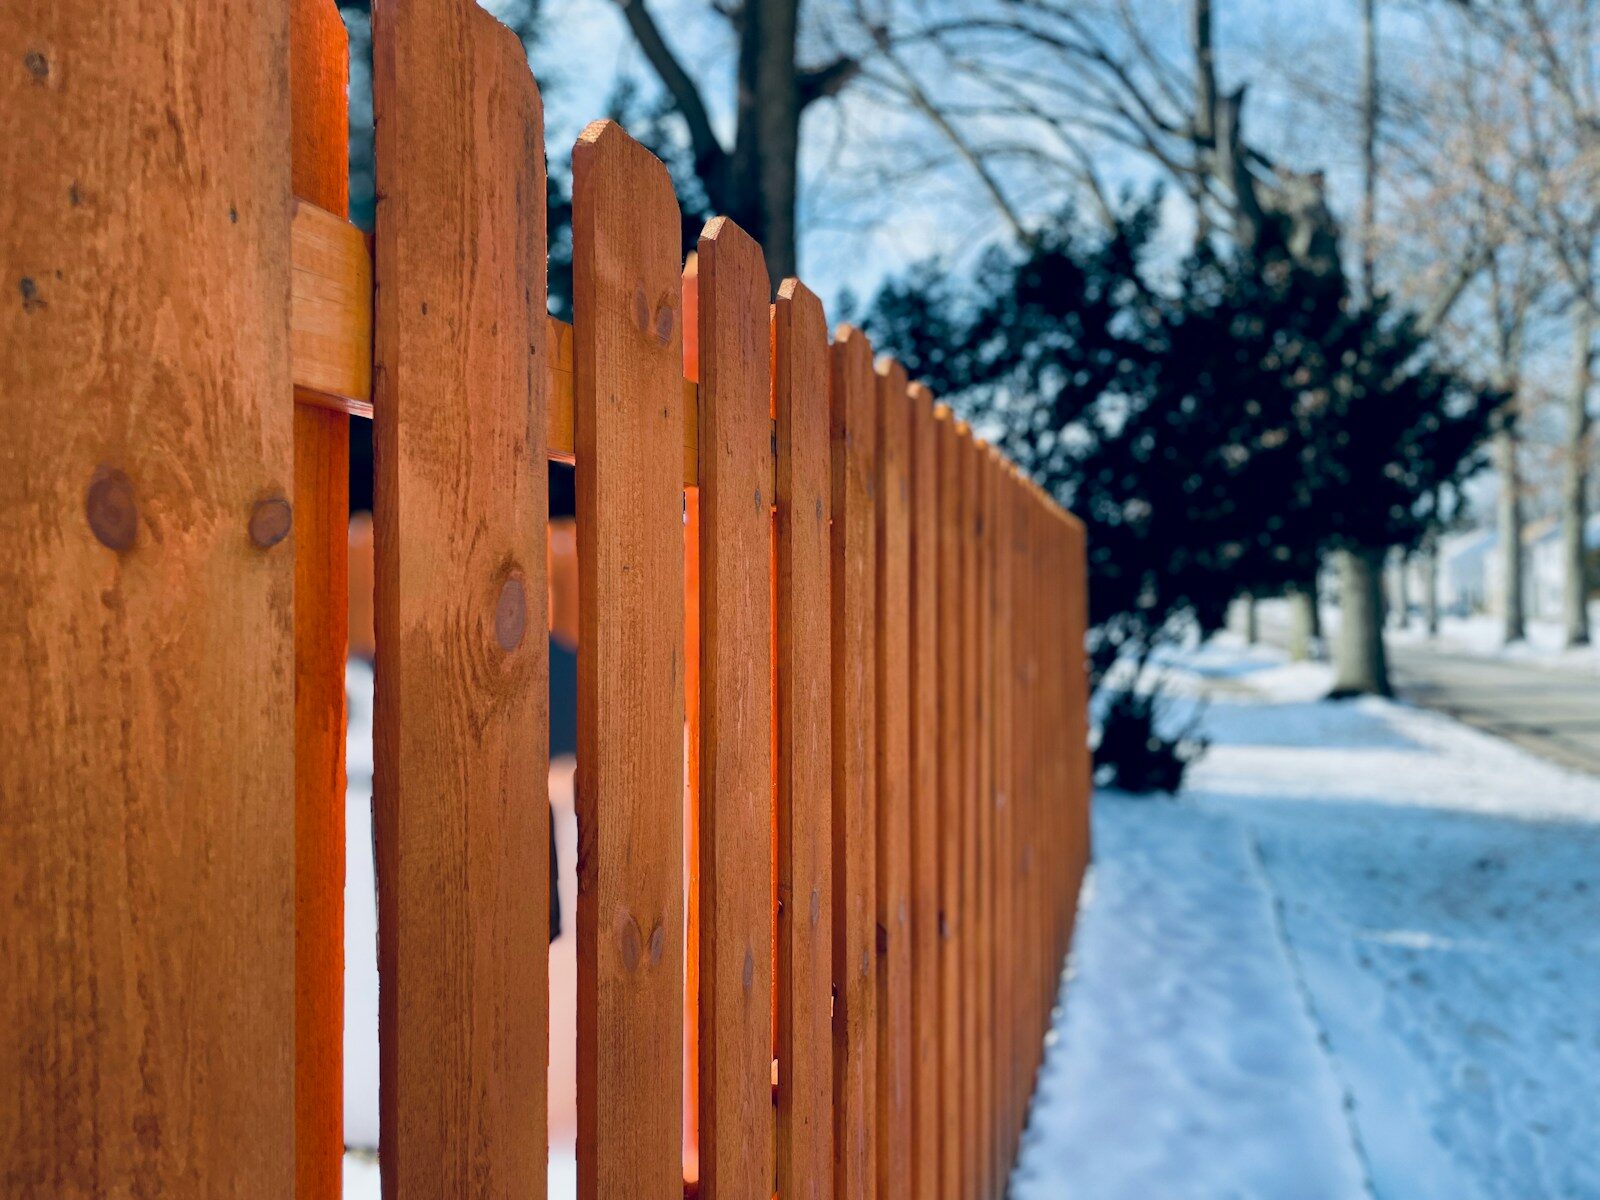
Dog-Ear Panel
Standard privacy panel style where each board’s top corners are cut at 45-degree angles — creating the characteristic “ear” shape. It’s one of the most common prefabricated styles because it reduces the chance of splitting at the corners and gives a finished look without requiring a cap rail.
3. Cedar Species: Which One Are You Actually Buying?
This matters more than most homeowners realize. “Cedar” at a lumber yard can refer to several distinct species, each with meaningfully different properties.
Western Red Cedar (Thuja plicata)
The gold standard for outdoor fencing. Native to the Pacific Northwest, it has the highest natural oil content of any commercially available cedar, translating to the best natural rot resistance. The heartwood is a rich reddish-brown. It’s lighter than most alternatives (about 23 lbs per cubic foot) and extremely workable. When a fencing product claims exceptional longevity, it’s almost always Western Red Cedar they’re talking about.
Best for: Premium privacy fencing, applications where longevity is the top priority.
Eastern Red Cedar (Juniperus virginiana)
Despite the name, not a true cedar — it’s actually a juniper. Widely available in the eastern United States and genuinely rot-resistant, but denser, harder to work with, and more prone to knots than Western Red. The color is more variable, ranging from cream to deep purple-red. It has a distinctive sharp, aromatic scent.
Best for: Homeowners in the eastern U.S. where Western Red isn’t locally available; rustic applications where character knots are desirable.
Northern White Cedar (Thuja occidentalis)
Softer and lighter than Western Red, with decent rot resistance. More commonly used for shingles, log cabins, and canoe construction, but does appear in fence products. Tends to be more affordable than Western Red where available.
Best for: Budget-conscious buyers in the Northeast where it’s locally milled.
Aromatic Red Cedar (Eastern Red Cedar, Milled)
When you see “aromatic cedar” at a big-box store, this is usually what they mean. It’s Eastern Red Cedar marketed on its scent. The scent is real and pleasant, but the quality varies widely and the knots can compromise structural integrity if you’re not careful about selecting boards.
Practical tip: Always ask your supplier which cedar species the panels are made from. Western Red Cedar should be specified — “cedar panels” without clarification may be any of the above or a blend.
4. Sizing and Dimensions: What the Numbers Mean
Standard pre-built cedar fence panels in North America come in a few common configurations.
Panel width: Almost universally 8 feet wide. This matches standard post spacing and minimizes cuts and waste during installation.
Panel height:
- 3 feet — picket/decorative
- 4 feet — moderate privacy, common for side yards
- 5 feet — partial privacy, popular where full enclosure isn’t required
- 6 feet — standard privacy height; the most commonly purchased residential size
- 8 feet — maximum height in most municipalities without a variance; requires more robust posts
Board thickness:
- 5/8 inch — the minimum for fence boards; lightweight but less durable long-term
- 3/4 inch — the sweet spot for most applications; better durability without significant added weight
- 1 inch (full 1″ or nominal 1″) — premium thickness; best longevity and resistance to warping
Important note on nominal vs. actual dimensions: Like all dimensional lumber, cedar fence boards are sold by nominal size. A “1×6” board is actually about 3/4 inch thick and 5.5 inches wide. A “1×4” is approximately 3/4 inch by 3.5 inches. This affects your calculations for coverage and material quantities.
Rail sizing: Most pre-built panels use 2×3 or 2×4 rails. For taller panels (6 feet and above) or in high-wind areas, 2×4 rails are worth the additional cost.
5. Grades of Cedar: Good, Better, Best Explained Plainly
Cedar lumber is graded by appearance and structural integrity. For fence panels, you’ll typically encounter these grades:
Clear (or Clear Heart)
Virtually knot-free, straight grain, premium appearance. The most expensive grade — often used for decorative fencing where the wood will be prominently visible. Overkill for a backyard privacy fence hidden behind shrubs, but worth every penny for a front-yard statement fence.
#1 (Select)
Tight, small knots (less than 1 inch in diameter), mostly clear between knots. The best balance of appearance, performance, and value for quality residential fencing. This is where most discerning homeowners should aim.
#2 (Standard/Construction)
Larger knots, more variation in grain, possible small checks. Still structurally sound, but more visually “rustic.” A good choice for utility fencing, dog runs, or any application where appearance is secondary. Significantly cheaper than #1.
#3 and Below
Knotholes, significant checking, possible wane (bark edge still present). Not recommended for fence panels that need to hold their appearance over years. Sometimes found in budget pre-built panels at warehouse stores.
Grading reality check: Pre-built panels sold at big-box retailers rarely specify their grade prominently. If a panel is priced notably below market average, it’s almost certainly #2 or lower material. This isn’t necessarily a deal-breaker — but it means more knots popping out over time and slightly faster weathering.
6. Pre-Built Panels vs. Custom Built: Honest Comparison
| Factor | Pre-Built Panels | Custom Built on Site |
|---|---|---|
| Cost | Lower material cost | Higher labor cost, similar material |
| Speed | Fast installation | Slower — boards set individually |
| Quality control | Variable (factory-assembled) | High (your oversight) |
| Design flexibility | Limited to standard sizes/styles | Unlimited |
| Handling uneven terrain | Difficult — panels are rigid | Easy — boards contour to slope |
| Repairability | Remove whole panel | Replace individual boards |
| Best for | Flat ground, standard sizing, budget builds | Sloped yards, custom designs, longevity-focused builds |
My honest take: For flat terrain and standard 6-foot privacy needs, pre-built panels from a reputable supplier are a smart, efficient choice. For sloped yards or any situation where you need a custom height, style, or a high-end appearance, custom-built fencing — hiring a carpenter or doing it yourself with individual boards — almost always produces a better long-term result.
The hidden cost of pre-built panels on sloped terrain is the “stair-stepping” effect: panels installed in steps down a slope leave triangular gaps at the base that require additional material, trim, or fill to address. Custom-built “racked” fencing eliminates this problem entirely.
7. Top Cedar Fence Panel Products Compared
Vigoro 6 ft. x 8 ft. Dog-Ear Cedar Privacy Fence Panel (Home Depot)
The most widely available pre-built panel in the U.S. Made from #2 grade cedar, 5/8-inch boards, with 2×3 rails. Priced accessibly — typically $45–$60 per panel. Solid for budget builds but shows its grade over time: expect more knots to loosen and more weathering variation than premium alternatives. Acceptable for utility applications and back-of-property fencing.
Verdict: Good value at entry level. Don’t expect it to look pristine after five years without staining.
Cedar Ranch 1×6 Western Red Cedar Privacy Panel (specialty lumber yards)
When you order directly from regional cedar specialists or lumber yards that stock Western Red Cedar specifically, you typically get genuinely graded material in #1 or better. These panels cost more — $75–$120 per panel for 6-foot height — but the wood quality is visibly superior. Boards are thicker, knots are smaller and tighter, and the color is more consistent.
Verdict: Best long-term value if you care about appearance and longevity. The price premium pays off over a 10–15 year horizon.
WeatherShield Pre-Stained Cedar Panels (Lowe’s)
A step up from basic panels — pre-stained with a brown preservative finish at the factory. The pre-staining doesn’t penetrate deeply, but it extends the window before you need to apply your own finish. Made from #2 cedar but the factory finish adds value. Priced at $55–$70 per panel.
Verdict: Good compromise for buyers who want to minimize early maintenance. The pre-stain is a genuine benefit, not just cosmetic.
Custom Milled Western Red Cedar Panels (Local Sawmills)
If you have a regional sawmill within reasonable distance, custom-milled panels from Western Red Cedar heartwood are the premium option. You specify thickness, board width, height, and style. You’ll pay more for the milling, but the wood quality is often superior to anything in a retail store and you get exactly what you want.
Verdict: The best option available. Requires research to find a good supplier, but worth the effort for a long-term installation.
8. How to Evaluate Quality Before You Buy
Walk up to a panel or a stack of boards and run through this quick mental checklist:
1. Check the end grain. Tight annual rings indicate slow-grown, denser wood — better quality. Wide, loose rings mean fast-grown, softer wood that will weather faster and accept less finish.
2. Look for heartwood vs. sapwood. Cedar heartwood is the reddish-brown core — this is where the natural oils concentrate. Sapwood is the pale, cream-colored outer ring. Sapwood has virtually no natural rot resistance. Good panels have high heartwood content. Cheap panels often include significant sapwood, especially in the outer boards.
3. Check the rail attachment. Are the boards nailed or screwed? Screws are significantly better — they hold through seasonal expansion and contraction without loosening. Look for at least two fasteners per board per rail (top and bottom).
4. Look for pre-drilling. Pre-drilled nail holes or screw holes prevent splitting at the board ends — a sign of more careful manufacturing.
5. Press on a few boards. They should feel solid and springy, not soft or spongy. Soft spots indicate excessive moisture or early rot.
6. Smell it. Fresh cedar has a clean, resinous scent. Musty, earthy, or sour smells indicate moisture damage or mold — avoid.
9. Cost Breakdown: What Cedar Fence Panels Actually Cos
Here’s a realistic cost breakdown for a 100-linear-foot cedar privacy fence installation in 2024:
| Item | Budget Build | Mid-Range | Premium |
|---|---|---|---|
| Cedar panels (13 panels @ 8ft) | $650–$780 | $975–$1,300 | $1,500–$2,000 |
| 4×4 cedar posts (14 posts) | $280–$420 | $420–$560 | $560–$700 |
| Post concrete (14 bags) | $70–$100 | $70–$100 | $70–$100 |
| Hardware (screws, brackets) | $40–$60 | $60–$100 | $80–$120 |
| Post caps (14) | $30–$50 | $50–$100 | $100–$200 |
| Stain/sealant | $40–$80 | $80–$150 | $150–$250 |
| Labor (professional install) | $800–$1,200 | $1,200–$1,800 | $1,800–$2,500 |
| Total (with labor) | $1,900–$2,700 | $2,850–$4,100 | $4,260–$5,870 |
| DIY total (no labor) | $1,100–$1,490 | $1,655–$2,310 | $2,460–$3,370 |
Regional pricing note: Cedar costs vary significantly by region. In the Pacific Northwest, Western Red Cedar is relatively affordable because it’s locally milled. In the Southeast or Midwest, expect to pay 20–35% more for the same quality material due to shipping costs.
Hidden costs to budget for: Permit fees ($50–$300 in most municipalities), fence line clearing and grading, gate hardware ($80–$400 per gate), and post removal if you’re replacing an existing fence ($150–$400 for a typical residential fence line).
10. Installation Basics Every Buyer Should Understand
Even if you’re hiring a contractor, understanding the fundamentals helps you evaluate the work and have informed conversations.
Post depth matters enormously. The general rule is one-third of the total post length should be below grade. For a 6-foot fence, you need 9-foot posts set 3 feet deep. Skimping on depth is the single most common reason fences fail — posts heave, lean, and eventually fall.
Post spacing: Standard spacing is 8 feet on center, matching panel width. In high-wind areas, 6-foot spacing with an extra mid-panel rail adds significant wind resistance.
Concrete: Set posts in fast-setting concrete (like Quikrete Fast Setting), allowing full cure (at least 24 hours) before attaching panels. Posts set without concrete in soft or sandy soil will migrate over time.
Leave a gap at the base. Cedar fence boards should never rest directly on the ground. Maintain a 2-inch gap between the bottom boards and soil level. Ground contact dramatically accelerates rot — even in cedar heartwood. Use gravel as a base under posts and along the fence line to promote drainage.
Panel attachment: Attach panels to posts with exterior-rated screws (not nails if you can help it) or panel brackets. Two points of attachment per post per panel is the minimum; three is better.
11. Maintenance and Longevity: Making Cedar Last
Untreated Western Red Cedar can last 15–30 years depending on climate and ground contact conditions. With proper maintenance, that range extends to 30–40 years. Here’s the honest maintenance picture:
Year 1: Allow the cedar to weather for 2–3 months before applying any finish. Fresh cedar has surface oils that resist penetration. Once it’s dried and slightly weathered, apply a penetrating oil-based stain or a clear sealant with UV inhibitors.
Every 2–3 years: Inspect for loose fasteners, board cracking, or checking (surface splits along the grain). Re-tighten or replace loose boards. Apply a fresh coat of stain or sealant.
Every 5 years: Do a thorough inspection of post bases — probe the wood at ground level with a screwdriver. If the screwdriver penetrates more than half an inch with moderate pressure, the post is compromised and needs replacement.
Product recommendations:
- TWP (Total Wood Preservative) — a professional-grade penetrating oil stain. Expensive but long-lasting. Popular with contractors.
- Cabot Australian Timber Oil — excellent penetration, beautiful finish, widely available.
- Ready Seal — a penetrating stain/sealer combo that’s easy to apply and performs well in humid climates.
What to avoid: Film-forming finishes like paint and solid-color stains. They look great initially but peel and trap moisture once they start to fail, accelerating rot beneath the surface. Cedar is best preserved with penetrating finishes, not surface-coating ones.
12. Common Mistakes Homeowners Make When Buying Cedar Panels
Buying on price alone. The $45 panel at a warehouse store and the $90 panel at a lumber yard are fundamentally different products. Cedar is one category where the cost difference genuinely reflects quality. The cheaper panel will look noticeably worse within three years.
Not checking local codes before purchasing. Most municipalities have height restrictions on fencing, setback requirements from property lines, and sometimes specific rules about solid vs. open panels along street frontages. Ordering 8-foot panels before checking whether 8 feet requires a permit is an expensive mistake.
Buying pre-built panels for a sloped yard. As mentioned earlier, pre-built panels on slopes create stepped gaps that are difficult to resolve neatly. If your yard slopes more than 6 inches across an 8-foot panel run, strongly consider custom-built racked fencing instead.
Forgetting to account for posts and hardware in the budget. The panel cost is only part of the story. A realistic materials budget for a 100-foot fence run is roughly 40% panels, 30% posts, and 30% hardware, concrete, and finish materials.
Not sealing the end grain. End grain — the cut tops and bottoms of boards — absorbs moisture far faster than face grain. Applying end grain sealer or extra stain coats to cut ends dramatically extends board life. It takes ten minutes and costs almost nothing.
Choosing the wrong panel style for wind exposure. Solid privacy panels in exposed, windy locations act like sails. If your property is exposed to prevailing winds, shadowbox or louvered panels that allow airflow through the fence are far more structurally appropriate.
13. Environmental Considerations
Cedar has a compelling environmental profile compared to pressure-treated lumber, composite, or vinyl fencing.
Pressure-treated lumber relies on chemical preservatives — historically arsenic (now largely replaced by copper-based treatments like ACQ and CA-B) — that raise disposal and handling concerns. Cedar achieves its durability through natural chemistry.
For homeowners concerned about sustainable sourcing, look for panels certified by the Forest Stewardship Council (FSC). FSC-certified cedar comes from responsibly managed forests where harvesting rates don’t exceed regeneration. Several regional cedar suppliers in the Pacific Northwest carry FSC-certified material.
At end of life, cedar can be composted or used as mulch — a significant advantage over vinyl, composite, or treated wood, which require special disposal.
The carbon footprint of locally milled cedar is also substantially lower than composite or vinyl products, which are energy-intensive to manufacture.
14. FAQs
Q: How long will cedar fence panels last? A: With proper installation and regular maintenance (staining every 2–3 years), Western Red Cedar panels can last 20–30 years. Untreated and unfinished, expect 10–15 years before significant degradation.
Q: Do cedar fence panels need to be sealed? A: They don’t need to be sealed to survive, but sealing dramatically extends their life and preserves appearance. Unsealed cedar weathers to a silver-grey — which many homeowners actually prefer — but is more vulnerable to surface cracking and moisture absorption over time.
Q: Can I install cedar fence panels myself? A: Absolutely, with the right tools and preparation. The most important factors are accurate post layout, proper post depth, and allowing concrete to fully cure before attaching panels. A standard 8-foot section takes an experienced DIYer about 30–45 minutes once posts are set.
Q: What’s the difference between Cedar Fence Panels and redwood for fencing? A: Both are premium natural fencing materials with similar rot resistance. Redwood is often denser and heavier, with a more consistent color. Cedar is more widely available and typically less expensive. In the Pacific Northwest, cedar is the default; in California, redwood is more common.
Q: Can I paint cedar fence panels? A: You can, but it’s not the best choice. Paint eventually peels, trapping moisture behind it. Penetrating stains are far better suited to cedar — they work with the wood’s natural movement rather than against it.
Q: How many cedar fence panels do I need? A: Divide your total linear footage by 8 (standard panel width) and add 10% for waste and cuts. For a 100-foot fence: 100 ÷ 8 = 12.5 → round up to 13 panels, plus 1–2 additional for cuts = 14–15 panels total.
Q: Should I use cedar posts with cedar panels? A: Cedar posts are the natural pairing, but many builders use pressure-treated 4×4 pine posts instead. Treated posts are more structurally consistent and resist ground-contact rot extremely well. The combination of treated posts with cedar panels is actually very common and practical — there’s no visual compromise since posts are mostly hidden by panels.
15. Final Verdict
Cedar fence panels remain one of the best investments a homeowner can make in outdoor property improvement. No other fencing material offers the same combination of natural durability, workability, visual warmth, and environmental responsibility at a comparable price point.
The key to getting this purchase right isn’t complicated. Know which species you’re buying. Pay attention to grade. Don’t compromise on post depth or concrete. And once the fence is up, give it a coat of penetrating stain and check it every couple of years. That’s genuinely all it takes.
If you’re reading this before spending a significant amount of money on fence materials, the single most valuable thing you can do is spend an hour at a local lumber yard rather than a big-box store. Talk to the people who know the wood. Ask specifically about Western Red Cedar heartwood content. Ask to see the grade. That conversation will tell you more than any product listing.
A Cedar Fence Panels built thoughtfully and maintained modestly can genuinely outlast a decade of neglected alternatives. It’s one of those purchases that rewards patience and attention — and the result, standing in your yard, looking solid and beautiful and faintly aromatic in the summer heat, makes the research feel entirely worthwhile.
About the Author
Daniel Hargrove is an outdoor construction specialist and home improvement researcher with over fourteen years of field experience across residential fencing, decking, and landscape structures. He has consulted for homebuilders, landscape architects, and individual homeowners across North America on material selection, sustainable sourcing, and long-term structural performance of wood-based outdoor construction. Daniel holds a certification in construction materials science from a North American building trades institution and has contributed to several regional home improvement publications and trade guides. His writing focuses on bridging the gap between what the industry knows and what homeowners need to know — without jargon, without oversimplification, and without the influence of material supplier sponsorships. When he’s not testing finishes on Cedar Fence Panels samples in his shop, he’s usually somewhere in the Pacific Northwest studying the forests that produce the world’s best fencing wood.
Daniel’s independent product testing and material guides are available through his newsletter, “Solid Ground,” published bimonthly for homeowners and building professionals.