


Walk into almost any high-end interior project completed in the last two years, and you’ll notice a quiet consistency: walls that don’t shout, don’t gloss, and don’t apologize for being dark. The black microcement wall has become something of a signature in spaces that prioritize character over convenience and for good reason. It’s one of those rare design choices that looks better the more you study it, pulling in light at odd angles, revealing subtle texture shifts depending on the time of day, and making everything placed against it look intentional.
But it’s also a decision that punishes the underprepared. Done right, a black microcement wall can define an entire room. Done wrong, it becomes a patchy, chalky reminder of why some materials demand professional skill. This guide covers everything worth knowing before you commit — from how the material actually behaves in deep tones to the lighting calculus that makes or breaks a dark wall, and the finish details most articles gloss over entirely.
What Microcement Actually Is (And Why Color Matters More in Dark Tones)
Microcement is a cement-based coating typically applied at two to three millimeters thick — far thinner than conventional render or plaster. It’s mixed with polymers, pigments, and fine aggregates that give it both flexibility and adhesion, allowing it to go directly over existing surfaces: tiles, plasterboard, concrete, even some painted walls: no demolition, no tile removal, no structural disruption.
The material is hand-applied using a steel trowel, which is where its character comes from. Every swipe of the trowel leaves a subtle directional trace — not a flaw, but a feature. When you run your hand across a properly finished microcement wall, you feel variation. It’s the tactile equivalent of a linen shirt versus a polyester one: technically, both are flat, but only one has texture worth noticing.
Now, color. Microcement accepts pigment deeply and with an impressive range, but darker tones behave differently from lighter ones. Black and near-black shades are the most demanding of the palette. Here’s why: in lighter colors, minor inconsistencies in trowel pressure, drying speed, or second-coat overlap are partially masked by the brightness of the pigment. In black, every variable is visible. Trowel lines read more sharply. Thickness variations create tonal shifts. Patches where the material dried at different rates can appear lighter or darker against surrounding areas.
This isn’t a deterrent — it’s an explanation of why expertise matters more with black than with almost any other color in the microcement range. The reward for getting it right is a wall with extraordinary visual depth, the kind that shifts from near-matte to subtly luminous depending on how light hits it.
The Case for Black: Why This Color Works in Interior Spaces Right Now
There’s a temptation to dismiss dark walls as a trend that will age badly — the interior design equivalent of a statement piece that dates a room. But black, particularly in mineral finishes like microcement, operates more like a structural color than a trend color.
Benjamin Moore’s 2026 Color of the Year — “Silhouette,” a warm charcoal with espresso and violet-gray undertones — signals exactly where the conversation around dark interiors is heading. It’s not the cold, harsh black of industrial lofts circa 2015. It’s warmer, softer, and far more livable. Krylon similarly named a brown-black “Coffee Bean” as its 2026 color pick. The market is reading this correctly: dark surfaces are moving from edge-case statement to genuinely mainstream option for people who want interiors that feel anchored rather than airy and disposable.
Microcement in black or deep charcoal specifically offers something paint and wallpaper can’t match: permanence of surface quality. Paint darkens unevenly over time, shows wear at shoulder height and door frames, and loses its finish in humid rooms. A sealed black microcement wall, properly maintained, keeps its depth for years. The sealant layer that protects the surface also subtly enhances the tonal richness — particularly with matte or satin varnishes, which are the recommended finish for walls.
Design Principles: How to Use a Black Microcement Wall Without Drowning a Room
The anxiety around dark walls almost always comes down to one fear: making a space feel smaller or oppressive. It’s a legitimate concern, and the answer lies not in avoiding black but in understanding how to work with it spatially.
Use It as an Accent Rather Than a Perimeter
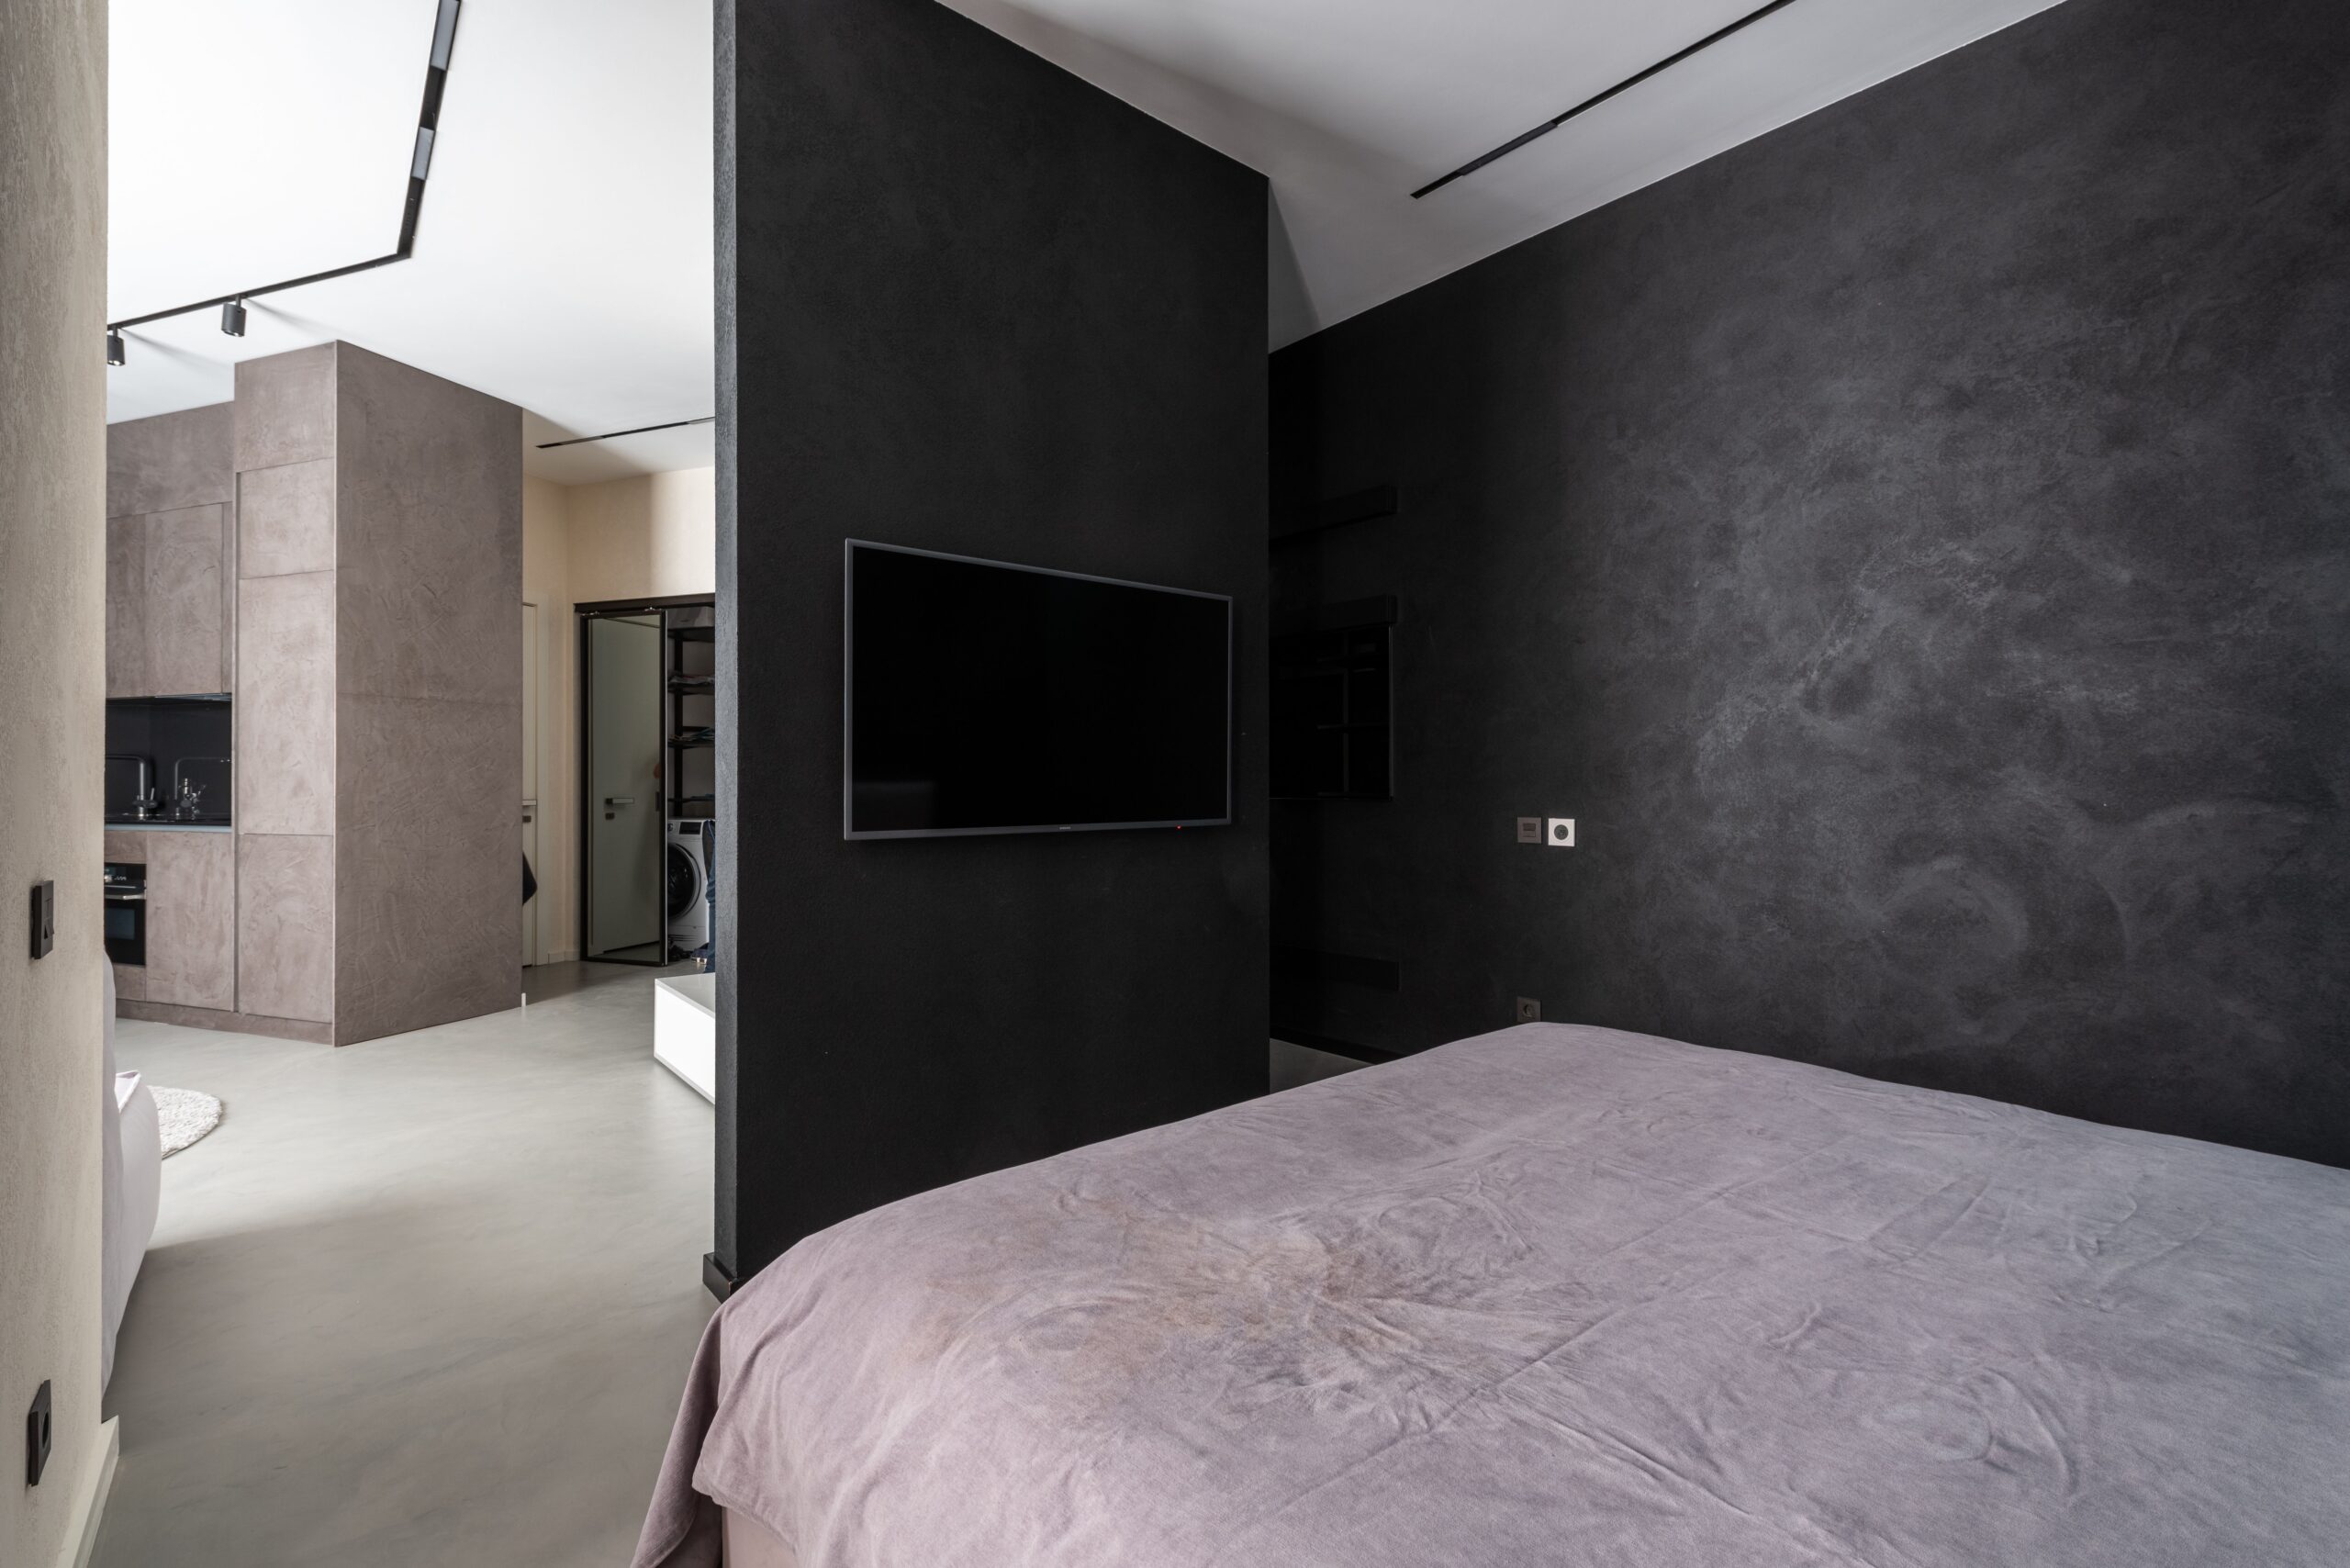
The most successful black microcement walls in residential spaces are feature walls — single planes that anchor a room rather than enclose it. A black feature wall behind a bed in a bedroom creates depth without compression. A black wall at the end of a hallway draws the eye forward, making the corridor feel purposeful rather than transitional. In a kitchen, a black microcement splashback extending to the ceiling creates a vertical anchor point that makes everything else — cabinetry, countertops, lighting — feel deliberately composed.
Full black perimeter applications are stunning in spaces with significant natural light and architectural volume: double-height ceilings, large south-facing windows, open-plan footprints where the black surfaces recede rather than crowd. In smaller or dimly lit rooms, a full four-wall application requires very careful lighting design to avoid a cavernous effect.
The Light Calculus
Here’s the real design conversation: when you commit to a black microcement wall, you’re not just choosing a wall finish, you’re redesigning your lighting plan. Natural light sources become more important. The direction of light across the surface determines how much of the microcement’s texture is visible — raking light (coming from the side) reveals the most trowel texture and depth. At the same time, direct frontal lighting flattens the surface and loses much of what makes the material interesting.
Artificial lighting at low angles — wall sconces, cove lighting, and floor-to-ceiling LED strips set away from the wall — beautifully activates black microcement. Overhead pendant lighting with no supplemental wall-level lighting is the worst configuration for a dark, textured surface: it creates an undifferentiated dark plane that reads simply as dark rather than interesting.
Contrast as Composition
Black microcement walls earn their keep when they’re placed in deliberate contrast. The most considered pairings currently in use: natural oak joinery (the warmth of the timber against the cool mineral surface is the most reliable combination in contemporary design); unlacquered brass hardware and fixtures; aged or brushed bronze; raw concrete floors or warm terrazzo; off-white or cream soft furnishings that hold the light the wall absorbs.
What tends to work less well: high-gloss white cabinetry directly adjacent to matte black microcement (too binary, too hard), or polished chrome fixtures (the coldness of chrome competes with rather than complements the mineral quality of the surface).
Application: What the Process Actually Involves
Understanding the application process helps set realistic expectations about cost, timeline, and the degree of disruption involved in a microcement project.
Surface Preparation
Everything downstream depends on what happens before the first coat of microcement goes on. The substrate needs to be structurally sound, clean, and properly primed. If applying over existing tiles, grout joints must be filled and feathered so they don’t telegraph through the finished surface. Over plasterboard or painted walls, a bonding primer goes on first, giving the microcement something to adhere to properly.
Any cracks, voids, or significant surface irregularities should be addressed at this stage. Microcement at two to three millimeters thick does not hide substrate problems — it follows them. A crack in a plaster wall will eventually show through the microcement if not properly addressed before application.
Application Layers
A standard microcement wall application involves multiple passes. A base coat goes on first, typically with a reinforcing mesh embedded at structural risk points, such as corners and around openings, to reduce cracking. This base must fully cure before the finish coat or coats are applied. Each coat is applied with a steel trowel using overlapping passes that build the texture and color depth. With black specifically, two or three finish coats are generally applied to ensure full, even color saturation — thinner coats with black pigment can look patchy or read more gray than deep black.
Between coats, light sanding evens out high points and prepares the surface for the next layer. The direction of trowel application is often varied between coats to create a more uniform texture rather than a strongly directional finish.
Sealing: The Step That Actually Protects Everything
The sealer is not optional or cosmetic — it’s integral to the surface’s performance. Microcement itself is water-resistant but not fully waterproof. The sealing varnish provides chemical resistance, stain protection, and waterproofing that make microcement viable in kitchens, bathrooms, and high-traffic areas.
For black walls specifically, the choice of sealer finish has a significant aesthetic impact. Matte varnishes preserve the mineral, chalky depth of black microcement and are the most commonly recommended finish for walls. Satin finishes add a subtle sheen that deepens the color slightly — some designers prefer this in living areas and bedrooms. High-gloss varnish on a black wall creates a lacquer-like effect that is visually striking but shows dust, fingerprints, and water marks far more readily.
Two to three coats of varnish are standard. The surface is usable forty-eight hours after the final coat. Still, full hardness and resistance develop over the following fourteen days — a detail worth communicating clearly to anyone living in the space during and immediately after installation.
Specific Applications: Room by Room
Bathrooms
The bathroom is arguably where black microcement walls make their strongest case. Eliminating grout lines removes the single most maintenance-intensive element of a tiled bathroom. A fully sealed black microcement shower enclosure has a spa-like coherence that tiling cannot replicate, regardless of budget. Pair it with matte black fixtures and fittings, natural stone or wooden accessories, and deliberate overhead or recessed lighting, and the result is genuinely hotel-grade.
The caveat: in bathrooms with poor ventilation, prolonged exposure to moisture can challenge even a well-sealed surface over time. Good extraction is as important as good sealing. For wet zones (shower floors and walls directly in the spray zone), ensure the sealant product is rated for continuous water exposure, not just water-resistant applications.
Kitchens
A black microcement splashback that runs from counter height to ceiling, or extends across a cooking wall, transforms the kitchen from a functional space into a designed one. The seamless surface is easier to clean than tiled surfaces with grout, handles heat proximity well (though not direct contact with flames), and creates a dramatic backdrop for open shelving, pendant lighting, and metallic hardware.
One practical note: cooking vapors and grease are more visible on dark matte surfaces than on lighter or glossier ones. Regular wiping with a pH-neutral cleaner keeps the surface looking sharp — but factor in that this is a wall that will show cooking residue in a way a white tiled splashback won’t.
Living Areas and Bedrooms
In living rooms, a single black microcement wall behind a media unit or fireplace anchors the space and frames the focal point. It works particularly well in rooms with exposed concrete or polished stone floors, where the tonal continuity creates visual coherence without matching materials exactly.
In bedrooms, the headboard wall is the natural location. A black microcement surface running floor-to-ceiling behind the bed, paired with white or cream linen and warm directional lighting, creates a composition that feels curated rather than decorated. It’s the kind of detail that photographs well but also — more importantly — lives well.
Cost, Timeline, and Finding the Right Applicator
As of mid-2026, microcement wall application in the US typically ranges from $10 to $25 per square foot for labor and materials combined, depending on complexity, location, and the specific product system used. Black finishes often sit toward the higher end of this range, given the additional care required to achieve consistent deep coverage.
A standard bedroom feature wall might take one to two days of application time, plus drying and curing periods between coats. A full bathroom could take three to five days from start to sealer application. Factor in surface preparation and drying time between stages, and a bathroom project might occupy five to seven working days in total.
The applicator matters more than almost any other variable. Microcement is an artisan trade skill — not every painter or plasterer who lists it as a service has the experience to handle it well. Ask for project photos that specifically show dark-colored applications, check for even coverage and consistent texture in the finished work, and ask directly about their experience with deep pigment coats.
Maintenance: What to Expect Long-Term
Maintaining a black microcement wall well is less about effort and more about knowing what to avoid. The principles are straightforward.
For daily or routine cleaning, a damp cloth or microfiber pad with a pH-neutral cleaner is all that’s needed. Avoid acidic cleaners (including many citrus-based products), abrasive pads, and anything highly alkaline. These can degrade the sealant layer over time, dulling the finish and compromising the surface’s water resistance.
FAQs
Can I DIY a black microcement wall? Technically, yes — there are consumer-grade kits available. Practically, black is the hardest color to achieve consistent results with. Most DIY attempts on dark pigments end in either patchy coverage or visible trowel lines. If this is your first microcement project, a smaller surface in a mid-tone color is a far better starting point. Reserve black for when you either have professional help or genuine prior experience with the material.
Will a black microcement wall make my room feel smaller? Only if the room lacks adequate natural or artificial light and you’ve painted all four walls black.
How does black microcement look in low-light rooms? Not at its best. The material’s beauty comes from how it interacts with light — the trowel texture, the tonal variation, the mineral depth. In a room that doesn’t get good light, natural or artificial, a black microcement wall will read as dark. Invest in good lighting before committing to dark microcement in a low-light space.
Can cracks be repaired on a black microcement wall? Larger damage is harder to address without some visible evidence of the repair.
Is black microcement appropriate for rental properties? It can be, particularly in bathrooms where the seamless, grout-free surface reduces maintenance. The application is semi-permanent — technically removable, but not without significant effort. Discuss with your landlord before proceeding.
Looking Ahead: Where Black Microcement Walls Fit in 2026 and Beyond
Black microcement fits this direction almost perfectly. It’s not a trend in the way a particular paint color or tile pattern is.
The move toward warmer blacks, charcoals with brown or violet undertones rather than cold blue-blacks, also plays well for microcement.
A Thought to Close With
There’s a version done by someone who understood the material, planned the lighting,
The difference between those two outcomes isn’t budget, exactly. It’s attention. It Attention to the substrate. Attention to the lighting plan. Attention to what goes in front of the wall and how it behaves under the room’s actual lighting conditions. Black microcement rewards that thinking more than almost any other finish, precisely because it hides nothing and amplifies everything. That’s not a warning — it’s an invitation to design with more care than you might have otherwise.